
Connecting valuable HR data to Microsoft Purview
The Microsoft Purview HR Data Connector is a nice way to integrate key data, external to Microsoft 365, into your Microsoft Purview solutions. The Data Connector is a key component of Insider Risk Management and uses data like employee resignation dates or performance improvement plans to discover potential malicious behaviour from disgruntled employees. The connector itself is relatively easy to set up, requiring a CSV file, an Application Registration and a scheduled script. In this article, I go through the steps required to create the connector and improve (somewhat) upon the sample process provided by Microsoft, but more on this later….
The set up
As I mentioned, setting up the connector isn’t a complex task. The components required by the connector are all relatively straightforward and will be familiar to many Microsoft 365 admins. With that in mind, the full list of steps required are:
- Assign the Data Connector Admin role to your admin account
- Create the CSV input file
- Create an Application Registration
- Create the Connector
- Run / schedule the data import script
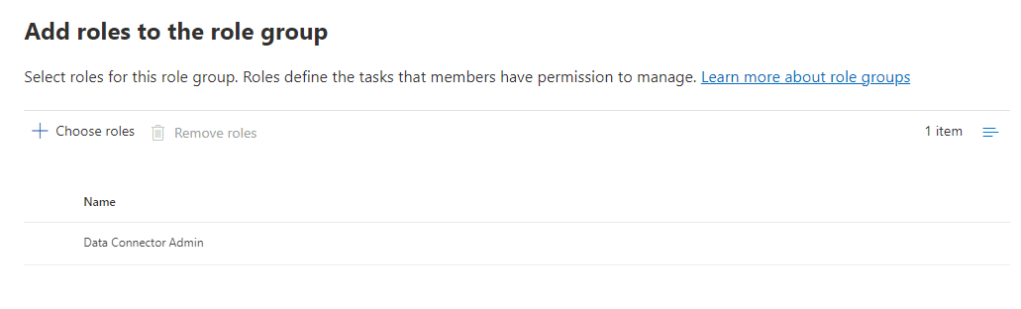
Assign the Data Connector Admin role to your admin account
The Data Connector role is already added for any Global Admins so if your are logged in as such, this step can be skipped. If you don’t have the Global Admin role assigned, an admin will need to grant you a role group with the Data Connector Admin role as shown in Figure 1.
Create the CSV input file
In a real world scenario, the HR data CSV file should be exported via your production HR system. This can often be scheduled using the API of the HR system to output to file. For the purposes of running a demo without a HR system in place, a manually generated file can be used. Sample files for different scenarios are available in the documentation. Here I focus on Employee Resignation Data, the content of my CSV file are shown in Table 1.
| Scenario | EmailAddress | ResignationDate | LastWorkingDate |
| Resignation | AdeleV@domain.com | 2023-07-05T10:30:00 | 2023-08-26T16:30:00 |
| Resignation | AlexW@domain.com | 2023-05-20T11:45:00 | 2023-07-06T16:30:00 |
Note the date format is yyyy-mm-ddThh:mm:ss.nnnnnn+|-hh:mm which is ISO 8601 date and time format. This data format can be retrieved using PowerShell as shown in Figure 2. This may not be an issue with exports from production HR systems but worth knowing how to format the date correctly.

Create an Application Registration
The tasks in the Purview HR Connector documentation call for an Application Registration to be created. There are plenty of examples on my site and others for creating an App Reg so I won’t delve into it here. I will note though, the documentation requests that you create a client secret as part of the process, which I’ve covered before is a pretty bad idea in production.
A better way to do this is to generate a Certificate for authentication. By looking at the steps in this article on using Certificates to authenticate to the Microsoft Graph PowerShell SDK, we use the below cmdlets to create a certificate using PowerShell and Store it locally.
The first cmdlet will create a new self-signed cert in the local user store:
$Cert = New-SelfSignedCertificate -DnsName seanmcavinue.net -CertStoreLocation "Cert:\CurrentUser\My" -FriendlyName "PurviewHRConnector" -Subject "Cert to Authenticate the Purview Data Connector" -KeyAlgorithm RSA -KeyLength 2048 -KeyExportPolicy Exportable -KeyProtection None -Provider 'Microsoft Enhanced RSA and AES Cryptographic Provider'
Next, this cmdlet will save the certificate in the folder C:\temp on the local machine.
Get-ChildItem "Cert:\CurrentUser\My\$($Cert.thumbprint)" | Export-Certificate -FilePath C:\temp\MicrosoftPurviewHRConnector.cer
Once the cert is created, upload it to the app registration under the Certificates & Secrets page as shown in Figure 3.
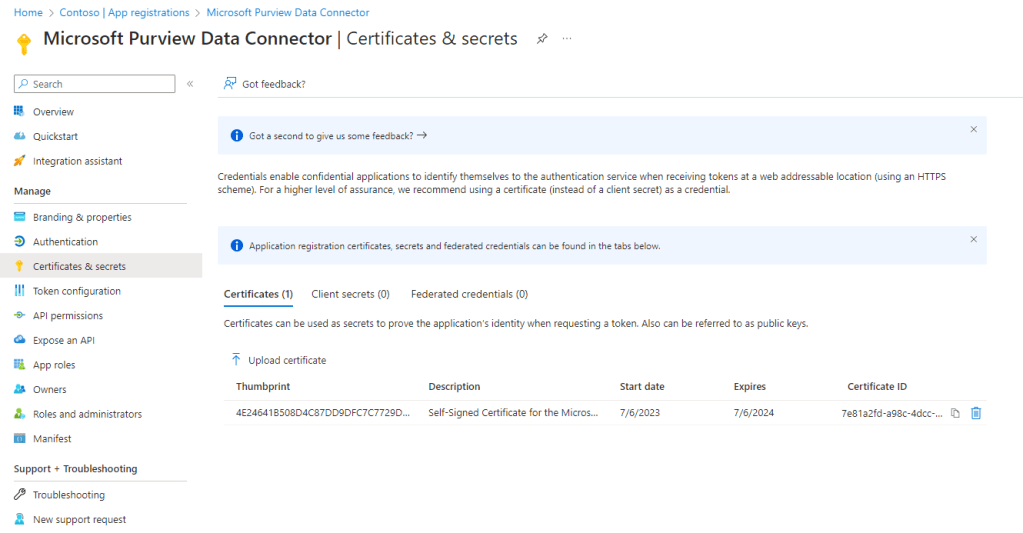
When the Cert is uploaded. Take note of the thumbprint as well as the Application ID and Tenant ID from the Overview page of the App Registration.
Create the Connector
With the preparation done, the Connector is set up from the Connectors -> HR page of the Microsoft Purview Compliance Center. Open the Connector page and select add connector to get started. On the first page of the Wizard, we accept the Terms of Service of the Data Connector. Next, we add the App ID we recorded earlier and give the connector a name as shown in Figure 4.

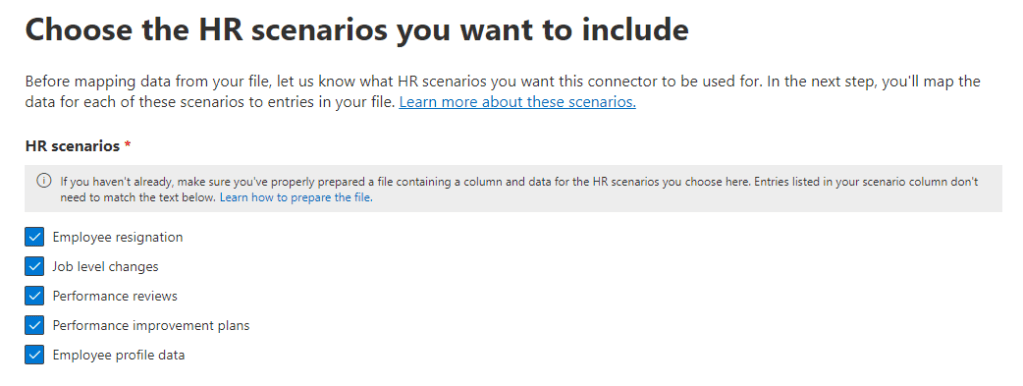
Next, select the scenarios you would like to impact with the HR data you import. For this example, I have selected all scenarios (Figure 5) even though out data only contains resignation data at the moment, we can always add more data later.
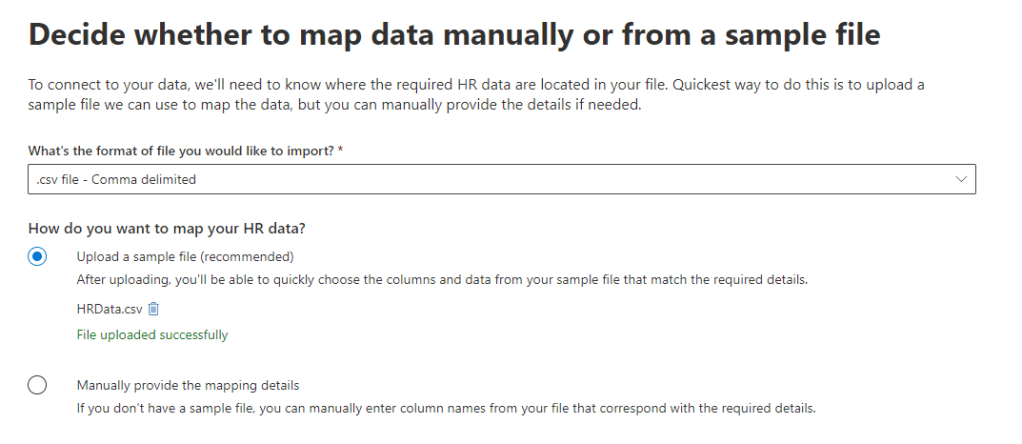
On the next page, upload your initial CSV as a sample file and click next as shown in Figure 6.
On the File Mapping Details page, select the correct scenario to column mappings (Figure 7). There are a set list of attributes required for each scenario, these should all be mapped to columns within your file.

Fill out each of the mappings, it’s worth noting that the columns do not need to exist in your sample file. If there is a scenario you haven’t catered for yet in your data, simply input what the column name will be. In Figure 8, I have configured the Employee Resignation scenario using the data from Table 1, and for the Job Level Changes scenario, I have predicted what those columns will be named.

On the final page, take note of the Connector ID in the summary. This is required for the next step.
Run / schedule the data import script
At the final page of the Connector set up, Microsoft provide a link to a “sample” and recommend that you “Modify the script as you see fit for your organization“. Realistically, I doubt many admins will have the knowledge required to update the script, never mind actually do this. With that in mind, I’ve taken the existing script (here) and customised it slightly to use Certificate Authentication using the cert that we set up earlier. I’ve uploaded the updated script to GitHub here.
Note: One of the best things about PowerShell is the community of people around the world who contribute code samples and scripts which others can use as a baseline for their work. Much of the logic added for the certificate authentication comes from this excellent article from Adam the Automator.
To run the script you need the following mandatory parameters:
- TenantId: The ID of the Azure AD Tenant
- AppId: The ID of the App registration
- CertThumbprint: The Thumbprint of the certificate created earlier and store in the current user personal store
- JobID: The Job ID from the connector created earlier
- FilePath: The full path to the CSV file containingthe HR Data
With all the above to hand, run the script using the example below. If all is in order, the output should look similar to Figure 9.
\DataConnectorSync.ps1 -tenantId <Guid> -appId <App Id> -certThumbprint <Certificate Thumbprint> -jobId <Job id GUID> -filePath <File Path> -Verbose

I did run into an issue with the script running in a demo tenant but once I changed to a non-demo tenant it seemed to work fine. It’s worth noting this for your own testing.
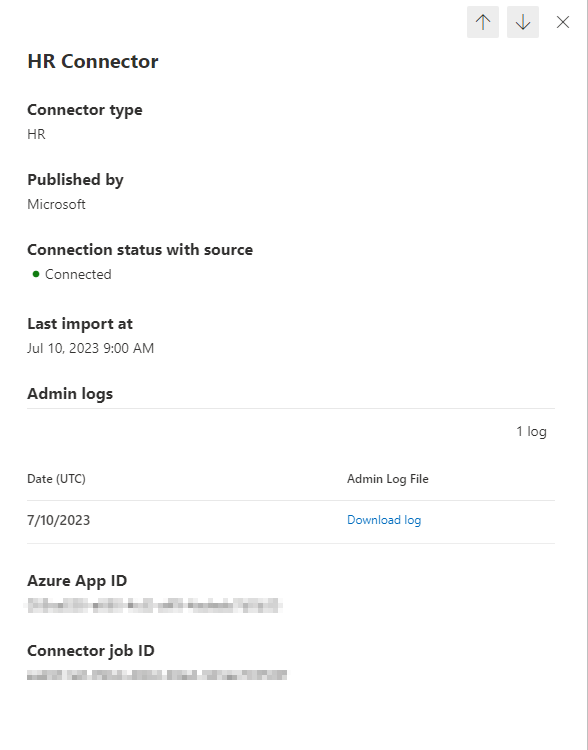
Once complete, the connector should show a “Connected” status as shown in Figure 10 and the upload log will be available for download.
Summary
One of the reasons for writing this article was that I wasn’t really happy asking my customers to generate app secrets in production given I’ve specifically written about the risks of doing this. With a little bit of time and some really good examples form the community I managed to update the sample script to something I’m a bit happier with. One thing I omitted here which I recommend in production is to restrict the service principal used to authenticate to a specific IP address using Conditional Access. That is probably a topic for another article…
