
Microsoft Entra Authentication Contexts (Available with Microsoft 365 E5 subscriptions) are a way to tag resources in your cloud environment (both Microsoft and Custom Apps) that you want to be treated differently from a Conditional Access perspective. At a basic level, we tag an object or app with an Authentication Context, and Conditional Access treats this object differently based on the presence of this tag. In this article I focus on the example of a sensitive SharePoint Online site that we want to prevent users from accessing based on a set of criteria. Essentially, what we want to achieve is to prevent specific users from accessing a particular SharePoint Online site, without blocking the entire SharePoint service.
Creating and Assigning Authentication Contexts
To get started, lets create a new Authentication Context. From the Microsoft Entra admin center, under “Protection” -> “Conditional Access” -> “Authentication Contexts”, create a new Authentication Context as shown in Figure 1. Give the Context a name, description and enable “Publish to apps” so it can be used in our label later.

Next, we need a way to assign the Authentication Context to sites. Create a new sensitivity label from the Microsoft Purview compliance portal to set the authentication context on the sites we want to protect.
There are some prerequisites involved in using sensitivity labels with Groups / Sites and Teams which I’ve detailed before here: https://seanmcavinue.net/2020/09/30/protecting-office-365-groups-and-microsoft-teams-with-sensitivity-labels-preview/. I won’t go over those steps again here but once your tenant is ready, create a new label as shown in Figure 2.

If you’ve carried out the required prerequisites, you should now be able to select “Groups & sites” from the label scope page (Figure 3). Select this and click next.
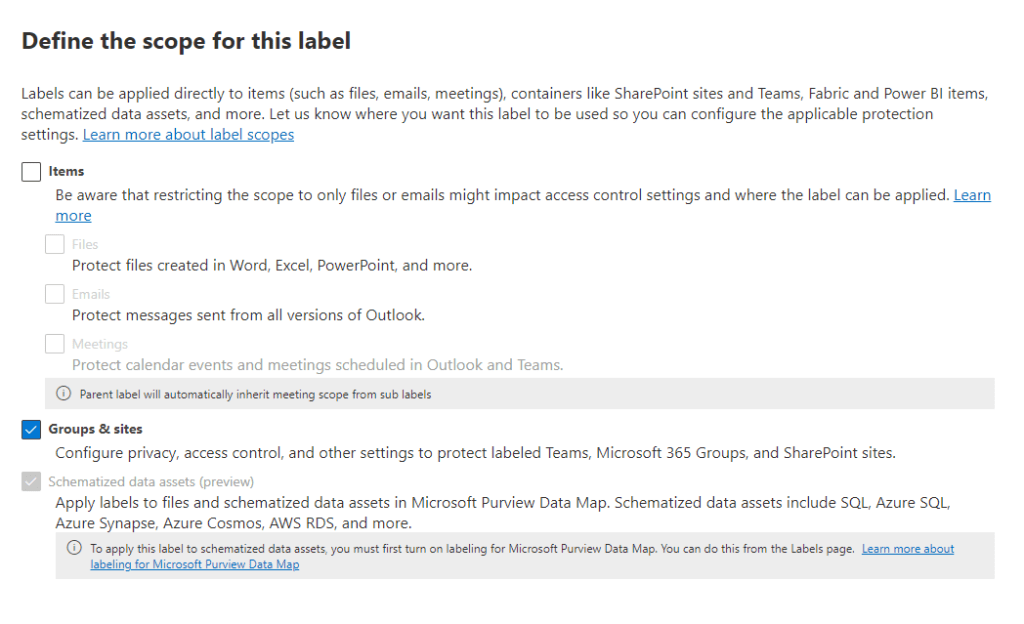
On the protection settings page, select “External sharing and Conditional Access” (Figure 4).

As a side note, there are tonnes of useful features now available throgh Sensitivity Labels for Groups and sites, it’s definitly worth considering as part of your environment but that’s another blog…
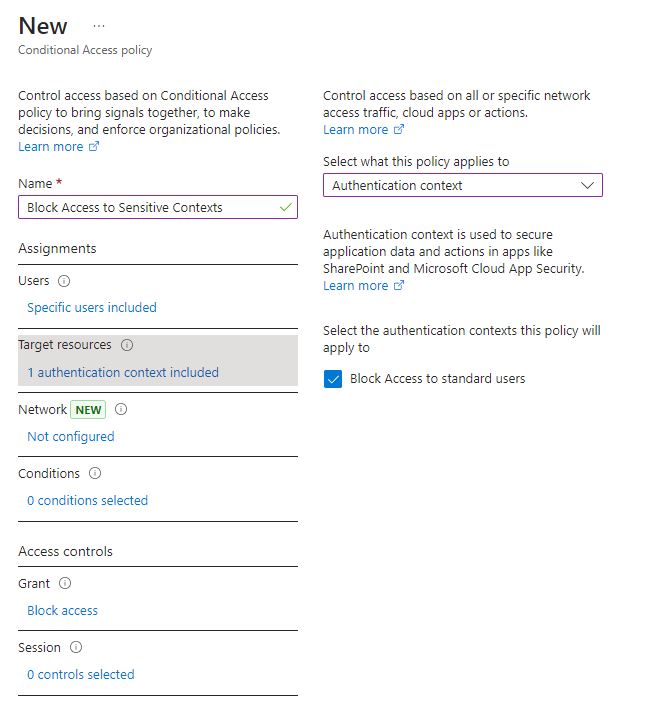
On the next page, select the authentication context created earlier as shown in Figure 5.

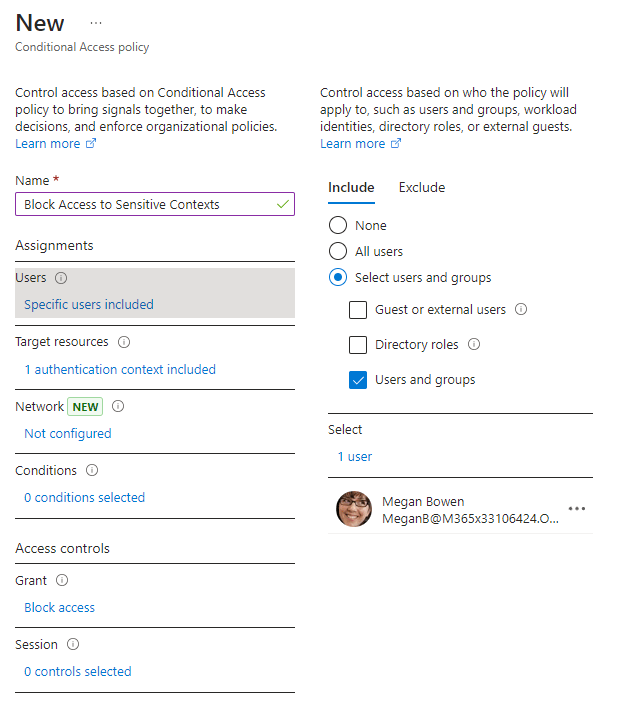
Finally, we need a Conditional Access policy to bring everything together. From the Microsoft Entra admin center, create a new Conditional Access policy with the settings required. In the example shown in Figure 6 and Figure 7, I create a policy targeting Megan Bowen where the target resources is the Authentication Context I set up earlier. The action on the policy is “Block”.
If you’ve been following along in your own environment (test environment hopefully!), then things will need a little time to replicate. While that happens, lets grab a coffee and recap.
Ok, What Did We Just Do?
To recap so far, we first created an Authentication Context, but this context does nothing on it’s own! For the Authentication Context to be effective, we need to assign it to sites or groups we want to protect. That’s where the sensitivity label comes in, the sensitivity label gets assigned to sites or groups (or Teams) and automatically applied the Authentication Context tag to any object it’s assigned to.
Finally, we set up a new Conditional Access policy to tell Microsoft Entra that if Megan tries to access any resource which is tagged with our Authentication Context – block the access! You’ll notice the Conditional Access policy doesn’t target the SharePoint Online app, this is intentional because we definitely don’t want to block all access to SharePoint Online.
Create a test site
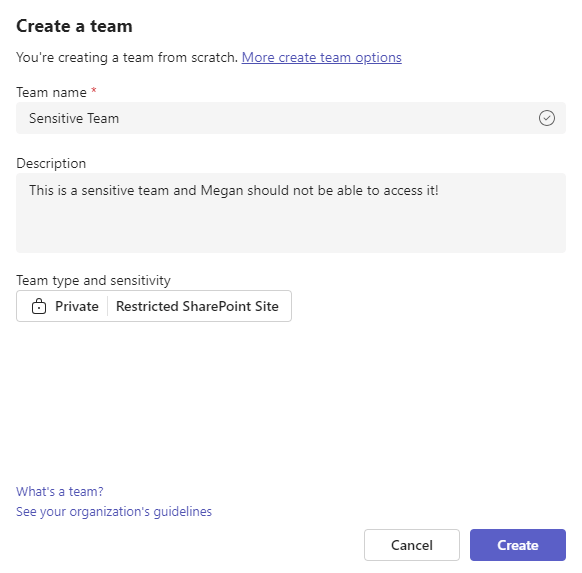
To test our configuration, we create a test site that has the sensitivity label we created previously assigned. For this example, let’s create a Team to see what the impact is on the Teams client. From the Teams client or admin center, create a new Team and make sure to assign the label you created earlier as shown in Figure 8. If the label option doesn’t show up, you might need to wait a while for everything to replicate.
Once the Team is created, add some test users, including the user that you want to block as members.
Testing Access
When the Team was created, I added two users, Adele and Megan (Figure 9). Megan is the user blocked through the Conditional Access policy. I’ve added Megan as a Team owner to give her the highest permissions on the Team and associated site.

Next, log in as one of the Team members that isn’t blocked by the Conditional Access policy to make sure everything works as expected. In Figure 10, I’ve logged in as Adele and confirmed she can access the Team with no issue.
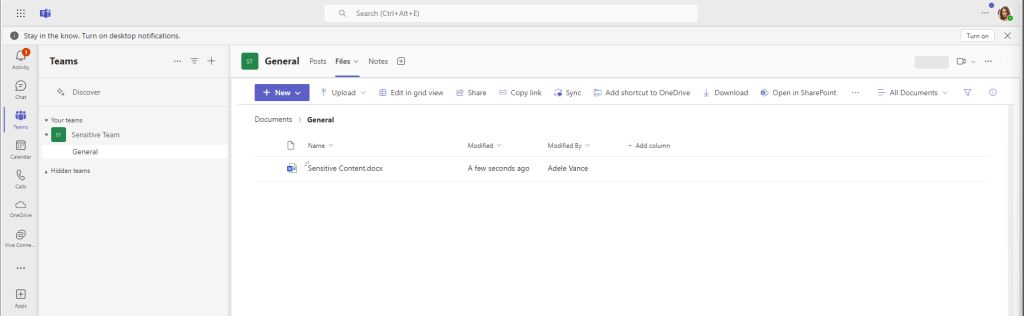
In Figure 11 however, I’ve logged in as Megan, who is targeted by the Conditional Access policy. She can see the Team, but when she attempts to access the files tab she get’s a pop up message.
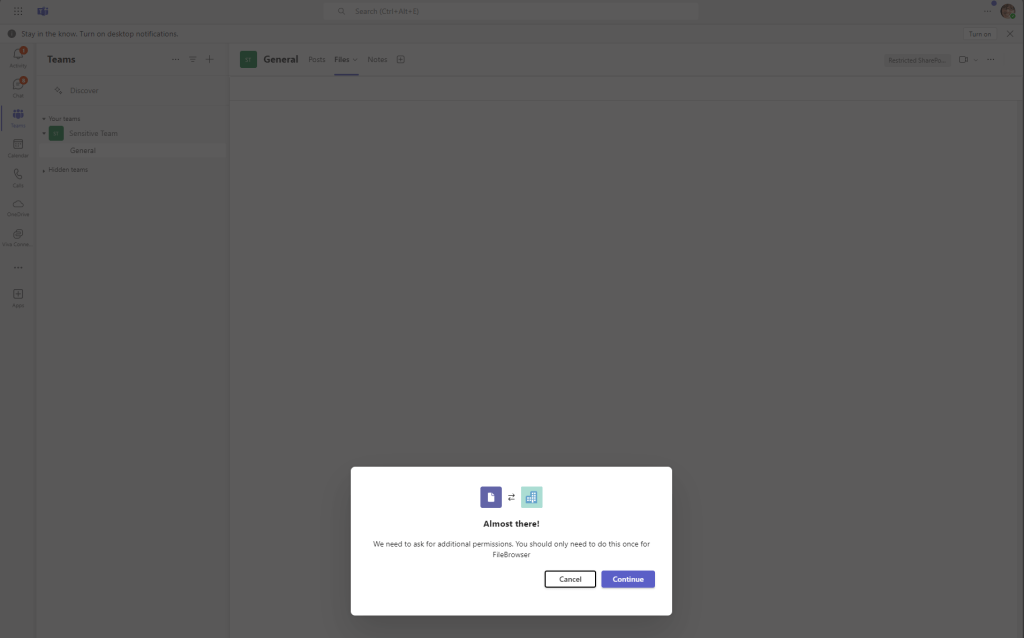
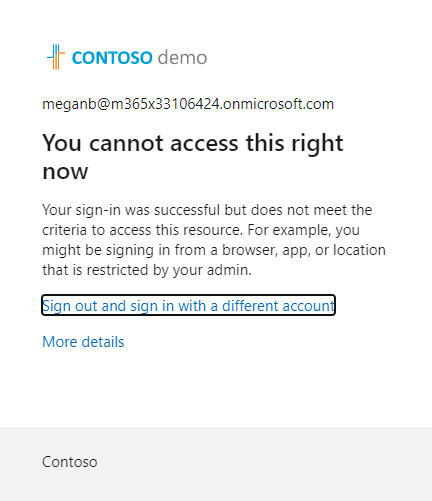
Clicking continue on this message redirects the user to the SharePoint site URL. When the she navigates to the URL of the site, Megan recieves the expected Conditional Access block message shown in Figure 12.
The block also works for files shared through sharing links which is good as this is a much more likely scenario than a user being a member of a site while also being blocked.
Assigning Authentication Contexts Without Labels
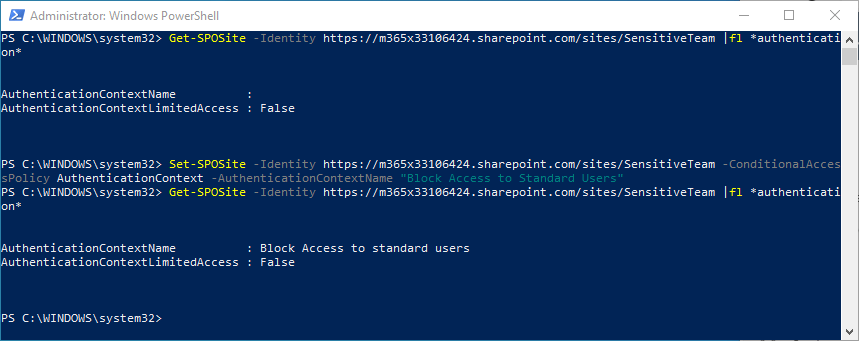
There are cases where you want to assign Authentication Contexts to sites without using labels. For example if you already use labels for classifying containers and don’t want to change the configuration. In this scenario, use the SharePoint Online Management PowerShell module with the cmdlet below to assign the Authentication Context to a site:
Set-SPOSite -Identity https://contoso.sharepoint.com/sites/SensitiveTeam -ConditionalAccessPolicy AuthenticationContext -AuthenticationContextName “Block Access to Standard Users“
In Figure 13 below, I set the Authentication Context manually on the site through PowerShell.
Limitations
It’s not all perfect with Authentication Contexts, there are a large number of limitations. The full list is outlined in the Microsoft Documentation but I’ve included some of the key ones to consider below:
- The documentation states (pretty generically and ironically without “context”) that Authentication Contexts don’t work with the Teams web app, meaning this is only viable for users accessing through the Teams client. In testing above however, I used the Teams web client and it worked pretty much as expected.
- OneDrive sync won’t work with sites assigned an authentication context
- SharePoint folder renaming in Teams fails if the site has an authentication context.
I’ve tested a few of the documented limitations and have had mixed results. This leads me to belive that there is active work to remove these issues ongoing. The statment in the documentation is: “Some apps don’t work with authentication contexts. We recommend testing apps on a site with authentication context enabled before broadly deploying this feature.” so I guess, proceed with caution.
Ways to Protect SharePoint Sites
Authentication Contexts don’t just block access, they can be used to enforce your own desired restrictions such as MFA, Terms of Use or device compliance on access. In this article I’ve onluy detailed one use-case. There are still a number of limitations with Authentication Contexts but from my testing there definitely seems to be progress in the back end so hopefullywe’ll see these limitations begin to disappear soon.
There are other way to protect SharePoint sites too. Authentication Contexts is one way, but there is also Conditional Access app control to restrict access to sites, Site-level access restrictions which come as part of SharePoint Premium / advanced management and Information Barriers which serve a slightly different purpose but focus on protecting access to information. These are just a few examples of the many tools admins should be familier with when governing access to SharePoint and Teams sites.
