
Entra is Loosing the License Management Feature
Recently Microsoft have announced that as of September 1st 2024 the license management features through the Microsoft Entra ID Admin Center and Azure portals will be removed. Instead, administrators planning to assigned licenses will be forced to use the Microsoft 365 admin center. The documentation has been updated accordingly with the below note:
Starting September 1st, the Microsoft Entra ID Admin Center and the Microsoft Azure portal will no longer support license assignment through their user interfaces. To manage license assignments for users and groups, administrators must use the Microsoft 365 Admin Center. This update is designed to streamline the license management process within the Microsoft ecosystem. This change is limited to the user interface. API and PowerShell access remain unaffected...
I’m not sure why, but I personally dislike using the Microsoft 365 admin center, particularly for license management as I find it a bit clunky. For anyone who needs to manage licenses at scale or just don’t want to use the Microsoft 365 admin center, it might be time to upgrade to managing licenses through PowerShell.
To help with this, I’ve published a script on GitHub here that allows you to assign licenses to users and groups easily.
Structure of the Script
Before starting, make sure that you have installed (and updated) the Microsoft Graph PowerShell SDK which is used extensivly in the script.
I’ve designed this script to be user friendly, it doesn’t require any parameters or inputs. It can be run by calling the PS1 file as shown below:
.\graph-AssignM365Licenses.ps1
Once the script starts, the user will be asked to select the licenses they want to add from the list of available licenses. The license list from the tenant will be displayed in a grid view where the user can select one or more licenses to add as shown in Figure 1. Note: To select more than one item in grid view, hold down control and select.

Many times when we assign licenses in Microsoft 365, we want to disable certain functionality available through service plans. The script will prompt you to ask if you want to disable service plans (Figure 2).

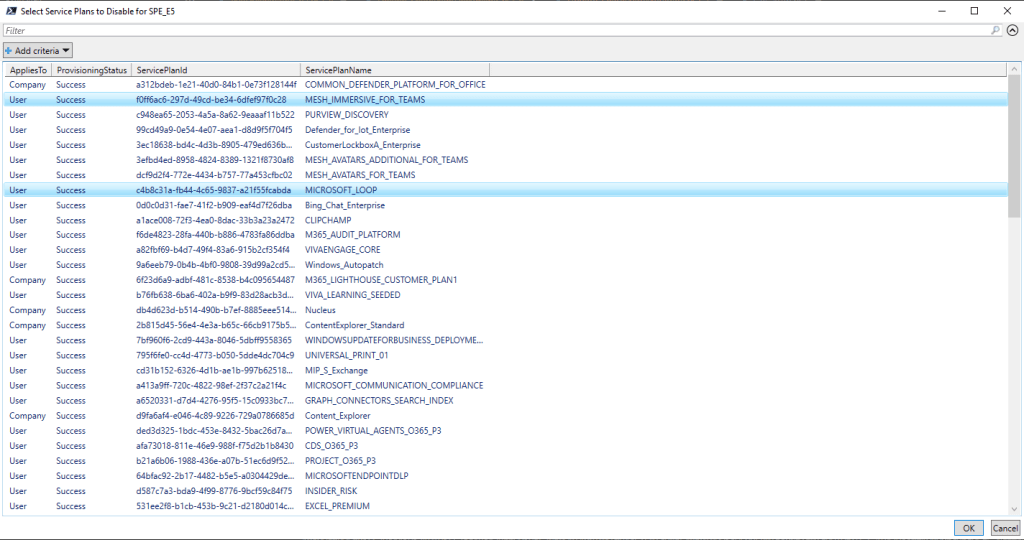
If you selected yes on the previous question, the next step will be a grid-view of each service plan (Figure 3), this will show for each license you selected in the first step. From here, select the plans you want to disable and click ok to continue.
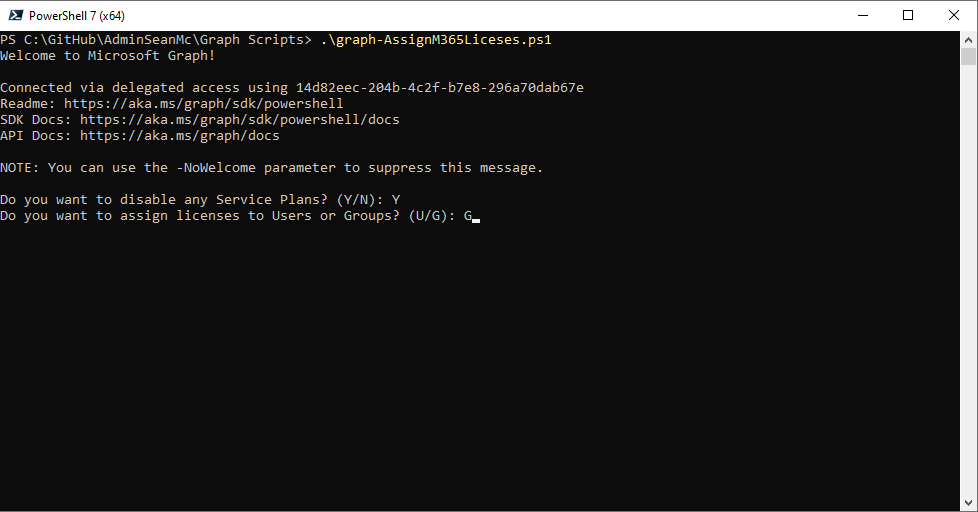
If you chose not to disable service plans or have already selected the service plans to disable, the next step is to define if you want to add licenses to users or groups. The script will prompt you to answer with a U or a G as shown in Figure 4.
Depending on if you pick users or groups, on the next grid view windows you will see a list of either users or security enabled groups (licenses can’t be assigned to groups that aren’t security enabled) as shown in Figure 5. As before, select one or more objects in your response and click OK.

Finally, the script will assign the licenses with any disabled service plans that you specified to the selected objects. Once the licenses are assigned, the script will finish (Figure 6).

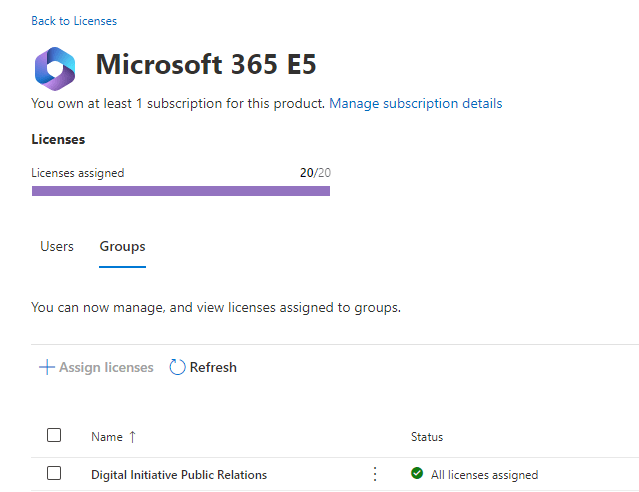
Checking in the Microsoft 365 admin center in Figure 7, we see the license has been assigned the the group specified.
More to Add
This script is a great way for people to get used to license management through PowerShell. The usual caveats around running scripts from the internet apply here, make sure you understand what any script is doing before you run it in your environment.
There are also more features that could be added here such as removing licenses, updating existing licenses etc. I recommend if you are just moving to license management through PowerShell that you use this script as a starting point and enhance to your own needs.
