
Whats the Big Deal With Passkeys?
You may have heard a lot of people talking about passkeys recently, particularly in the context of Microsoft Entra. A passkey isn’t a Microsoft concept, far from it. A passkey is essentially a credential / key-pair that is built using public key cryptography and is bound to a specific service. Passkeys are used to provide passwordless authentication in a secure way based on FIDO protocols.
Microsoft Entra ID supports the use of passkeys to authenticate and enables this easily for users through the Microsoft Authenticator app as we will see in this article. The Microsoft Authenticator app also supports passwordless sign-in through the phone sign-in function. This is different to passkeys and requires the user to enter a code to authenticate.
Enable Passkeys for Users
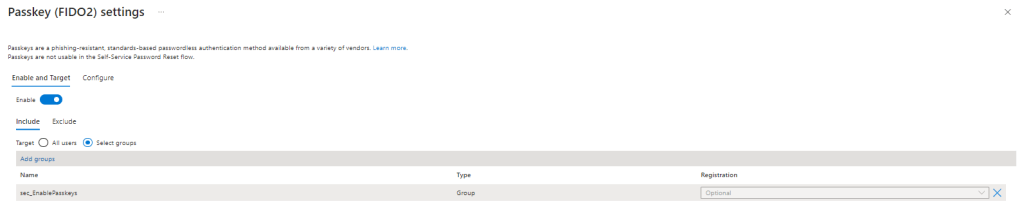
To enable passkeys in Microsoft Entra, open the Microsoft Entra admin center and navigate to “Protection” -> “Authentication Methods”. From here you should see “Passkey (FIDO2)” listed as an option, select this. On the “enable and target” section, choose to add all users, or select specific groups. I recommend rolling out to groups in production. Select the group you want as shown in Figure 1 and optionally add in exclusions also.
On the “Configure” page, we have a number of options:
- Allow self-service set up – This option allows users to register passkeys
- Enforce attestation – Attestation performs a check at registration that the FIDO2 key is provided by a legitimate vendor by validating the metadata against the FIDO Alliance Metadata Service. Attestation is Enforce key restrictionsnot currently supported for Microsoft Authenticator.
- Enforce key restrictions – Allows you to add Authenticator Atterstation GUIDs (AAGUID) to a block list to prevent particular models or manufacturers. When this is enabled a list of AAGUIDs is required. It can also be used to whitelist specific keys rather than block which means any not on the list will be blocked by default. To enable Microsoft Authenticator, enable key restrictions and set the “Restrict Specific Keys” option to “Allow”. Once you check the box for Microsoft Authenticator (Preview) the AAGUIDs will be populated for authenticator automatically.
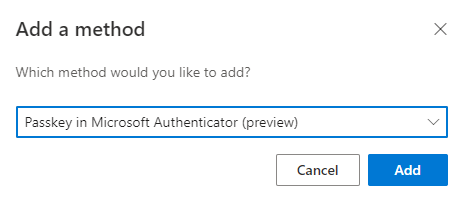
Once passkeys are enabled as an authentication method for users, passkeys can be added from the security info page of the users account. From here, select “Add sign-in method” and choose “Passkey in Microsoft Authenticator” as shown in Figure 2.
Follow the instructions on screen until you get to the QR code. Make sure bluetooth is enabled on both devices to register the passkey and then scan the QR code and follw the on-screen instructions. Once the passkey is created, you will be prompted to give it a name and if everything has been successful, see the screen in Figure 3.

Using Your Passkey
The next time you sign in, you will have the option to use your face, fingerprint, PIN or security key (Figure 4).

Clicking this option will prompt for they type of key to use. From here, select “Use a phone, tablet, or security key” (Figure 5).

Scan the QR code on screen and hit sign in on your device and you will be signed in! Subsequent sign-ins will default to using passkeys.
Summary
Passkeys through the Microsoft Authenticator app are easy to set up and convinient to use. Organisations moving towards passwordless authentication should definitely test out passkeys through Authenticator. It’s still in preview but it’s worth getting ready for an eventual GA release and adoption. In this article I’ve gone through the steps you need to take to enable passkeys in your tenant.
