
Building A Site Through PnP
For todays article, I decided to do something a bit different. I have a requirement at the moment to set up a list of SharePoint sites with a specific layout and configuration. To deploy the sites I chose PnP PowerShell for it’s reach featureset and level of flexibility. Instead of writing about what’s possible here, I decided to go through the process of provisioning and cusomizing a group of SharePoint site.
First, the requirements:
- Each site should be a Microsoft 365 Group connected Team site
- Each site should have a specific naming and URL convention applied
- Each site should have a customized layout for the home page
- Each site should have a specific sensitivity label assigned to control the configuration
Small disclaimer: To keep things somewhat straightforward, I won’t be addressing logging or error handling in this article. In a production script you should always add appropriate logging and error handling like the log function I descibed in my previous article.
Getting Started
To get started with this task, we first need to make sure that we have the PnP PowerShelll module installed and up to date. A quick check with the cmdlet below shows me I’m up to date on version 2.5.0:
Get-Module pnp.powershell
Figure 1 below shows the version number returned.

If you aren’t up to date, running the Update-Module cmdlet as shown below will update the module:
Update-Module PnP.PowerShell -force
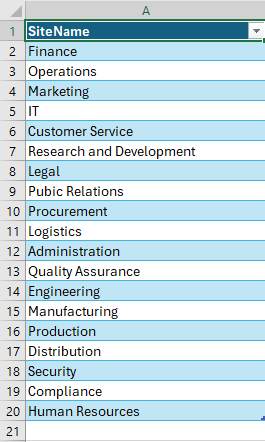
We have a few more preparation steps before we even start our script. The first is to create some inputs, I have a list of sites to create but for the purposes of this article, I’ve created a new list based on typical business areas (Figure 2). I created the list in Excel and saved the file in CSV format for use in the script.
Another requirement we need to prepare for is that each site should be assigned a sensitivity label. I won’t go into creating a sensitivity label here but you can check out this previous article all about sensitivity labels for Groups and sites.
What we need to do to assign the label in our script is find out the GUID of the label. To get the label GUID, we need another PowerShell module. We want to connect to the Security and Compliance PowerShell which requires the ExchangeOnlineManagement module.
We check the module as we did before to make sure it’s up to date and then run the below cmdlet to connect:
Connect-IPPSSession
Once connected, we run the Get-Label cmdlet to get the label we want and it’s associated GUID as shown in Figure 3. Once we have the GUID, take note of it for use in our script

Building the Script
So far we have completed all of the prep work: we have the list of sites to be created, we have the GUID of the label to assign and we have our PnP PowerShell module up to date. Now to start the script. The first thing I like to do with any script is work out the structure before writing the code. The sctructure for this script will be something like the below:
- Import the data from the CSV
- Loop through each site in the list, creating each one and returning this data
- For each site that was created, customize the layout as required
Adding Script Parameters
The first thing we want the script to do is import the CSV. Let’s start by taking in the CSV file path as a parameter. We will also eventually need the sensitivity label ID and the prefix to assign to the site names and URLs so we can add these now too. Another parameter we will need later is the SharePoint tenant (domain.sharepoint.com). The parameters section should be the first part of the script, excluding any comments. All our parameters are manditory for the script to run successfully and they will all be string values so we’ll add the below parameters to the top of the new script:
param (
    [Parameter(Mandatory = $true)]
    [string]$CSVFilePath,
    [Parameter(Mandatory = $true)]
    [string]$SensitivityLabelID,
    [Parameter(Mandatory = $true)]
    [string]$Prefix,
    [Parameter(Mandatory = $true)]
    [string]$SharePointTenant
)
Starting the Script
The first step in the script involves importing from our CSV.To do this we use the Import-CSV cmdlet as shown below:
$Sites = Import-CSV $CSVFilePath
The next thing we want to do is provision the sites. To do this we need to connect to the admin URL of the SharePoint tenant. We can calculate this from the SharePoint tenant name and then connect using the Connect-PnPOnline cmdlet:
$AdminURL = "https://$SharePointTenant"
Connect-PnPOnline -Url $AdminURL -Interactive
Once we’re connected, we want to loop through the site names in our CSV and create each of them, we also want to store the details of each so we can update them. Before we start our look, we’ll create an array to store the outputs from the site creation activity, then loop through each site and create them. We save the details of each site when it’s created by adding them to the array:
$createdSitesArray = @()

foreach ($site in $Sites) {
    $SiteName = "$Prefix - $($site.siteName)"

    $NewSite = New-PnPSite -Type TeamSite -Title $SiteName -SensitivityLabel $SensitivityLabelID -Alias $SiteName.replace(' ', '')

    $createdSitesArray += $NewSite
}
In the above code, we first create our array to store the outputs. We then start our loop by using a foreach to iterate through each site in our list. We generate the name by using the prefix and create the site with the New-PnPSite cmdlet. The output of this cmdlet is stored in the $NewSite variable which we then add to our array for tracking.
In the last piece of the script, we loop through each site that we created and perform some basic updates to the UI but adding a piece of text and a web part for the default document library:
foreach ($createdSite in $createdSitesArray) {
    $siteURL = $createdSite
    $PageName = "Home.aspx"
    $DocumentLibraryName = "Documents"
    Connect-PnPOnline -Url $siteURL -Interactive

    $Page = get-pnppage -Identity $PageName
    $List = Get-PnpList -Identity $DocumentLibraryName
    Add-PnPPageSection -Page $Page -SectionTemplate OneColumn -Order 1
    Add-PnPPageTextPart -Page $Page -text "Welcome to your new site!" -Section 1 -Column 1
    Add-PnPPageWebPart -Page $page -DefaultWebPartType "List" -Section 1 -Column 1 -WebPartProperties @{ isDocumentLibrary = "true"; selectedListId = "$($List.id)" }
}
In this loop, we step through each site that was created and connect to the site. We then get the home.aspx page and the default “Documents” document library. Once we have these items, we add a new single column section and add in a text web part with a welcome message and a document library web part pointing to the default library.
Running the Script
Now that we have a script created, we save and run the script from PowerShell with the required parameters as shown in Figure 4 below:
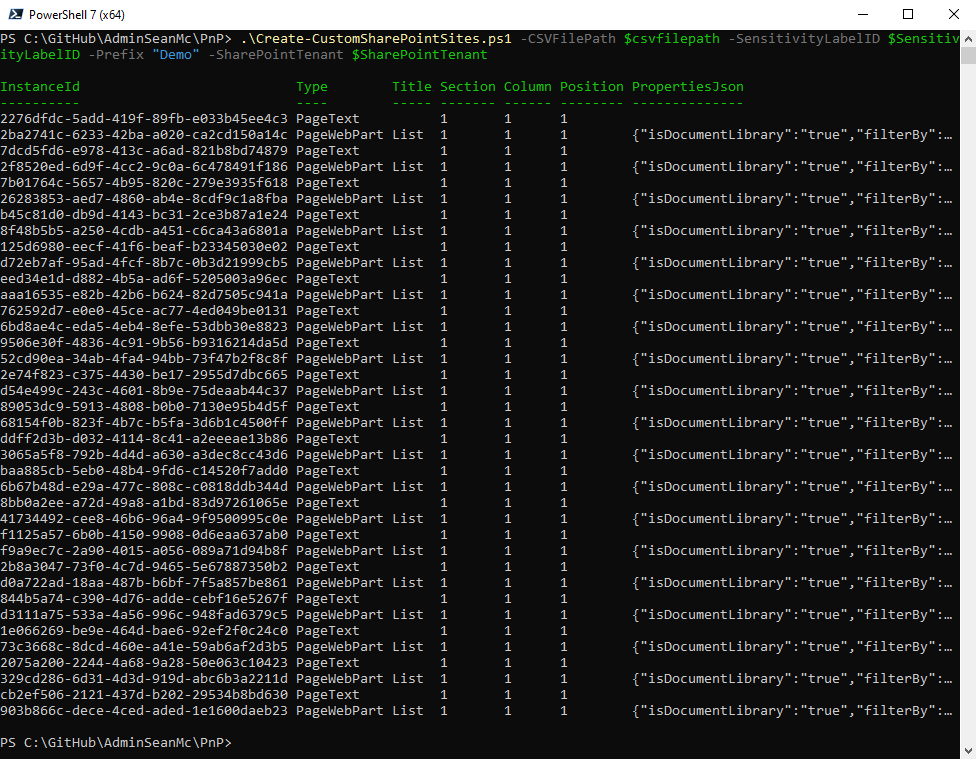
The script runs through the code we added and creates and updates each site. We can check the sites and see they have been created to the specifications we wanted (Figure 5)

Summary
Building scripts like this are part of the day to day work for many Microsoft 365 admins. What I’ve gone through here is a simple example of where a short script can save you a lot of time on repetitive tasks. I’ve uploaded the code I went through here to GitHub and encourage people to build upon it. Don’t forget to share what you create and help others to learn!
