
Assigning Labels to Multiple Libraries Quickly
I had a conversation with a collegue recently who was building a new SharePoint structure for a customer. One of the most important aspects of the build was the retention requirements the customer had. The specific document libraries across multiple SharePoint Online sites have different retention requirements.
A good way to solve this issue is to use retention labels in Microsoft Purview. Labels can be assigned to document libraries to ensure content within that library is subject to the correct retention and deletion times. The challenge came with applying the labels to all the libraries in a pretty large scale deployment.
PowerShell to the Rescue (Again)
That’s where PowerShell comes in. Tasks like this are a prime example of where PowerShell really shines. We can take what would be a very lengthy process of assigning labels to hundreds of libraries and reduce the effort to about an hour.
To do this though, we first need a PowerShell script! In this article, I’ll walk you through the process of building a PowerShell script to assign retention labels to large numbers of document libraries.
Initial Planning
Looking at this requirement, we need to figure a couple of things out. How exactly will PowerShell help us and how will we structure the script. The first one is obvious, as with most tasks like this involving SharePoint Online, I chose the PnP PowerShell module. The PnP PowerShell module can be installed using the below cmdlet if you don’t have it installed already:
Install-Module PnP.PowerShell
The second one is a bit trickier, there are a large amount of libraries and we want to build in the flexibility to set and change labels in a simple process. I also didn’t have a list of site URLs and library names to hand which I could hardcode in the script or add as an input file. I ended up deciding to add some user input into the code to allow the appproach to be a bit more dynamic.
The structure I went with used the brilliant “Out-GridView” cmdlet. Out-GridView pipes the output of an object or array to the screen and displays it to the user in a new window. Adding the -OutputMode parameter allows Out-Gridview to take back a selection of items within that array from the user.
So the structure ended up being something like the below:
- Read the tenant name from the user in the console (useful for reusing the script)
- Connect to the tenant admin site
- List all sites in the tenant and ask the user to select the ones they want to modify (allowing multiple selections)
- List all retention labels and ask the user to select the one they want to modify (allowing only a single selection)
- Connect to each site in turn and list all document libraries in the site
- Ask the user to choose the document library to update (allow multiple selections)
- Update the library with the label
Writing the Script
Ok, now for the fun part, how do we write this script. Well the first step is to read the tenant name and connect to the tenant admin site through PnP. This can be achieved using the Read-Host cmdlet and saving the response to a variable which is then passed to the Connect-PnPOnline cmdlet as shown below:
$TenantName = Read-Host "Enter the tenant name (e.g. if the sharepoint url is contoso.sharepoint.com, enter 'contoso')"

Connect-pnponline -url "https://$tenantname.sharepoint.com" -Interactive
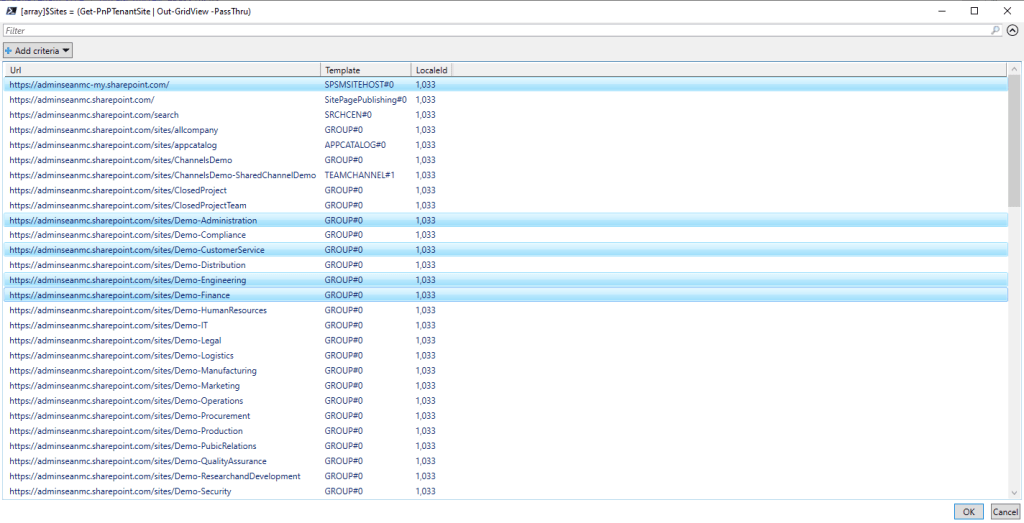
If successful, we should now be connected to the tenant admin site. From here, as an admin, we should then be able to get all sites using the Get-PnPTenantSite cmdlet. We want the user to pick the specific sites they want so we’ll also pipe this to Out-GridView and save the results as our array of sites to process. We also add the -PassThru parameter to Out-GridView which is the same as using the “-OutputMode Multiple” parameter, allowing the user to select one or more items from the output to be returned:
[array]$Sites = (Get-PnPTenantSite | Out-GridView -PassThru)
The output of this cmdlet is a window for the user to choose one or more objects to return as shown in Figure 1.
The next piece is just a Write-Host cmdlet to let the user know how many sites they’ve chosen. This is just in case they have misclicked:
Write-Host "You have chosen to process $($Sites.count) site(s)"
Next, we get a list of labels as shown in Figure 2.
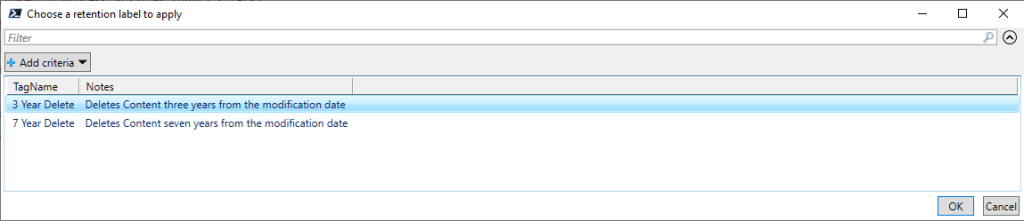
This time, when using Out-GridView, we use the “-OutputMode Single” as we only want the user to be able to select one label:
Write-Host "Select the Retention Label you would like to apply"

$Label = Get-PnPLabel | Select tagname,notes | Out-GridView -OutputMode Single -Title "Choose a retention label to apply"
Now that we have out site list and label, it’s time to start our loop. In each iteration of the loop, we want to connect to the URL of the site we want to modify, and then use “Out-GridView” again to display the list of document libraries in the loop. The start of this loop looks like the below:
foreach($site in $sites){

    Connect-PnPOnline -url $site.url -Interactive

    [array]$Libraries = get-pnplist | ?{$_.basetype -eq "DocumentLibrary" -and (!$_.hidden)} | select  title,id| Out-GridView -OutputMode Single -Title "Select one or more libraries to apply the label $($label.tagname) to"
Now we have an array of one or more document libraries to process, we loop through each (Loops inside loops are commonplace in PowerShell!). When we loop through each, we want to set the label selected previously on the libraries we selected. Rinse and repeat for every site we selected. For context, I’ve shown the full inner and outer loop together below:
foreach($site in $sites){

    Connect-PnPOnline -url $site.url -Interactive

    [array]$Libraries = get-pnplist | ?{$_.basetype -eq "DocumentLibrary" -and (!$_.hidden)} | select  title,id| Out-GridView -OutputMode Single -Title "Select one or more libraries to apply the label $($label.tagname) to"

    foreach($library in $libraries){

    Set-PnPLabel -List $library.title -Label $label.tagname

    }

}
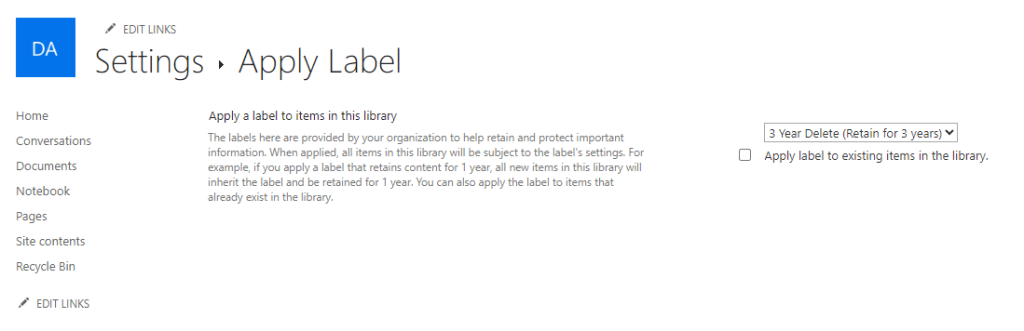
Running through the process takes minutes to update multiple libraries in multiple sites. When checking the site afterwards, we can confirm that the label is applied to the libraries as expected (Figure 3).
Summary
This is another example where a manual task, in this case the following steps:
- Open the SharePoint Site
- View all contents
- Select the Library
- Select the library settings menu
- Select the label option
- Change the label
Can be reduced down into a streamlined process with the aid of PowerShell. The usual caveats apply about running scripts in your own environment and that I’ve removed any error handling for the sake of keeping the message here clear. I’ve uploaded the full sample script to GitHub here, I’d be happy to hear any improvements people have come up with!
