
An Amazing Tool That You Can Start Using Quickly
The world of Microsoft cloud security is a busy one. There always seems to be something new you need to consider to stay up to date. Even without new recommendations and controls, keeping track of your existing controls is difficult enough!
In this article I want to discuss Maester. Maester is an awesome tool that allows you to automate standard security testing for Microsoft Entra / Microsoft 365. I’ll go through what exactly that means at a functional level below, but essentially, Maester let’s you ensure you’re environment is aligned, and stays aligned with best practices.
How Does It Work?
Maester is a PowerShell module that is based on the Pester testing framework. It allows you to build tests, or use existing ones, to perform testing against your configuration. This allows you to detail your security configuration as code, and validate it periodically.
For example, if we look at the default tests, let’s say you want to ensure that your users passwords are not set to expire. Generally you would implement the configuration, document it and then sleep soundly knowing it’s in place right? Well in most moden environments, changes are happening every day. This means that your configuration from today, could be undone tomorrow (either by accident or intentionally). Maester provides a mechanism to consistently validate your configuration and identify gaps.
Installing Maester
The documentation for Maester (available here) is excellent. There is a clear installation guide which I won’t look to reproduce here. In short though, Maester is installed as a PowerShell module and then you can install a suite of default tests to get started.
My experience with installation has always been painless. I do recommend adopting PowerShell 7 as your standard. One note I would make for clarity, the installation guide instructs you to create a folder and install the tests there. keep in mind the directory you are currently in so you don’t end up putting your test folder in a weird location depending on what you were doing previously. Personally, I like to install the tests in a folder on the root of the C drive on my workstation.
Maester is also supported from Azure Automation, Container Apps and DevOps. I won’t delve into the installation on those platform here but will save that for a dedicated article in the future.
Understanding The Tests
I mentioned above that you can use the built-in tests or create your own. The tests are based on the Pester framework so if you’re not familier with that, then they might not make a huge amount of sense to look at.
At a high-level, a pester test is a .ps1 file that follows a particulay syntax which contains multiple elements including the following core elements:
- Describe: This element contains a group of tests that fall under a specific overall test.
- Context: This element contains a logical grouping of tests inside a Describe block.
- Tag: This element assigns a tag or multiple tags to a test or group of tests to identify them when running (we’ll see this later)
- It: This element contains the individual tests that combine to make up the success criteria for the overall test as part of a Describe block and, if required a Context block.
- Should -Be: The “Should -Be” statement is what maps the output of the actual test to what the expected value is, it defines the success criteria.
There are more elements that can make up a test but for now, the above list should give you an idea of what to expect. An example of a test from Maester is MT.1025 – No external user with permanent role assignment on Control Plane which tests for external users with permanent role assignments in Entra. This test is stored in a Describe block along with other related tests as shown in Figure 1.

As shown in Figure 1, each test references a function to run some logic and produce a response. This response is then validated with the “Should -Be” statement. Looking at the Test-MtPrivPermanentDirectoryRole function (you can review the code here) you will see the logic it performs and at the end, it will return the $result which is then used by the test to provide a success or failure.
Running Maester
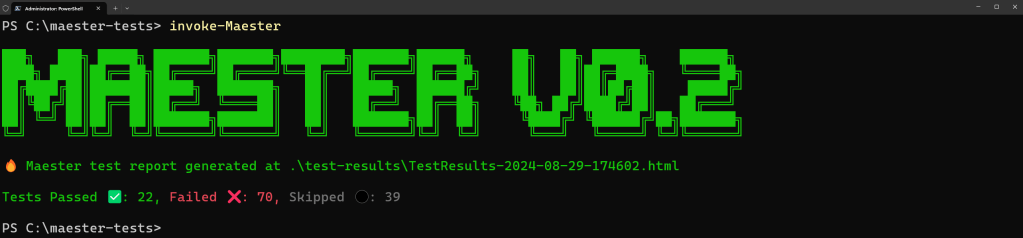
Running Maester locally is straightforward, simply connect and log in with the cmdlet Connect-Maester and then invoke the tests using Invoke-Maester. Using this cmdlet on its own will run the tests in the current directory. Remember the directory we used earlier when we ran Install-MaesterTests? That’s the one you will likely be running from when you get started and contains all the default tests. Figure 2 shows the output you will see in the console when running the tests, complete with a summery of passed / failed and skipped tests.
More important than the console output, you will receive a HTML output (Shown in Figure 3) with the results and details for each test.

Clicking on the info icon on any of the tests will give you the full details of the test and what it checks, along with a recommended result as shown in Figure 4.

From the result info, we also see the tags that I mentioned earlier. If we wanted to run specific tests, based on tags, we can add the “-Tag” parameter to the Invoke-Maester cmdlet. This will run just the tests with the tags we add as shown in Figure 5.

Maester Permissions
Of course with any tool we use in our tenant, the security of the tool itself is important! The tool uses the Microsoft.Graph PowerShell SDK to connect to the Microsoft Graph. This can be viewed by checking the Connect-Maester.ps1 file contained in the module (viewable on GitHub here). Similarly, for Azure, it uses the Az module and for Exchange Online and Security & Compliance the Exchange Online Management PowerShell module is used.
The tool uses delegated permissions so is always limited to the access that the user has in place for their account. By default only the Microsoft Graph is used and connected. To connect and allow permissions for all compnents, we use the following syntax:
Connect-Maester -Service All
Notifications
The Maester module supports notifications thorough both email and Teams channel message. This is extreamly useful when you are automating the tests.
To use either of these options we need to connect with the right permission scopes. For Teams, this can be done with the following syntax:
Connect-Maester -SendTeamsMessage
For Email, we can use this one:
Connect-Maester -SendMail
Once we are connected, we use the following syntax to send our report to a Team channel:
Invoke-Maester -TeamId "<Team ID>" -TeamChannelId "<Channel ID>"
This way, we get a nice message into our Team channel summerizing the results as shown in Figure 6.

Similarly, if we want to send this output as an email, we use the following:
Invoke-Maester -MailRecipient "<Email Address>"
The email captures the results of the report and summerizes it for your recipients (Figure 7). This can be an individual or a distribution group.

Summary
There’s tonnes more to talk about when it comes to Maester, such as building your own tests or integrating with automation tools. I will save these pieces for future posts but needless to say, Maester is a no-brainer for security consious Microsoft 365 administrators. If you’re not a security consious administrator, you should be!
I recommend everyone gives running Maester a try to see how easy it is to get started, we can all use more useful tools like this to make our lives easier!
