With more and more enterprise organizations moving to the cloud every day, it can get confusing to map requirements and costings when moving from an on-premise environment. The Azure Migrate Service allows us to very quickly get hard data on what our azure footprint will look like. In this blog I will go through the basic end-to-end configuration of the Azure Migrate Service on a vCenter 6.5 environment.
Setup
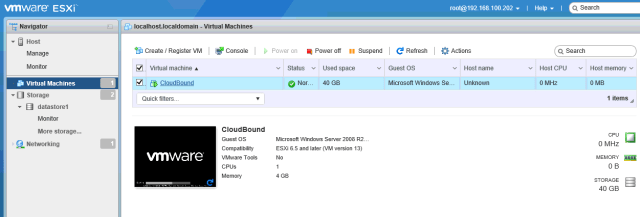
I have built an ESXi 6.5 host managed by a vCenter 6.5 virtual appliance for the purpose of this demo. On this host I have added a Windows 2008R2 VM named ‘CloudBound’. This is the machine I am planning to migrate to Azure using the Azure Migrate Service.
First, lets get our migration project setup in the Azure portal. We log in to our subscription and create a new Migration Project


When the migration project is created, open it up by clicking “Discover & Assess” to begin the process.
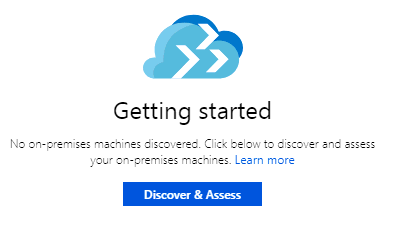
In the next window, let’s kick things off by selecting the “Discover Machines” option to discover our on-prem environment.
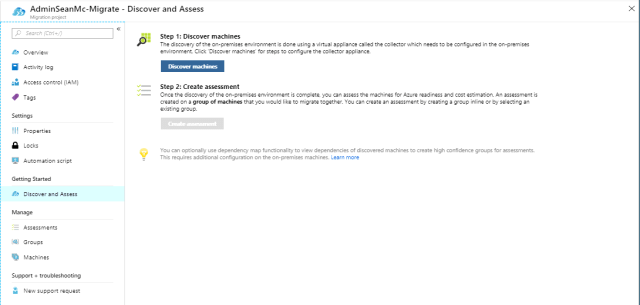
We are presented with several steps. The first step logically is to download the collector appliance which will allow us to discover and assess our vCenter environment. The collector appliance comes in .OVA format and there are options for a one-time discovery or continuous. For the purposes of the lab, lets do a one time discovery. Download the One-time discovery OVA file and deploy it to your vSphere environment.


This import will take a few minutes so let’s grab some tea and come back to it.
Configuring the Collector Appliance
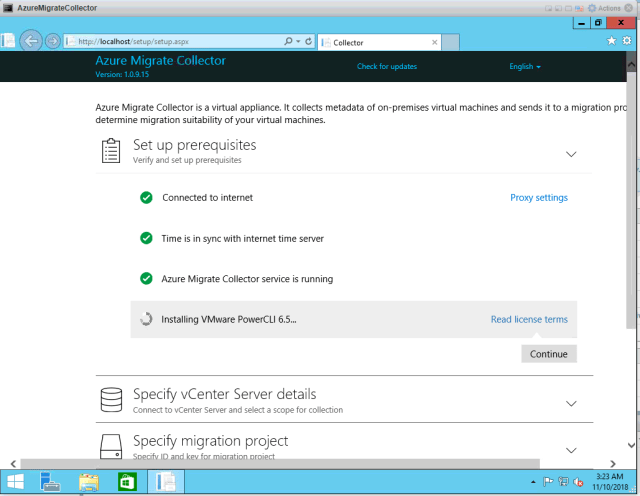
Now that the collector is deployed, let’s log on to the console and begin configuration.

First we carefully read and accept the license terms and give the collector an admin password.
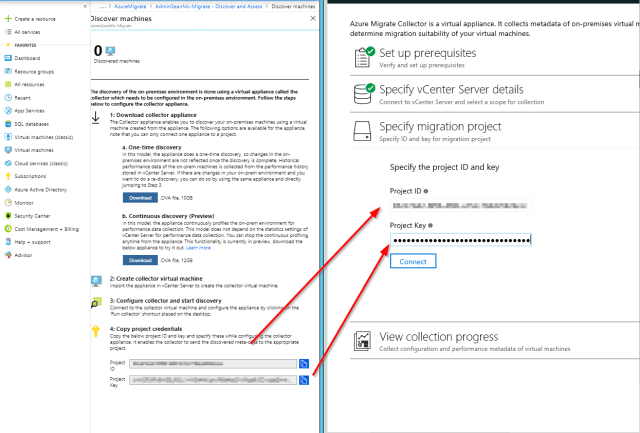
We can then log into the connector VM and run the “Run Connector” utility on the desktop. We could also browse to the connector remotely if we wanted.
Let the prerequisite wizard finish getting everything ready and then we can start configuration. We need to make sure the connector has network and internet connectivity, for this lab I’ve allowed it to use DHCP.
When the prerequisite installer completes, we are prompted for vCenter credentials, specify the credentials and click ‘Connect’.

We may receive a message about enabling utilization history for disks, for this demo we can ignore this but in production I would recommend having it enabled. We now select the host/cluster we want to assess and hit continue.
Now we can go back to our Azure Portal to copy the [project ID and Project Key into our appliance then hit ‘Connect’.
Once the connection is successful, we can click continue to kick off the data collection. This may take some time so time for another break!
Viewing the Assessment
Now that the collector has finished and uploaded the data, we can create an assessment. (When the assessment finishes on the collector, it may take some time for the machines to appear in the Azure Portal)
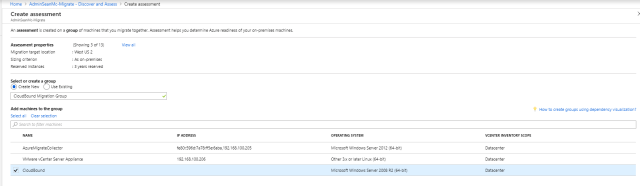
Open up the Migration Project and select ‘Create Assessment’.

Here we will create a new migration group and include out ‘CloudBound’ Server.
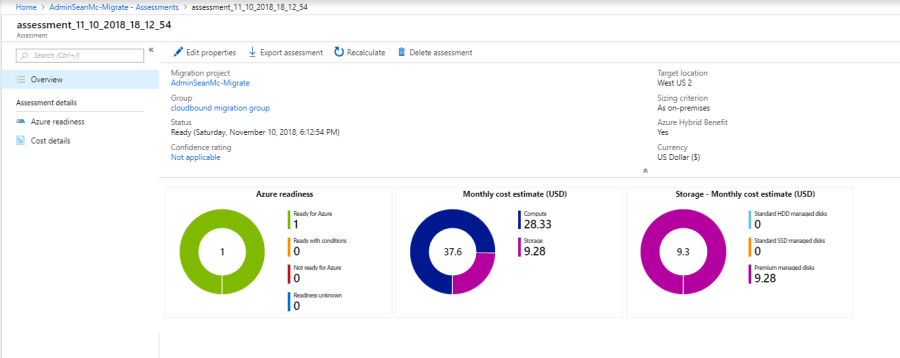
When the assessment is created, navigate to the “Assessments” blade to view it. You’ll notice that the confidence rating isn’t great, in my demo its set to “Not Applicable”, this rating is based on several factors such as how many data points are available for a given VM. I create my Windows 2008R2 server today so Azure will not have a whole lot of data to work with.

Select the assessment to view the migration recommendations. Here we can see the readiness summary and cost estimates for our migration group. We can edit the properties of the group to change our requirements for things like the desired location and storage type.


In the Azure Readiness Blade we can see the recommendations for each VM along with the suggested migration tool. Here we can export out our assessment to prepare the data for review. Clicking on a VM will give us some statistics about the VM.


The cost details blade will give us a breakdown of the cost estimates per VM.

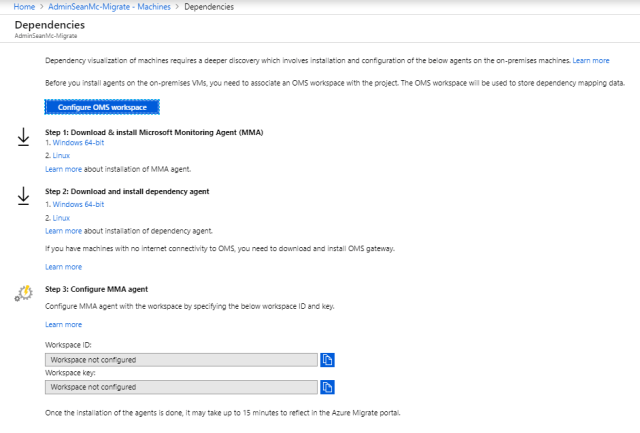
Finally, we can also the Microsoft Monitoring Agent and dependency agent to map out dependencies within a group. As this environment only has a single server, there isn’t much to show but adding that on top of the assessment we carried out can provide us with real, dependable data and help prepare for migration.
And that’s it, we have configured the Azure Migrate Service to assess our on-premise vCenter environment and have some nice reports to show the benefits of moving our workloads to Azure.
