Today (31/03/21), Microsoft have made public the steps and script to generate the Microsoft Viva Connections for Desktop. In this post we will go through how to package and deploy the app for Microsoft Teams.
What is Microsoft Viva?
Microsoft Viva is “an employee experience platform” which is essentially a collection of solutions which all fall under the Microsoft Viva umbrella. There are four components to Microsoft Viva:
- Viva Connections – Surfaces information intelligently to users in a central location via the Viva Connections App
- Viva Topics – Organizes content into AI generated “Wiki” pages and surfaces easily to end users
- Viva Learning – Provides a learning platform for users, allowing for Microsoft training materials and integrating with third-party learning platforms
- Viva Insights – Provide users with personal insights on productivity and wellbeing along with providing some visibility to managers and leaders of the wellbeing of their reports
Do I need a License for Viva Connections?
Viva Connections is licensed via an existing M365/O365/SharePoint license.
Setting up Viva Connections
Setting up Viva Connections for your tenant is relatively easy, below we will go through the configuration required including any prerequisites that need to be in place.
Prerequisites
To prepare for Viva Connections, we should have the following in place:
- Configure a SharePoint Online Home Site
- You must be a site owner of the home site
- Configure Global Navigation for SharePoint
- Only include SharePoint Modern Pages in Viva Connections
- Prepare two icons:
- A 192X192 pixel coloured icon for Teams app catalogue
- A 32X32 pixel monochrome icon for Teams app bar
- Download the Viva Connections for Desktop PowerShell Script
- (Optional) A link to your organizations custom privacy policy web page
- (Optional) A link to your organizations custom terms of use policy web page
Configure a SharePoint Online Home Site
A SharePoint Online Home Site is a SharePoint Online Communication site that is set as the landing page for users. This is often the home page of the corporate intranet. To configure a Home Site for our tenant, sign into the SharePoint Online Management Shell and run the below command:
Set-SPOHomeSite -Url <HomeSiteURL>
Configure Global Navigation for SharePoint
Global Navigation for SharePoint allows us to help users to find content by making the navigation configured on our Home site or a custom Hub / Global Navigation available via the SharePoint app bar. To enable Global Navigation, open the previously configured Home Site and in the Settings menu, select “Global Navigation”.

Enable the Global Navigation toggle and configure the settings with an optional logo, a Company name and then choose whether to use the navigation of the Home Site or to use a Hub or custom Global Navigation (More information on this here). If we choose to use Hub or Global Navigation, we can use the “Edit Global Navigation” option to configure this.
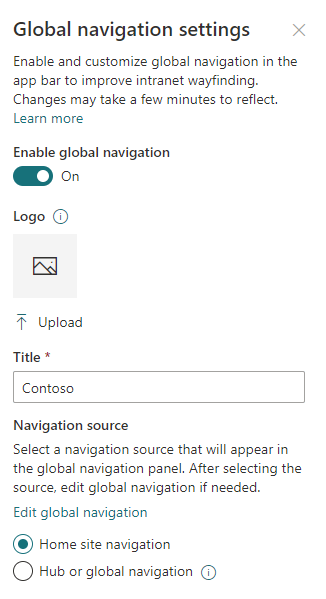
When everything is in place, hit save and after refreshing the page, we will see the Global Navigation has been updated in the app bar.

Prepare the Icons
To add icons to the app, we need the following images:
- A 192X192 pixel coloured icon for Teams app catalogue
- A 32X32 pixel monochrome icon for Teams app bar
The images I used are below:


Generate Viva Connections for Desktop App
To generate the app, first download the script available here and extract the ZIP. Open PowerShell and navigate to to path you extracted to. We can run the script directly and need to provide the following information as it runs:
- The URL of your home site
- Log in with Admin credentials (must be an owner of the home site)
- A name for your app
- A short description of the app
- (Optional) A link to the organizations privacy policy – Hit enter to accept the default Microsoft policy
- (Optional) A link to the organizations terms of use policy – Hit enter to accept the default Microsoft policy
- The organization name
- A link to the organizations public website
- Upload the coloured icon
- Upload the monochrome icon
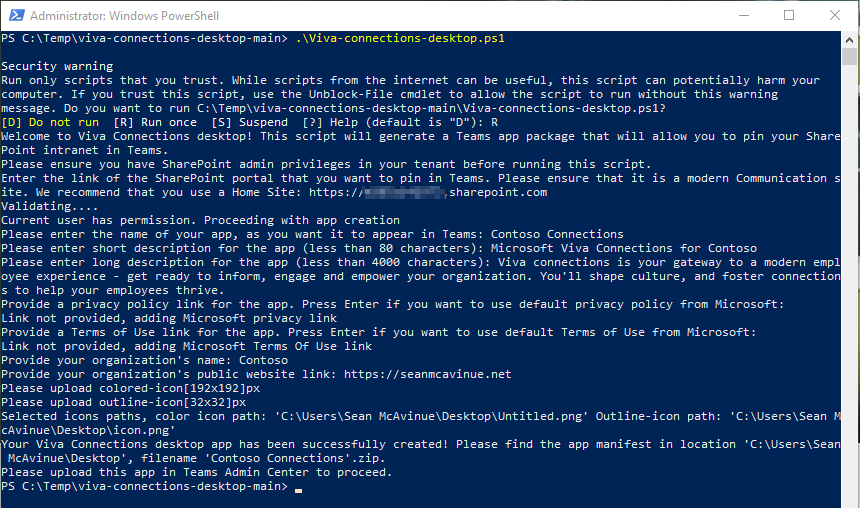
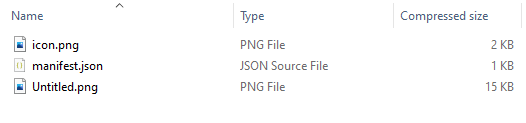
Once all of this information is provided, the app manifest will be provisioned as a .ZIP file.
Upload the App to the Microsoft Teams Admin Center
On the Teams Admin Center, navigate to “Teams Apps” -> “Manage apps” and select “Upload”.

Upload the ZIP file that was created in the last step. Once uploaded, you should see the app in the list as below:

(Optional) Deploy the App to End Users
With the app uploaded, we can manage it like any other Teams app however it’s highly recommended to deploy and pin the app using an app setup policy. We can create and deploy a new policy or just modify the default policy depending on what exactly we want to do. Below I have added the app to the top of a new App Setup Policy:

Once the policy is updated, if it’s not already set, ensure to upload the policy to include the in-scope users.
Using the Viva Connections App
From within the app in Teams, by adding the app or via the App Setup Policy, our users are presented with our SharePoint Home site along with the Global Navigation, Followed sites and news and posts relevant to them:

Summary
Viva Connections brings a lot of information into Teams, moving even further towards Teams being the new “Desktop” for users where they can access vast amounts of information from the same familiar console. Connections is the first real addition from Microsoft Viva which we can deploy for production easily and without additional cost. I will have future posts on the other components of Microsoft Viva in future but for now, you can find more information at the below link:
