
Conditional Access is a vital component of any Azure AD / Microsoft 365 tenancy. It is an extremely flexible and effective tool to help shape and enforce authentication criteria such as MFA and device compliance. While creating Conditional Access Policies can be very straightforward, as they grow, they can become quite complex and it can be difficult to predict how some new policies may affect existing ones. Given how easy it is to configure a policy, it’s also very easy to misconfigure a policy and have a negative impact on user authentication.
To help admins gain insight into the effect of changes to policies, Conditional Access policies can be configured in “Report Only” mode. This allows each authentication to be assessed against a particular policy, with the results logged but without actually taking the specified actions. This is a really cool way to test the impact of changes before moving them into production.
One issue with Report Only policies though, is that assessing the logs can be cumbersome and require either a lot of manual work or some scripting to pull the data out into an easily readable format. In addition to this, the retention of logs in Azure AD is quite short, even under Premium licensing (check out Table 1 below from the Microsoft Documentation).
| Report | Azure AD Free | Azure AD Premium P1 | Azure AD Premium P2 |
|---|---|---|---|
| Audit logs | 7 days | 30 days | 30 days |
| Sign-ins | 7 days | 30 days | 30 days |
| Azure AD MFA usage | 30 days | 30 days | 30 days |
Conditional Access Insights and Reporting Workbook
The Conditional Access Insights and Reporting Workbook is based on an Azure Log Analytics Workspace and allows for both the retention of logs past the Azure AD defaults and provides a nice dashboard to make sign-in logs a lot more user friendly and informative at a glance.
Azure AD Logs are shipped into a Log Analytics Workspace and from there, pre-configured queries help to display the data in a nice, easy to read dashboard (figure 1).

In this post, I will detail the following steps required to configure the Workbook:
- Set up a new Log Analytics Workspace
- Configure Azure AD to send Logs to the new workspace
- View the Insights and Reporting Workbook
Set up a new Log Analytics Workspace
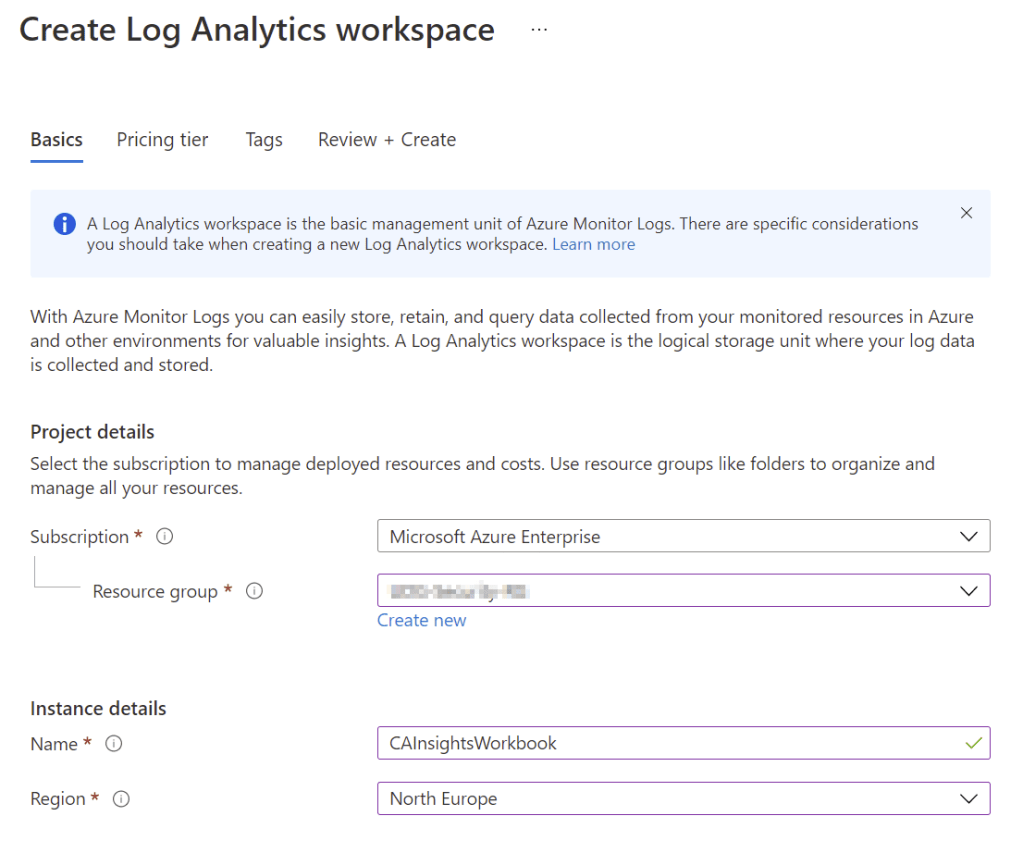
To create a Log Analytics Workspace, open the Azure Portal and search for “Log Analytics Workspaces”. Click “Create” and give the Workspace a name, Resource Group, Subscription and Location (Figure 2), optionally select the pricing tier and then click “Review + Create” to finish creating the Workspace.
Configure Azure AD to Send Logs to the New Workspace
With the Workspace configured, next open the “Diagnostic Settings” page from the Azure Active Directory Admin Portal. Select the option to “Add diagnostic setting” and configure “SignInLogs” and any other logs you may want to retain to send to the new Log Analytics Workspace that you configured (Figure 3) and click “Save”.

This will send all new sign in logs to the Workspace you created.
View the Insights and Reporting Workbook
To view the Workbook, open the “Security” page from the Azure AD Portal, then select “Conditional Access” -> “Insights & Reporting”. The Workbook shows a detailed breakdown of all sign-ins in the environment and can be filtered by Conditional Access Policy, Time range, User, or Application. To view the results of a specific policy, for instance a report only policy, simply change the dropdown in the report to select the policy and the data will be filtered everywhere in the workbook as can be seen in Figure 4 below.

