
In many companies, users with admin accounts for different services are trusted to only use their admin privileges when there is a requirement that needs to be met. We rely on logging to track changes and many companies very rarely review logs until an issue is discovered elsewhere. As IT Admins, we get stuck between giving our staff the access to let them carry out their job and enforcing governance and change control procedures.
Privileged Access Management (PAM) is an often overlooked technology which allows us to apply that level of governance, while not creating overly complex and drawn out processes that prevent our staff from carrying out their job effectively. This is accomplished by applying a ‘Just In time’ access model. For example, when a member of the helpdesk needs to perform a password reset, they can request this access for the required amount of time, providing justification for the request. This can then be approved automatically, or follow a simple predefined approval process.
PAM is a part of Microsoft Identity Manager (MIM) 2016 and starting with Windows Server 2016, it becomes even easier to implement. This blog is part one of my “Implementing Privileged Access Management on Server 2016/2019” post and here I will step through how to prepare for a MIM installation, Create the Privileged AD DS domain required and prepare the corporate Domain.
Server Requirements:
- An existing corporate domain of functional level 2016
- One Windows Server 2016 Server to host the MIM application
- One Windows Server 2016 Server to host the privileged domain
Note: MIM 2016 can be licensed by Office 365 EM+S licensing so if you have implemented Privileged Identity Management in Office 365, you can extend that environment to your on premise environment.
Configuring the Corporate Domain
For this blog I have created a lab domain called lab.corp.net. I will use this existing domain and prepare it for the PAM implementation.
first log onto your corporate Domain Controller(s). For PAM to work we need to enable RPC access to the SAM database. On the Corporate DC, open an administrative Powershell window anmd run the below command to add in the registry key to enable this:
New-ItemProperty –Path HKLM:SYSTEM\CurrentControlSet\Control\Lsa –Name TcpipClientSupport –PropertyType DWORD –Value 1
Next we need to enable the AD Optional Feature for PAM is it is not already enabled. In the same window as above, enter the below commands to enable the feature.
Import-Module ActiveDirectory
Enable-ADOptionalFeature “Privileged Access Management Feature” -Scope ForestOrConfigurationset
Now we configure the auditing policies in the Default Domain Controller GPO. Make the below additions to the policy:
Computer Configuration > Policies > Windows Settings > Security Settings > Local Policies > Audit Policy > Audit account Management

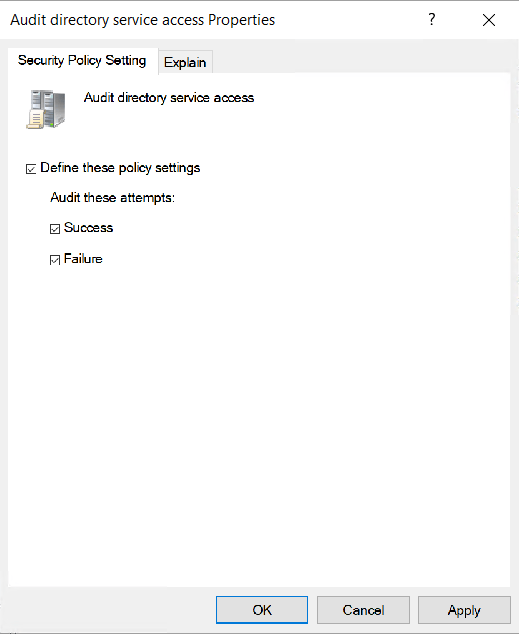
Computer Configuration > Policies > Windows Settings > Security Settings > Local Policies > Audit Policy > Audit directory Service access
That’s all the configuration for our corporate domain, next we will create and configure the privileged domain.
Configuring the Privileged Domain
Create a new Windows Server 2016 Server with GUI. Log on to the server and as before, enable RPC access to the SAM DB with the below command:
New-ItemProperty –Path HKLM:SYSTEM\CurrentControlSet\Control\Lsa –Name TcpipClientSupport –PropertyType DWORD –Value 1
Now let’s install the new domain. First we add the server manager module and install the AD-DS and DNS roles
#Install ADDS and DNS Features
import-module ServerManager
Install-WindowsFeature AD-Domain-Services,DNS –restart –IncludeAllSubFeature -IncludeManagementTools
After the Server restarts, we create our priv forest with the below commands. We are creating a delegation on DNS to our corporate domain, when prompted for credentials, enter your corporate domain credentials.
#Create Priv forest
$ca= get-credential
Install-ADDSForest –DomainMode 7 –ForestMode 7 –DomainName priv.lab.corp.net –DomainNetbiosName priv –Force –CreateDNSDelegation –DNSDelegationCredential $ca

Next we create the required service accounts and groups. Be sure to change all passwords after creation and keep track of them!
import-module activedirectory
$sp = ConvertTo-SecureString “Password01” –asplaintext –force
New-ADUser –SamAccountName MIMMA –name MIMMA
Set-ADAccountPassword –identity MIMMA –NewPassword $sp
Set-ADUser –identity MIMMA –Enabled 1 –PasswordNeverExpires 1
New-ADUser –SamAccountName MIMMonitor –name MIMMonitor -DisplayName MIMMonitor
Set-ADAccountPassword –identity MIMMonitor –NewPassword $sp
Set-ADUser –identity MIMMonitor –Enabled 1 –PasswordNeverExpires 1
New-ADUser –SamAccountName MIMComponent –name MIMComponent -DisplayName MIMComponent
Set-ADAccountPassword –identity MIMComponent –NewPassword $sp
Set-ADUser –identity MIMComponent –Enabled 1 –PasswordNeverExpires 1
New-ADUser –SamAccountName MIMSync –name MIMSync
Set-ADAccountPassword –identity MIMSync –NewPassword $sp
Set-ADUser –identity MIMSync –Enabled 1 –PasswordNeverExpires 1
New-ADUser –SamAccountName MIMService –name MIMService
Set-ADAccountPassword –identity MIMService –NewPassword $sp
Set-ADUser –identity MIMService –Enabled 1 –PasswordNeverExpires 1
New-ADUser –SamAccountName SharePoint –name SharePoint
Set-ADAccountPassword –identity SharePoint –NewPassword $sp
Set-ADUser –identity SharePoint –Enabled 1 –PasswordNeverExpires 1
New-ADUser –SamAccountName SqlServer –name SqlServer
Set-ADAccountPassword –identity SqlServer –NewPassword $sp
Set-ADUser –identity SqlServer –Enabled 1 –PasswordNeverExpires 1
New-ADUser –SamAccountName BackupAdmin –name BackupAdmin
Set-ADAccountPassword –identity BackupAdmin –NewPassword $sp
Set-ADUser –identity BackupAdmin –Enabled 1 -PasswordNeverExpires 1
New-ADUser -SamAccountName MIMAdmin -name MIMAdmin
Set-ADAccountPassword –identity MIMAdmin -NewPassword $sp
Set-ADUser -identity MIMAdmin -Enabled 1 -PasswordNeverExpires 1
Add-ADGroupMember “Domain Admins” SharePoint
Add-ADGroupMember “Domain Admins” MIMService
Now that our users are created, we configure the auditing and security policies on the Priv domain through Group Policy.
Add the below policies on the Default Domain Controller Policy:
Computer Configuration > Policies > Windows Settings > Security Settings > Local Policies > Audit Policy > Audit Account Management
Computer Configuration > Policies > Windows Settings > Security Settings > Local Policies > Audit Policy > Audit Directory Service Access
Computer Configuration > Policies > Windows Settings > Security Settings > Account Policies > Kerberos Policy > Maximum lifetime for a user ticket
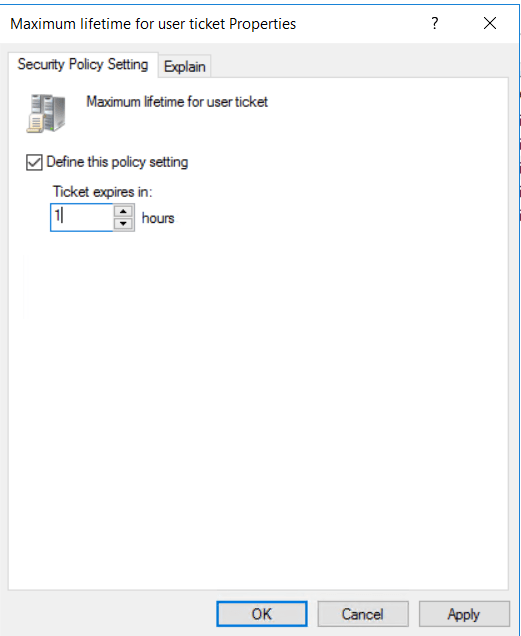
Click OK on the popup

Next we configure the Default Domain policy to restrict our service accounts as below:
Computer Configuration > Policies > Windows Settings > Security Settings > Local Policies > User rights assignment > Deny log on as a batch job
Add: priv\mimcomponent; priv\mimmonitor; priv\mimservice

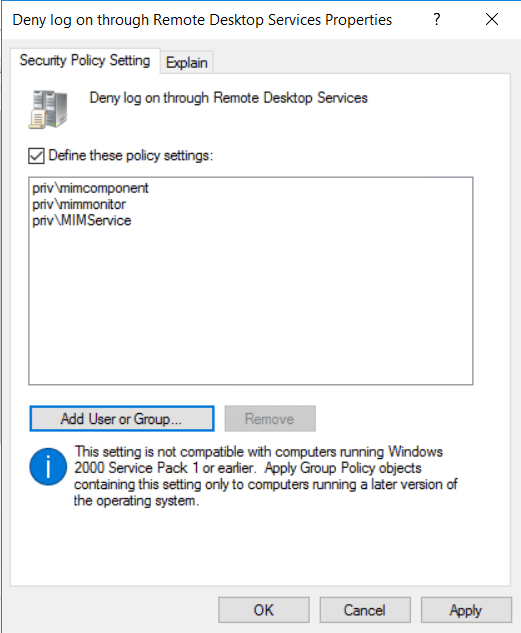
Computer Configuration > Policies > Windows Settings > Security Settings > Local Policies > User rights assignment > Deny log on through Remote Desktop Services
Add: priv\mimcomponent; priv\mimmonitor; priv\mimservice
Now that our logging and security policies are done, we create a DNS forwarder so our Priv Domain can forward requests to our Corp domain. Replace 10.0.0.4 with the DNS server(s) in your Corp domain
Add-DnsServerConditionalForwarderZone –name “lab.corp.net” –masterservers 10.0.0.4

Add the appropriate Service Principal Names for the MIMservice:
setspn -S http/pamsrv.priv.lab.corp.net PRIV\SharePoint
setspn -S http/pamsrv PRIV\SharePoint
setspn -S FIMService/pamsrv.priv.lab.corp.net PRIV\MIMService
setspn -S FIMService/pamsrv PRIV\MIMService
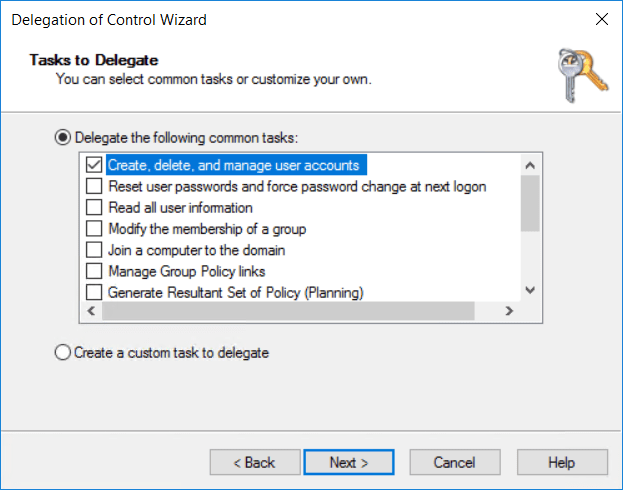
The next step is to delegate Control in AD to our service accounts in AD Users and Computers. In ADUC right click your domain and click ‘Delegate Control’

In the Delegation of control Wizard, add the users: MIMComponent, MIMMonitor and MIMService.

select ‘Create, delete, and manage user accounts and Modify the membership of a group’ and click next and finish
Run the delegation Wizard again and select the MIMAdmin user. Select the option to ‘Create a custom task to delegate’

Sselect to delegate ‘this folder, existing objects in this folder and creation of new objects in this folder’

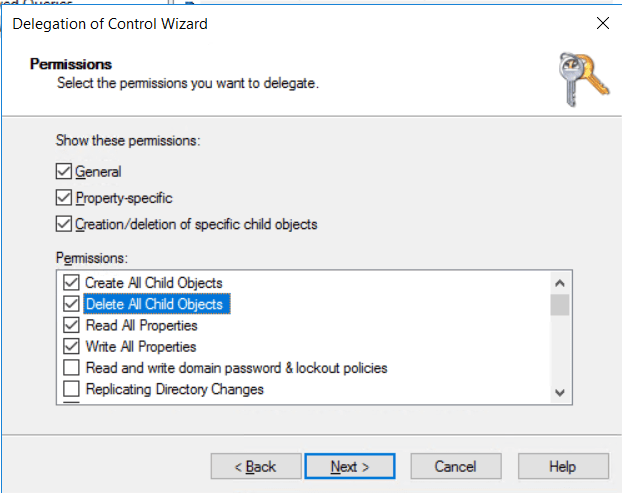
In the ‘General’ section, select the following attributes and then click next and finish:
- Read
- Write
- Create all Child Objects
- Delete all Child Objects
- Read All Properties
- Write All Properties
- Migrate SID History
Delegate once more to MIMAdmin, creating a custom task to delegate as before and this time select ‘Only the following objects in the folder’ and tick ‘User Objects’ and click next.
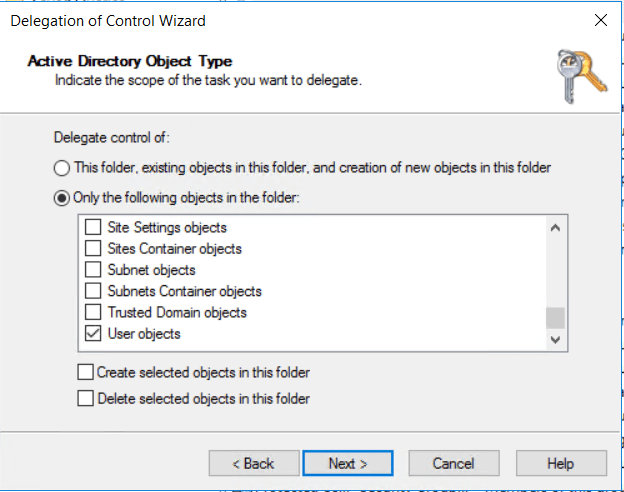
Grant the ‘Change Password’ and ‘Reset Password’ Rights.

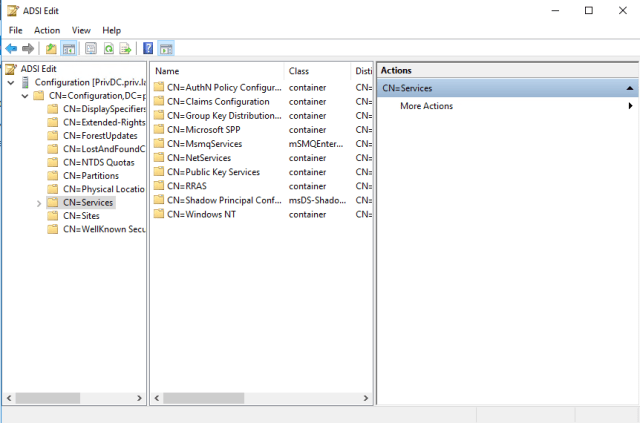
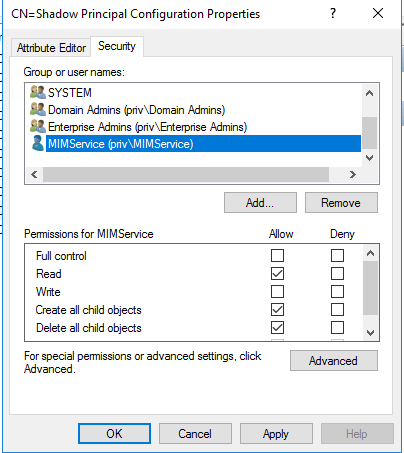
Next we need to allow permissions to MIM Admins and MIMService on the container “Configuration -> Services -> Shadow Principal Configuration”. Do this by opening ADSIEdit and connecting to the Configuration naming context. Navigate to the container and right click to set permissions for the MIMService and any other MIM Admins for write, create all child objects and delete all child objects permission
The final step is to add the MIMService and MIMComponent accounts to the ACL for the ‘Admin SD Holder’ object to ensure they can update admin groups and to add the MIMadmin account to create and update authentication policy. To do this open an admin command prompt and run the below commands (Replace the domain structure top match your own). When finished restart both the Corp DC and the Priv DC.
dsacls “CN=AuthN Policies,CN=AuthN Policy Configuration,CN=Services,CN=configuration,DC=priv,DC=lab,DC=corp,DC=net” /g mimadmin:RPWPRCWD;;msDS-AuthNPolicy /i:s
dsacls “CN=AuthN Policies,CN=AuthN Policy Configuration,CN=Services,CN=configuration,DC=priv,DC=lab,DC=corp,DC=net” /g mimadmin:CCDC;msDS-AuthNPolicy
dsacls “CN=AuthN Silos,CN=AuthN Policy Configuration,CN=Services,CN=configuration,DC=priv,DC=lab,DC=corp,DC=net” /g mimadmin:RPWPRCWD;;msDS-AuthNPolicySilo /i:s
dsacls “CN=AuthN Silos,CN=AuthN Policy Configuration,CN=Services,CN=configuration,DC=priv,DC=lab,DC=corp,DC=net” /g mimadmin:CCDC;msDS-AuthNPolicySilo
dsacls “cn=adminsdholder,cn=system,dc=priv,dc=lab,dc=corp,dc=net” /G priv\mimservice:WP;”member”
dsacls “cn=adminsdholder,cn=system,dc=priv, dc=lab,dc=corp,dc=net” /G priv\mimcomponent:WP;”member”
Now our Priv DC is finally configured! That’s the end of this part of the blog series. In the next post, I will go through installing and Configuring MIM for PAM.

Pingback: Implementing Privileged Access Management on Server 2016/2019: Part 3 – Deploying the MIM/PAM Server – Admin Sean Mc
Pingback: Implementing Privileged Access Management on Server 2016/2019: Part 4 – Finalize Configuration and Test PAM Requests – Admin Sean Mc