
This is the second post in a series which will go through setting up Privileged Access Management on Server 2016/2019. in this post we will configure the SharePoint component of Microsoft Identity Manager.
*As I am using a lab environment I have chosen to install MIM, SQL and SharePoint on the same server but in production they would need to be planned and scaled out correctly.
Prerequisites:
- I have installed SQL Server 2016 locally on the MIM/SharePoint server. a SQL instance will be required for both SharePoint and MIM
- The PAM/MIM/SharePoint server should be joined to the priv domain
Installing SharePoint Server 2016
First download the SharePoint Server 2016 ISO and mount it. Open an administrative command prompt and navigate to the source files for the installation. From here run the prerequisite installer with the command:
.\prerequisiteinstaller.exe

Follow the on screen prompts to install the required prerequisites, roles and features. when this finishes, the server will restart.
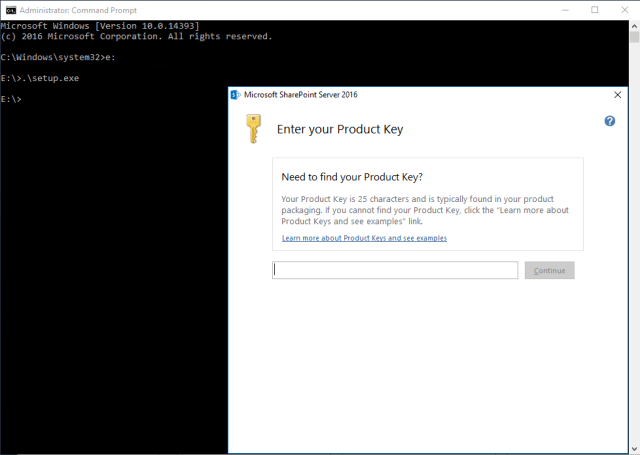
Next, open an administrative command prompt and navigate to the source files again. Run the setup using the command:
.\setup.exe
Follow the on screen prompts to enter your product key and install SharePoint Server 2016 as below:

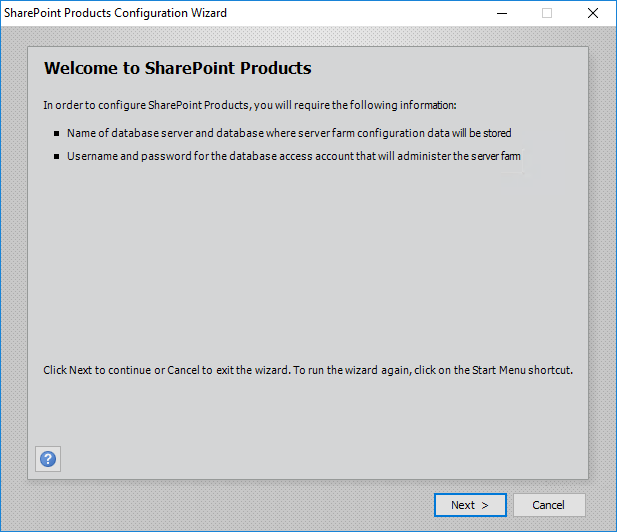
When the installer finishes, you should be prompted to run the SharePoint Products Configuration Wizard.

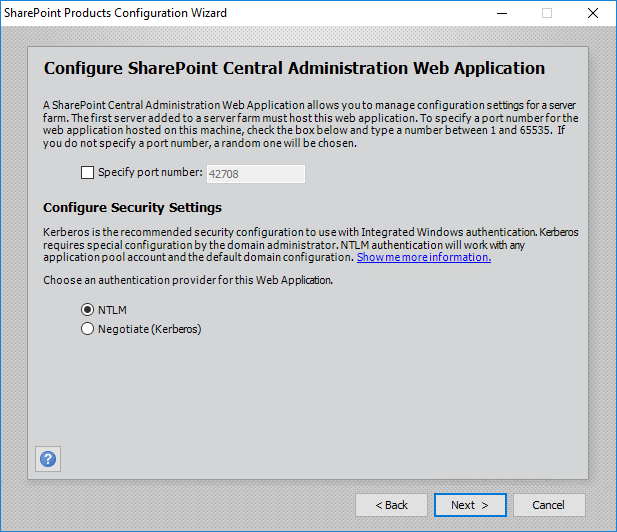
Follow the screenshots below to configure SharePoint 2016 and create a new farm:
Specify a service account with access to your SQL instance

For my lab I will install a single server farm


When the configuration wizard finishes, you will be taken to the SharePoint Central Admin Page.

Now that the farm is set up, we can configure the MIM web app and Site Collection.
Set up Web App and Site Collection
Create two AD Service Accounts named priv\MIMPool and priv\MIMInstall to use during the setup.
Also set up a DNS A record for your MIM Site Collection pointing to the SharePoint Server such as mim.priv.lab.corp.net.
Next, configure the MIMPool account as an SP Managed Service Account with the below commands:
*Note: in the below script blocks, I have marked in bold entries that you may need to change to match your environment
##Enter the credentials of the priv\MIMPool account
$ManagedServiceAccount = get-credential
## Create the SP Managed Service Account Entry
New-SPManagedAccount $ManagedServiceAccount
$dbManagedAccount = Get-SPManagedAccount -Identity $ManagedServiceAccount.username
## Create a new web application
New-SpWebApplication -Name “MIM Portal” -ApplicationPool “MIMAppPool” -ApplicationPoolAccount $dbManagedAccount -AuthenticationMethod “Kerberos” -Port 80 -URL http://mim.priv.lab.corp.net

Create a new site for MIM with the below commands:
$t = Get-SPWebTemplate -compatibilityLevel 15 -Identity “STS#1”
$w = Get-SPWebApplication http://mim.priv.lab.corp.net/
New-SPSite -Url $w.Url -Template $t -OwnerAlias priv\miminstall -CompatibilityLevel 15 -Name “MIM Portal”
$s = SpSite($w.Url)

Run ‘$s.CompatibilityLevel’ to ensure the compatibility level of the new site is “15”
Disable the SP Timer Job “Health Analysis Job (Hourly, Microsoft SharePoint Foundation Timer, All Servers)” with the commands below:
$contentService = [Microsoft.SharePoint.Administration.SPWebService]::ContentService;
$contentService.ViewStateOnServer = $false;
$contentService.Update();
Get-SPTimerJob hourly-all-sptimerservice-health-analysis-job | disable-SPTimerJob
Now that the site is set up, navigate to it and log in with the MIMInstall user credentials to verify it was created as expected. If you get an error logging in, follow one of the fixes here. When you are logged in successfully, you should see an empty site as below:


Finally add the site created to the local intranet zone on the server and restart the server:

We have now Successfully configured SharePoint for MIM. In a following blog I will continue the MIM/PAM setup process.

Pingback: Implementing Privileged Access Management on Server 2016/2019: Part 3 – Deploying the MIM/PAM Server – Admin Sean Mc
Pingback: Implementing Privileged Access Management on Server 2016/2019: Part 4 – Finalize Configuration and Test PAM Requests – Admin Sean Mc