
At Ignite 2019, Microsoft announced an ambitious new addition to the Microsoft 365 platform – Project Cortex. Cortex promised to bring the powerful AI features available in Azure to Microsoft 365, aiming to provide some really powerful automation and data insights. A year on and Microsoft have carried out private previews of Cortex and have announced at Ignite 2020 that rather than one large deployment, Project Cortex will be split into smaller components. The first of which is finally here, SharePoint Syntex.
At a high level, SharePoint Syntex allows organizations to unlock some powerful insights from their data using AI services. Tasks such as applying metadata and classifying/retaining data that previously had to be done manually (if they were done at all) can now be automated for some really cool results.
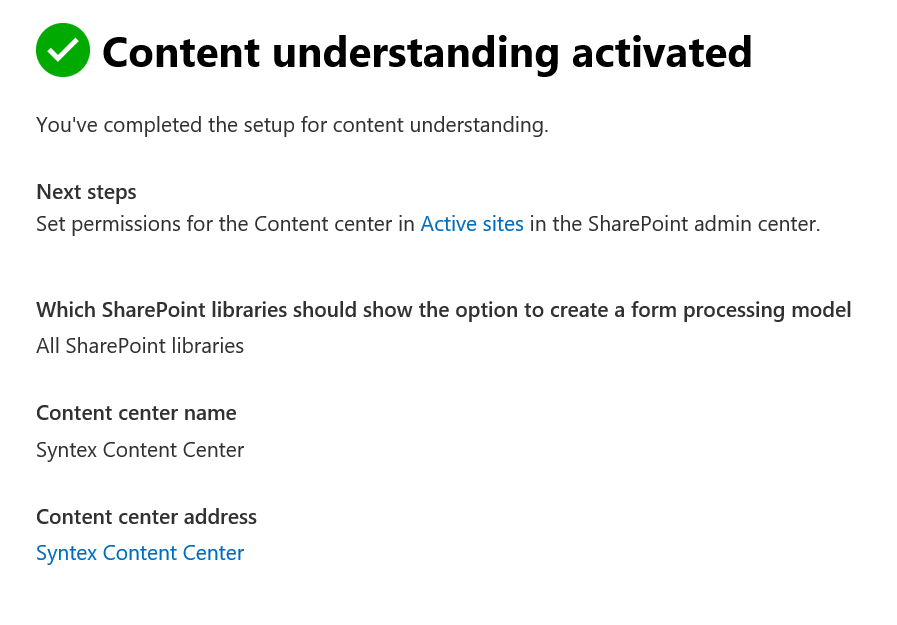
To illustrate the power of SharePoint Syntex, after the licensing has been added, navigate to Setup -> Organizational Knowledge in the Microsoft 365 Admin Center. Select Content Understanding Setup and configure the libraries you would like to enable for Form Processing. For now we’ll select ‘All SharePoint Libraries’. For Document Understanding we will name our Content Center site and finish setup by clicking Activate. Additional Content Centers can then be created from the SharePoint Online Admin Portal.


When our Content Center is built, we open it up to see some of the cool features available to us. The tasks we need to complete to begin the content understanding are:
- Create a document understanding model (Also available is a form processing model)
- Train the model with training files
- Create data extractors to specify our important information
- Apply the model to a document library
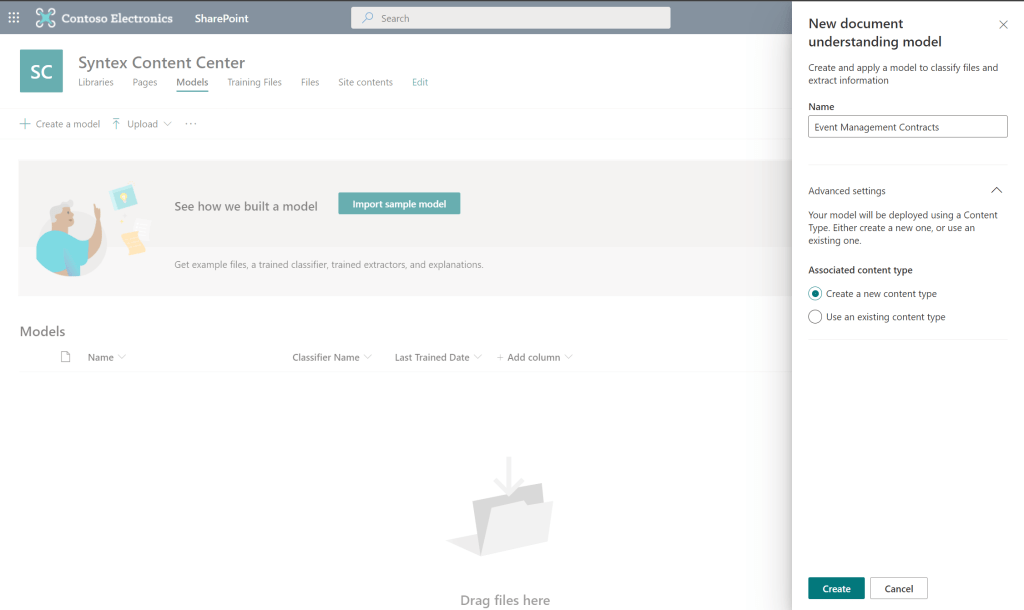
First, let’s open the Models page and create a new document understanding model. We’ll create a model to assess Event Management Contracts on one of our document libraries. We’ll also create a new Content Type as part of the model creation.
Now let’s add some example files to begin training our new document understanding model. I’ve downloaded some sample contract files for a fictional event management company as Word documents that we can use to train the model. We’ll also upload a file that does not match our classification (Document 6) so we have a negative classifier.


Now that the training files are uploaded, let’s train our classifier.

We train the classifier by manually classifying the training files we uploaded.

Once we have processed our files we can either add more (The more data provided the more accurate the model) or proceed to training the model. For now we’ll proceed.

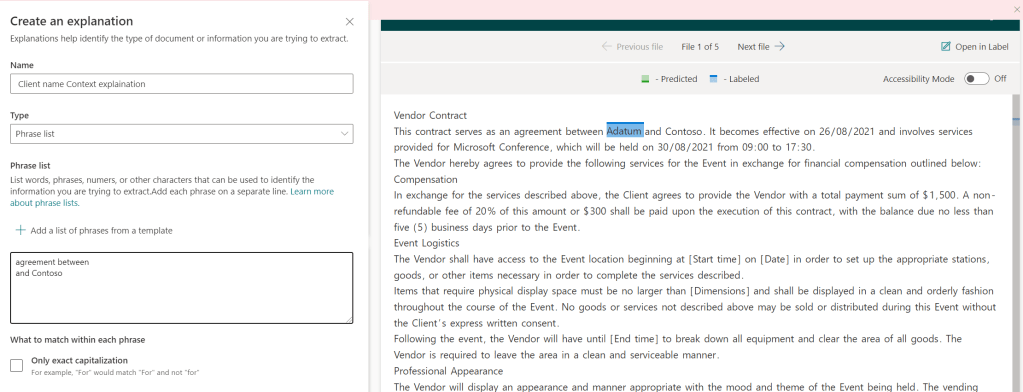
On the training page, we’ll give the model some understanding of our classification by using Explanations. Explanations provide the model with some reasoning for decisions and enhance the accuracy of predictions.


We add several explanations to our model to help it accurately predict classifications, here we’ll go with some simple currency, date and time templates as we know all event management contracts will contain all three in some format.
Finally, we test our classifier by uploading some more documents, a mixture of matching and non-matching data should be uploaded.
If our training was sufficient, we should see our content accurately predicted on the test page. If everything looks good, we can Exit Training.

Next we need to define what we extract from our documents that are classified successfully. To do this, we create entity extractors which will essentially become our Metadata for our files, extracted directly from the file itself.

For our contract example, let’s extract the following data that we expect for each contract:
- Client Name
- Contract Start Date
- Event Date
- Event Start Time
- Event Finish Time
- Total Fee
- Deposit
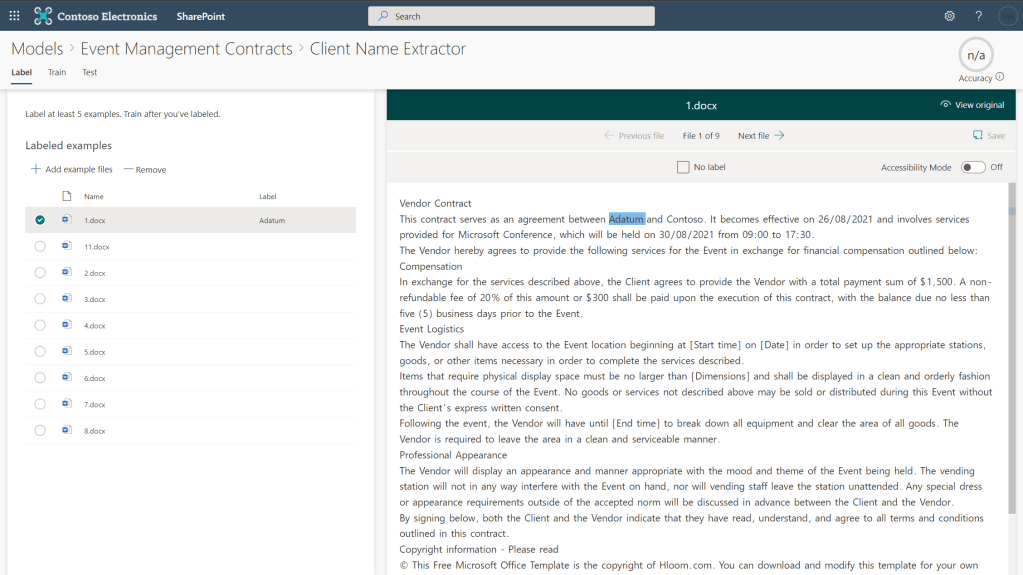
To extract this information we will create extractors for each. We create our extractors and identify the relevant piece of information in each of our training documents.
After we’ve labelled at least five examples, we can move on to training as before. Enter templates or start from a blank context to add explanations. This is quite a basic example but the more data given to the model the more accurate it will be across different data sets and document structures.

When all of our extractors are in place, we train the model once more, we will see all of the explanations we added for our extractors are also added to the model to help with identification of data.
Finally, with all the setup done, we can apply the model to our library to see it in action!
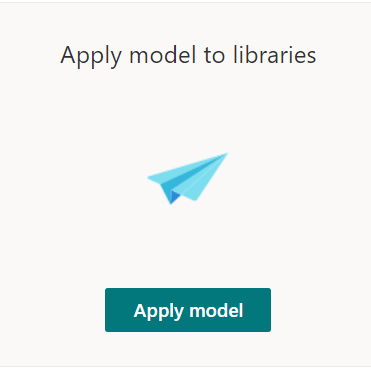
We’ll apply the model to our Global Sales site, on the Event Management Contracts library. When this is applied, a new content type will be created for our documents and a new view of the library will be created including our extractors.

Our new view is now in place so now time to test all our work and upload documents. When we first upload we will se that analysis is taking place. After a minute or two, we can refresh the page and see our data automatically assessed and our extractors pulling the valuable information of of the document!
When classification has finished, we now see all our hard work paying off and dat is automatically classified and extracted from our documents!

SharePoint Syntex when set up correctly can help save both time and money for organizations by giving insights into data automatically, cutting down on manual processing and making the document management process much more efficient.
As the first component of Project Cortex to see release, this is already a massive step for Microsoft 365 and is no doubt the first in a long line of exciting tools available in the platform.
For more information on SharePoint Syntex: https://docs.microsoft.com/en-us/microsoft-365/contentunderstanding/?view=o365-worldwide
For more on Project Cortex: https://resources.techcommunity.microsoft.com/project-cortex-microsoft-365/
Sample Contract Files for this blog post were obtained from http://www.hloom.com/
