
This post is part of the overall MS-500 Exam Study Guide. Links to each topic as they are posted can be found here.
Note: Azure Advanced Threat Protection has recently been renamed Microsoft Defender for Identity. This post will refer to it using the new name but the exam may contain references to the older name. For any topics referencing Azure ATP, read as Microsoft Defender for Identity.
In the previous post, we looked at configuring Microsoft Defender for Identity. Now that everything is up and running and we have our sensors installed, we will now look at how we monitor and manage our MDI service. MDI itself provides native functionality however it can also be expanded upon using Microsoft Cloud App Security, Azure Sentinel etc. We won’t dive into the these services in this post as there are dedicated topics for those technologies on the exam. We will also be looking at Microsoft Defender for Endpoint in a future post and there we will show integration between the two technologies and how it can provide in depth visibility into the environment.
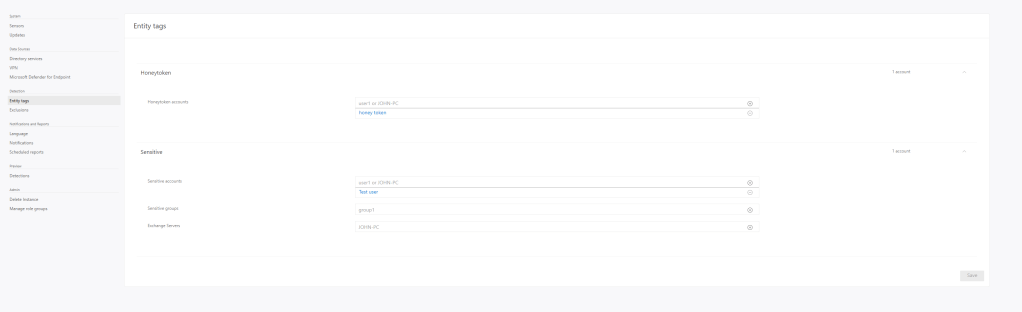
Adding Entity Tags
Entity tags in MDI allow us to mark certain objects as “Sensitive” and also nominate “Honeytoken Accounts”. A user or group marked as sensitive is treated as such and subject to more stringent analysis such as group modification monitoring. The following groups are sensitive by default:
- Administrators
- Power Users
- Account Operators
- Server Operators
- Print Operators
- Backup Operators
- Replicators
- Network Configuration Operators
- Incoming Forest Trust Builders
- Domain Admins
- Domain Controllers
- Group Policy Creator Owners
- read-only Domain Controllers
- Enterprise Read-only Domain Controllers
- Schema Admins
- Enterprise Admins
- Microsoft Exchange Servers
The following service objects are also considered sensitive by default:
- Certificate Authority Server
- DHCP Server
- DNS Server
- Microsoft Exchange Server
Honeytoken accounts on the other hand, are the opposite. They are generally accounts which are set up for the sole purpose of tempting attackers to expose themselves by breaching the account. We would give a honeytoken a tempting name such as “GlobalAdmin” to entice attackers, MDI will then alert any time this account is used, allowing us to detect a breach.
We can configure these Entity Tags from the settings option in MDI:
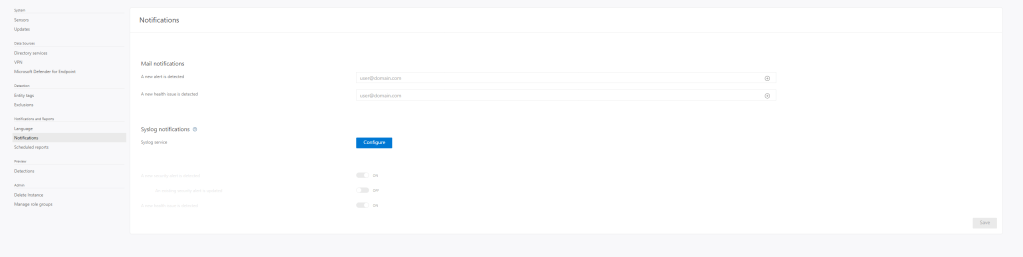
Notifications and Reports
Along with having dashboards available to us, we can configure notifications via email so that we are aware of any potential issues immediately. This can be done from the Notifications settings in the MDI portal:
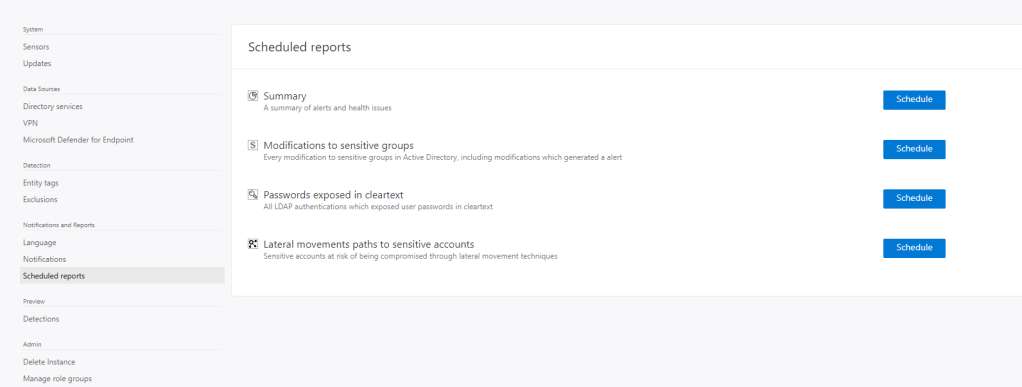
We can also schedule regular reports via the Scheduled Reports section:
Notifications and alerting can also be handled arguably better via MCAS or Azure Sentinel which we will go through in future posts.
Simulate an Attack
Here we will simulate an attack on our domain so we can go through the investigation process. There are several playbooks available from Microsoft which detail different attacks we can simulate in our environment. I recommend going through some of them to get to know how the different aspects tie together. In our lab environment, I have run two different samples:
- Honeytoken activity: Tested by attempting to log on to a domain machine using the honeytoken account
- User and IP address reconnaissance: Tested by running the simulation here
Checking the portal, we see two alerts, one for each:

If we dive into the honeytoken alert, we can see some great details about the chain of events:
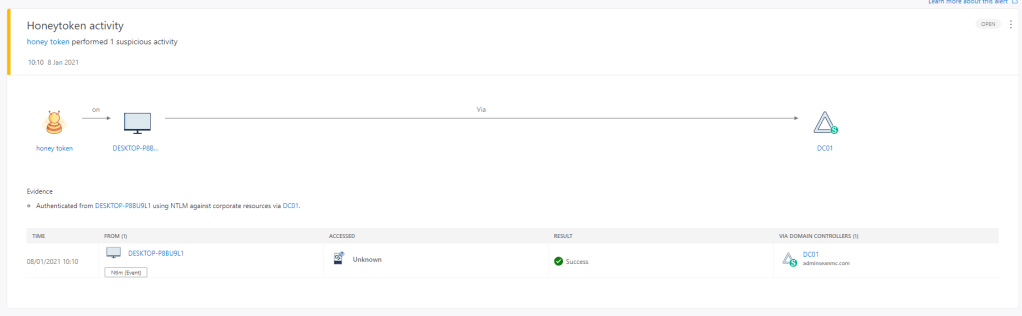
Here we can see our honey token account logged in to one of our desktops and was authenticated successfully via DC01. We can then dive into the recent activity on the desktop by clicking on it:

We can see that immediately previously, a user named “Test user” logged on to the machine. We can go deeper and deeper on tracing the attack but since this was an intentional test, there’s not much more to see on this one. We will detail MCAS in a future post but it’s worth noting that this data is surfaced in MCAS where we have more flexible alerting ad tracking:

Similarly we will look into Azure Sentinel in a future post also. In the meantime, I recommend going through the pre-created playbooks Microsoft have made available to simulate different types of attacks and see what information you can gather on each. For now we can close out our alerts using the alert options:

For some more information around MDI and testing it in your environment, check out the below links:
Microsoft Defender for Identity documentation | Microsoft Docs
Microsoft Defender for Identity reconnaissance phase security alerts | Microsoft Docs
Microsoft Defender for Identity integration with Microsoft Defender for Endpoint | Microsoft Docs

Pingback: Study Guide Series – Exam MS-500: Microsoft 365 Security Administration – Sean McAvinue