
This post is part of the overall MS-500 Exam Study Guide. Links to each topic as they are posted can be found here.
Note: Microsoft Defender ATP has recently been renamed Microsoft Defender for Endpoint. This post will refer to it using the new name but the exam may contain references to the older name. For any topics referencing Microsoft Defender ATP, read as Microsoft Defender for Endpoint.
In the previous post we looked at some of the aspects of planning a Microsoft Defender for Endpoint solution for our environment. Here we will step through the configuration and management aspects of the solution.
Configure the Security Center
Once we have our Defender for Endpoint licenses present in our tenancy, we can navigate to https://securitycenter.windows.com to begin our configuration. Here we will find the setup wizard for the Defender for Endpoint Security Center.
Begin the Wizard to set up Permissions:

We choose our Data Storage location, the retention period we want on our data (default is the max of 180 days), our organization size and if we would like to enable preview features. Data storage location and organization size can’t be changed once our instance is configured.

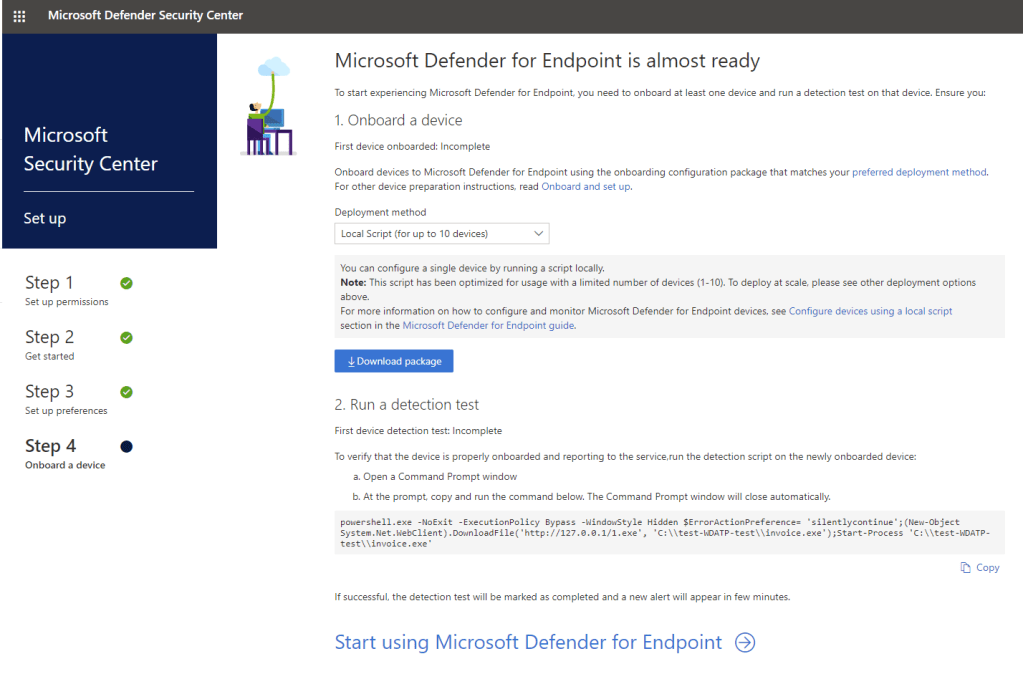
Once the initial configuration has finished, we will see the device onboarding options screen. We can use this to onboard our first device. We can skip this for now by clicking “Start using Microsoft Defender for Endpoint” and onboard later.
Now that we are in the Security Center, open up the settings page (cog icon in the left menu) and we can start configuring our service.
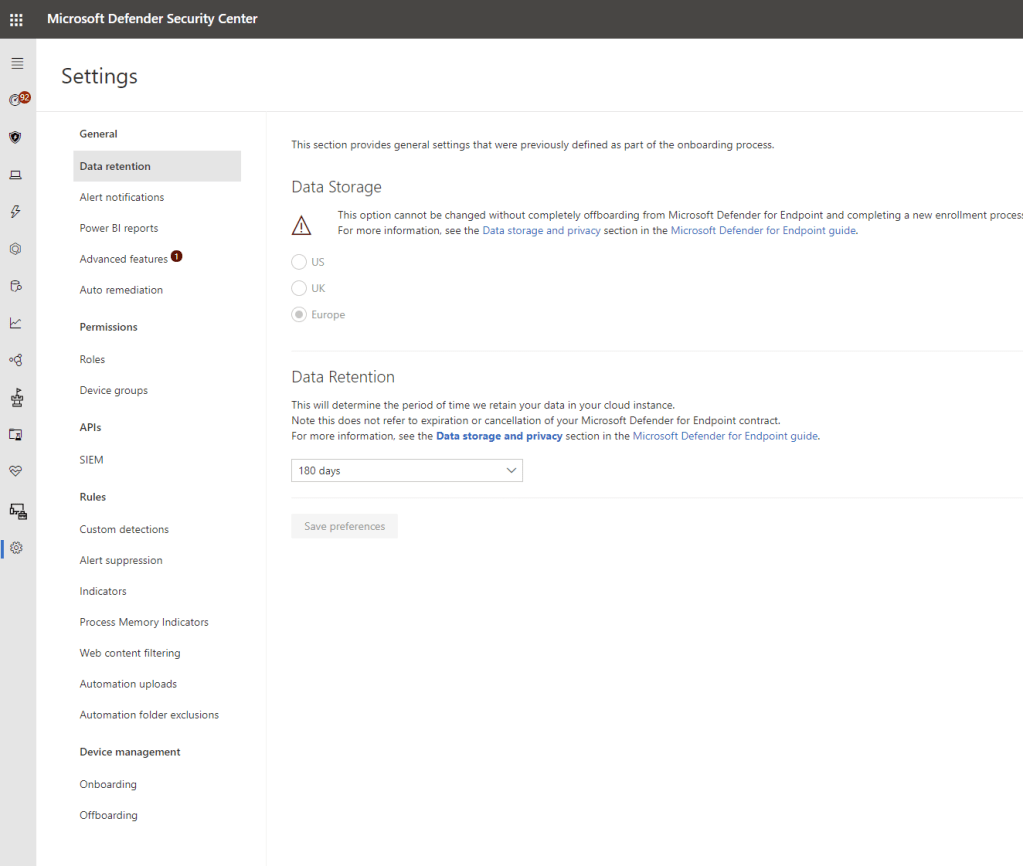
Here we have a lot of options to choose from, below is a summary of the configuration pages available here:
- Data Retention – Update the Data retention period
- Alert Notifications – Create alerting rules to notify on specific alert severities or devices
- Power BI Reports – Integrate with Power BI (This connector is depreciated now and should follow this process going forward)
- Advanced Features – Enable / Disable advanced features such as MCAS integration, Secure Score integration, Web content filtering, Intune Integration, turn on Preview Features etc.
- Auto Remediation – Configure the levels for auto-remediation of detected issues
- Roles – Configure RBAC access for the Security Center
- Device Groups – Configure logical groups to manage devices. Can be used with Reporting, auto-remediation and RBAC
- SIEM – Enable Microsoft Defender for Endpoint SIEM integration. This can be used to integrate with various SIEM solutions such as Azure Sentinel
- Custom Detections – Manage custom detection rules
- Alert Suppression – Manage suppressed alerts
- Indicators – Configure specific file, IP, URL, Certificate indicators to allow, block and alert upon
- Process Memory Indicators – Manage Process Memory Indicators that have been added in Security Center
- Web Content Filtering – Apply Web Content Filtering policies to device groups
- Automation Uploads – Configure file extension to be submitted for content analysis
- Automation Folder Exclusions – Exclude folders from Automation Uploads
- Onboarding – Select an onboarding option and follow instructions to onboard devices
- Offboarding – Select an onboarding option and follow instructions to onboard devices
There are a ton of options available to us, particularly via the Advanced Options . Each of these options is detailed further in the Microsoft Documentation but for the exam you should be aware of each option and the impact associated.
Onboard a Device Using Local Script
To Onboard a device to Defender for Endpoint, navigate to the Onboarding page and select the onboarding method. We detailed the different methods in the previous post. For our test we will use a local script to onboard a standalone device. Click “download package” and copy the files to the target machine.

Extract the script and run as administrator on your target machine.

At the prompt, select yes (Y) to begin the onboarding.
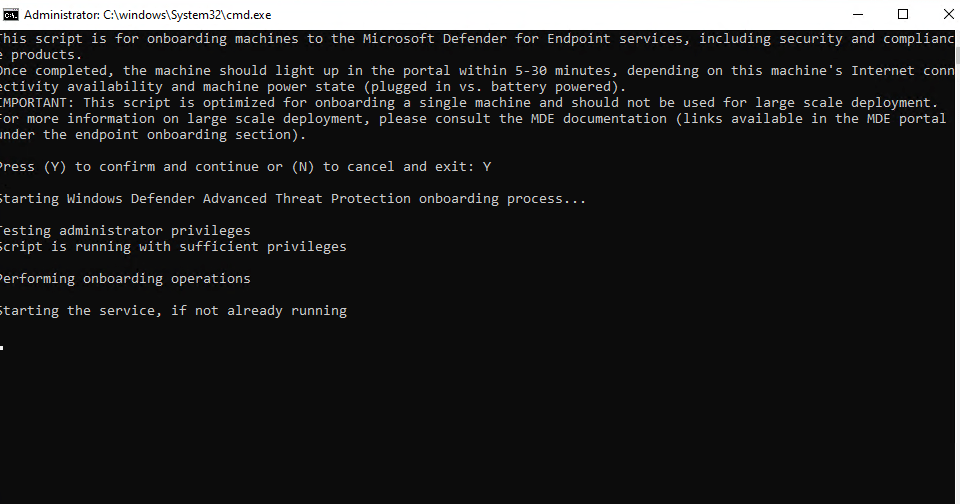
Press any key to continue once the script finishes and once it closes, our machine will appear as onboarded in the Security Center after a few minutes.

Summary
We’ve gone through initial configuration and machine onboarding in this post. In the next post we will look at monitoring and managing Defender for Endpoint. I also recommend getting familiar with each of the deployment methods if possible. For more detail, check out the below links.
Set up Microsoft Defender ATP deployment – Windows security | Microsoft Docs
Onboard devices to the Microsoft Defender ATP service – Windows security | Microsoft Docs
Onboarding tools and methods for Windows 10 devices – Windows security | Microsoft Docs
Onboarding tools and methods for Windows 10 devices – Windows security | Microsoft Docs
Onboard Windows 10 devices using Configuration Manager – Windows security | Microsoft Docs
Onboard Windows 10 devices using Mobile Device Management tools – Windows security | Microsoft Docs
Onboard Windows 10 devices using a local script – Windows security | Microsoft Docs

Pingback: Study Guide Series – Exam MS-500: Microsoft 365 Security Administration – Sean McAvinue
Pingback: Study Guide Series: Exam MS-500 – Manage and Monitor Microsoft Defender ATP – Sean McAvinue