
This post is part of the overall MS-500 Exam Study Guide. Links to each topic as they are posted can be found here.
Note: Office 365 ATP has recently been renamed Microsoft Defender for Office 365. This post will refer to it using the new name but the exam may contain references to the older name. For any topics referencing Office 365 ATP, read as Microsoft Defender for Office 365.
Configure Office 365 ATP
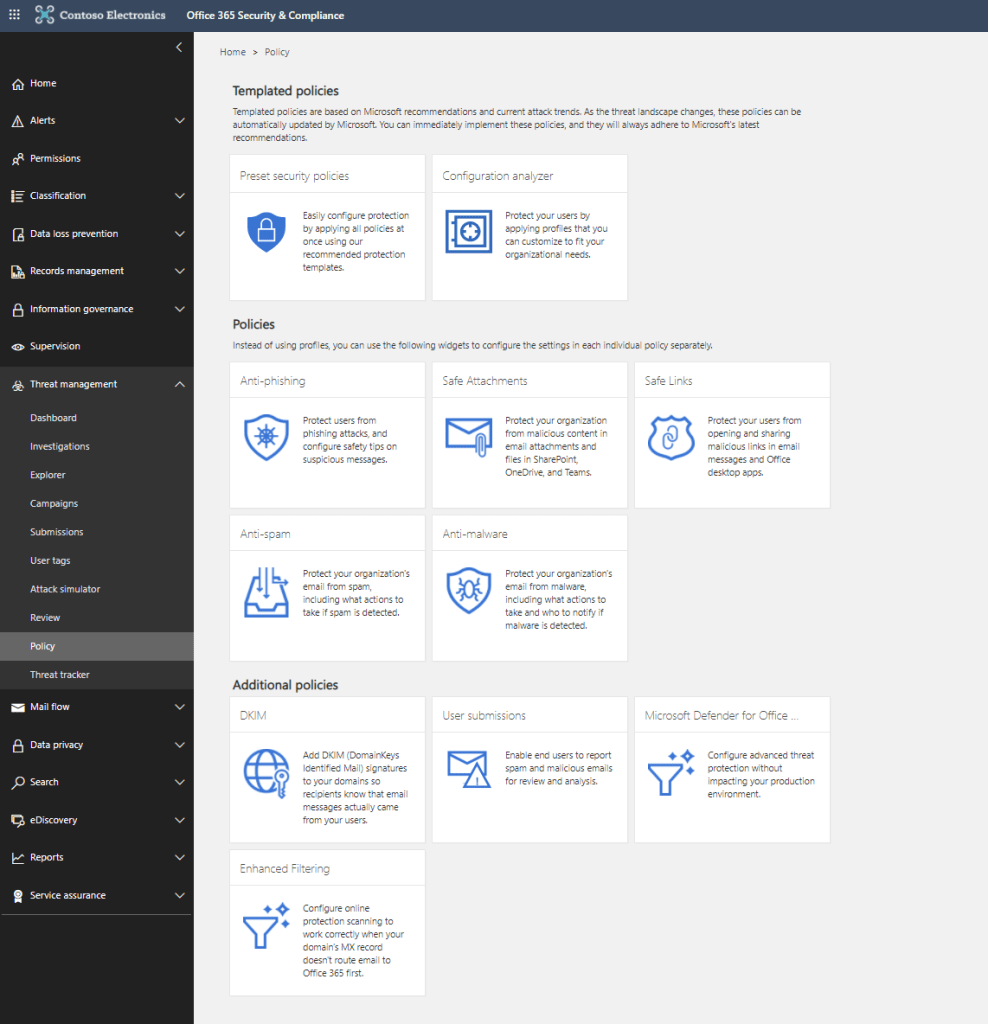
Microsoft Defender for Office 365 provides a wide range of protections for our Office 365 users. As part of out Defender for Office 365 configuration, we will configure the following policies:
- Anti-phishing – Anti Phishing policies allow us to configure protection from common phishing attacks, we can also provide different levels of phishing protection to particular users or domains, this allows us to protect against spear phishing where a particular user or group of users is heavily targeted
- Safe Attachments – Safe Attachment policies allow us to protect our users by scanning the files that they receive for malicious content, before they get access to them
- Safe Links – Like Safe Attachments, Safe Links policies allow us to scan hyperlinks that our users receive for malicious content and mitigate threats before our users open the link
- Anti-spam – Anti-spam policies allow us to define how spam/phishing mails are treated in our environment
- Anti-malware – Anti-malware policies allow us to define how malware is treated when it is detected in our environment
There are also two aspects of Defender for Office 365 which help admins to configure Defender for Office 365 out of the box, I’ve detailed both of these previously at the below links:
Office 365 ATP Preset Security Policies – Sean McAvinue
Microsoft Defender for Office 365 Configuration Analyzer – Sean McAvinue
While not strictly a component of Defender for Office 365, DomainKeys Identified Mail (DKIM) is also available through the same configuration page, I’ve also covered this previously in the below link:
Protecting Exchange Online Mail With DKIM – Sean McAvinue
All configuration of Defender for Office 365 can be done from either the older Security and Compliance Center or the new Microsoft 365 Security Center. We’ll use the new page in this post but keep in mind it can be done from either with a slightly different user interface.
Security & Compliance Center:
Security Center:
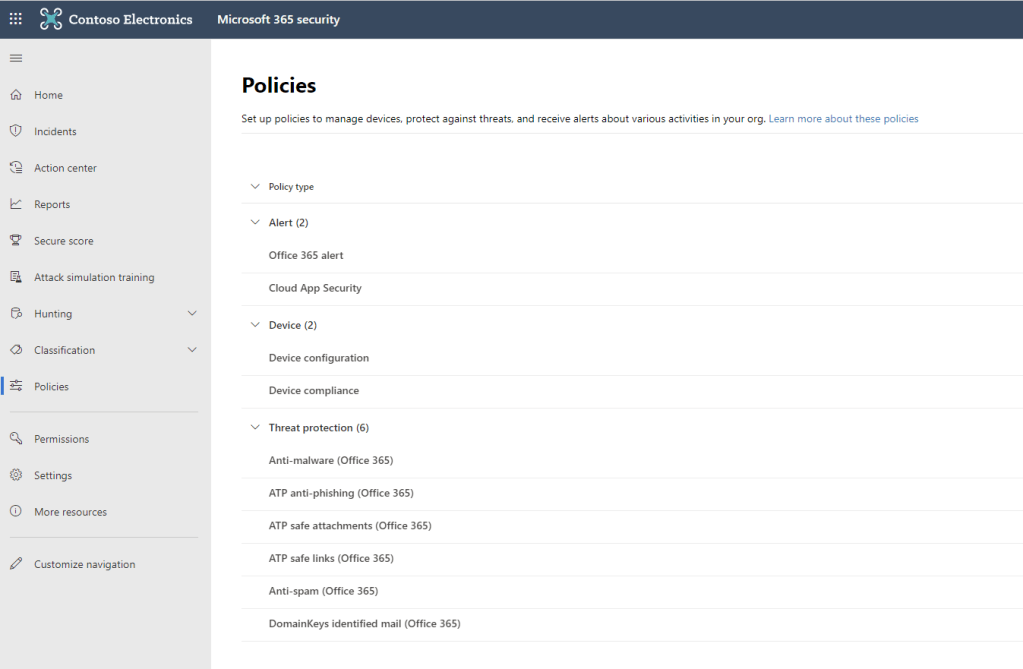
Anti-phishing Policies
To configure your anti-phishing policy, open up the policies section of the Security Center and select “ATP anti-phishing”. When configuring anti-phishing policies, we can configure our default policy to target all users and also create custom policies which will apply to a subset of users/domains. This is useful when we have groups with different licensing or risk levels.
We can click the “Default Policy” option to view or edit our default policy, by default there is not a lot configured here:

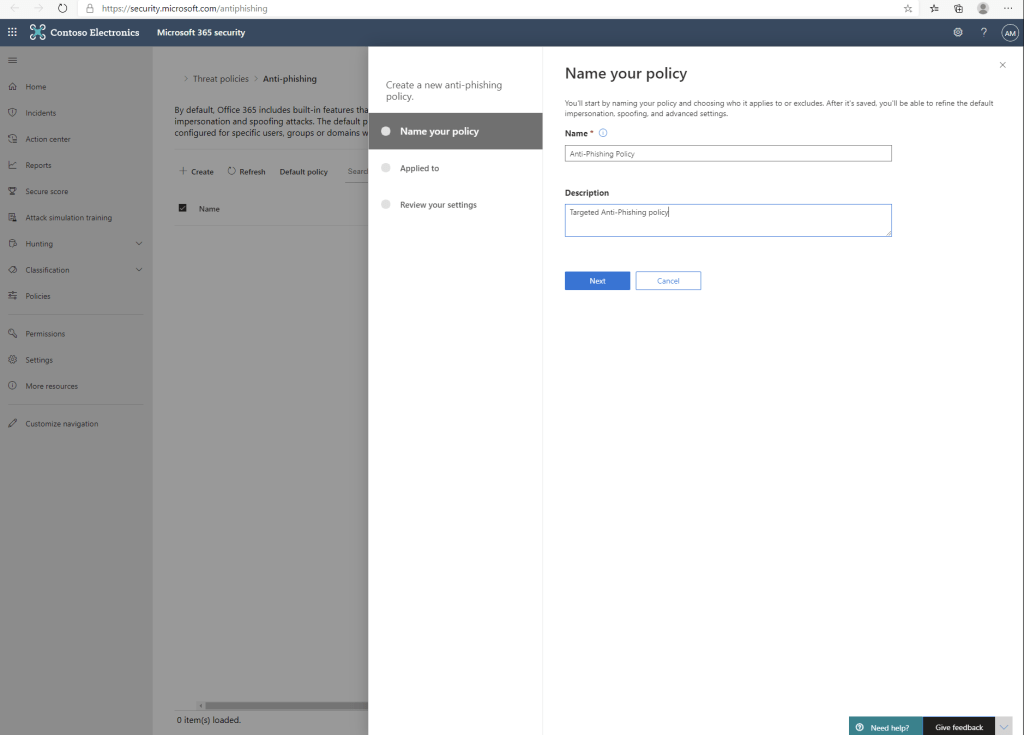
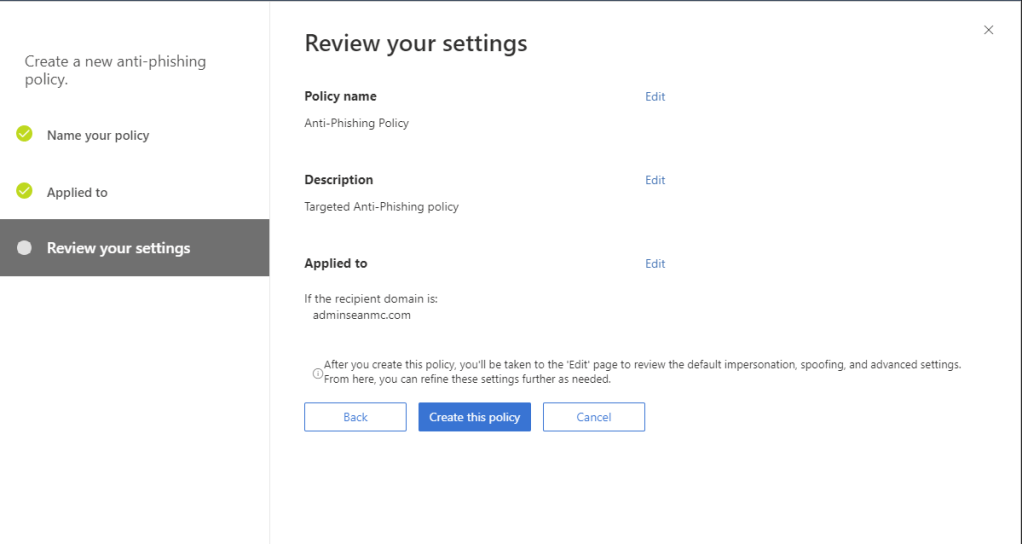
Click on “Create” to create a new custom policy and fill in the name and description of the policy to get started:
Next, choose the scope for the policy, below I’ve selected all users on the adminseanmc.com domain. Several conditions can be defined here to target the right group of users.
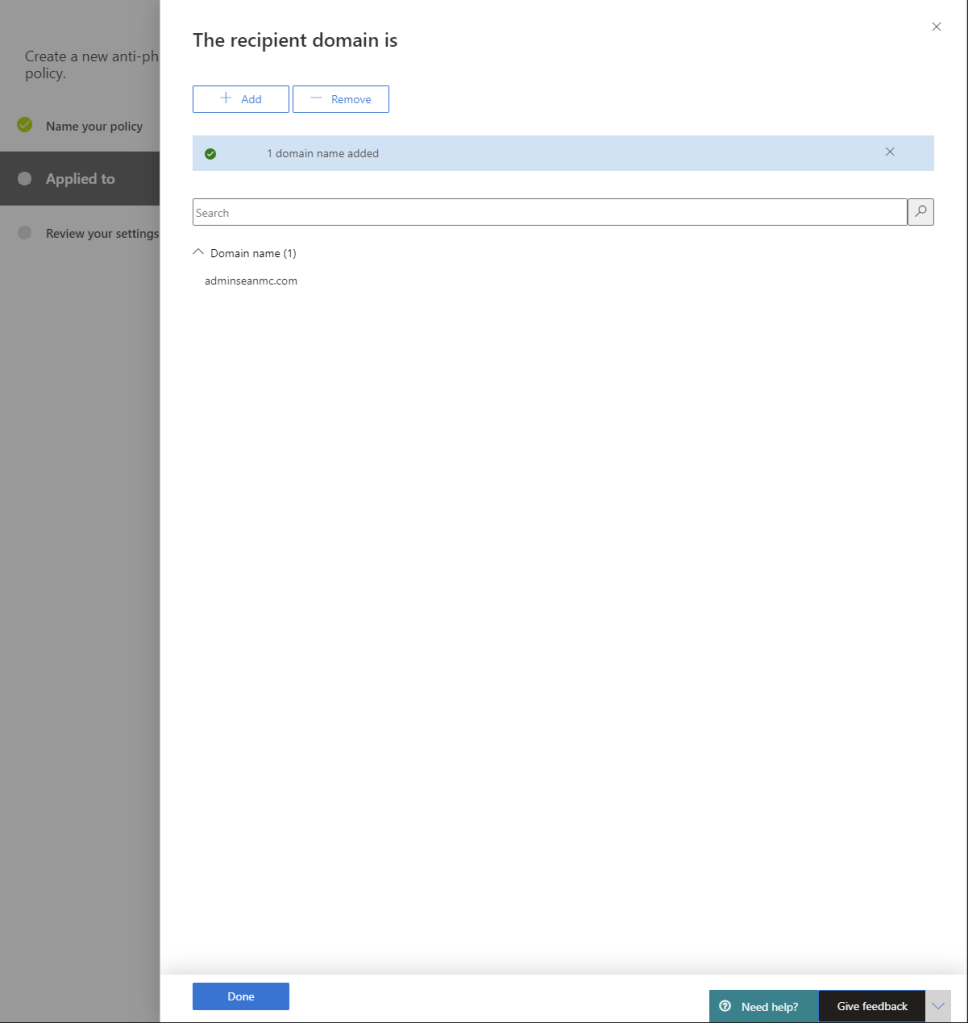
Next, click “Create this policy” to start customizing the configuration.
Click on the newly created policy to view the configuration. We can click the edit option on any of the sections to customize.
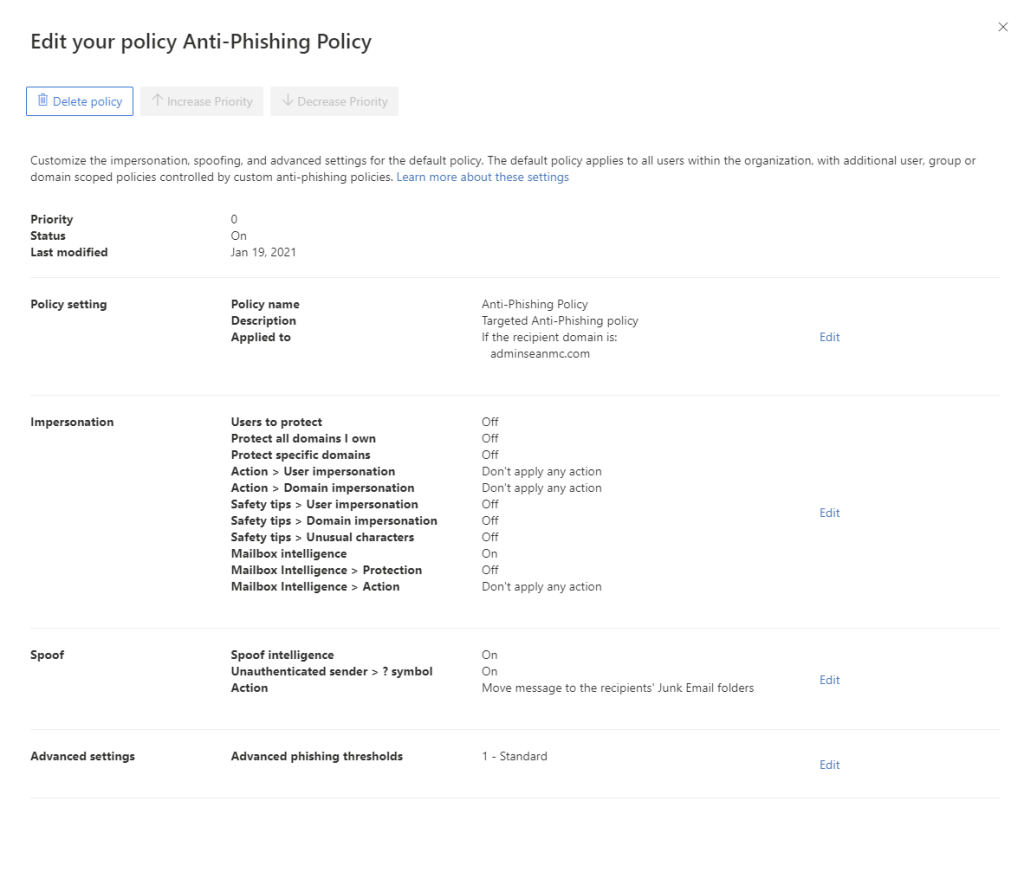
The settings we can customize in an Anti Phishing Policy are:
- Users to protect – Add internal or external users to protect against impersonation. For example, if we specify “Sean@adminseanmc.com” here and subsequently receive a mail from “Sean@admin-seanmc.com” (using an impersonated domain made to look similar to ours), this domain would otherwise be seen as a legitimate domain. Since we have specified the address in our impersonation protection, this mail will be subject to our user impersonation action below
- Protect all domains I own – Adds all accepted domains to impersonation protection, as with the users to protect, Defender for Office 365 will detect potential domain impersonation for these domains
- Protect specific domains – Add external domains to protect, this is usually partner companies and suppliers etc.
- Action > User impersonation – Define the action to be taken when user impersonation is detected
- Action > Domain impersonation – Define the action to be taken when domain impersonation is detected
- Safety Tips > User impersonation – Users will receive a safety tip informing them that the address looks similar to one of the protected users and may be impersonated
- Safety Tips > Domain impersonation – Users will receive a safety tip informing them that the domain looks similar to one of the protected domains and may be impersonated
- Safety Tips > Unusual characters – Users will receive a safety tip informing them that the address contains suspicious or unusual characters
- Mailbox intelligence – Turns on mailbox intelligence. Mailbox intelligence leverages AI to determine a users email patterns and inform decisions on potential spoof emails
- Mailbox intelligence > Protection – Uses mailbox intelligence to create a “sender map” for users based on their mailbox activity, this is used to inform the decisions made on impersonation protection
- Mailbox intelligence > Action – Define the action to take when impersonation is detected by mailbox intelligence
- Advanced phishing thresholds – Set the threshold for anti-phishing detections from the below list:
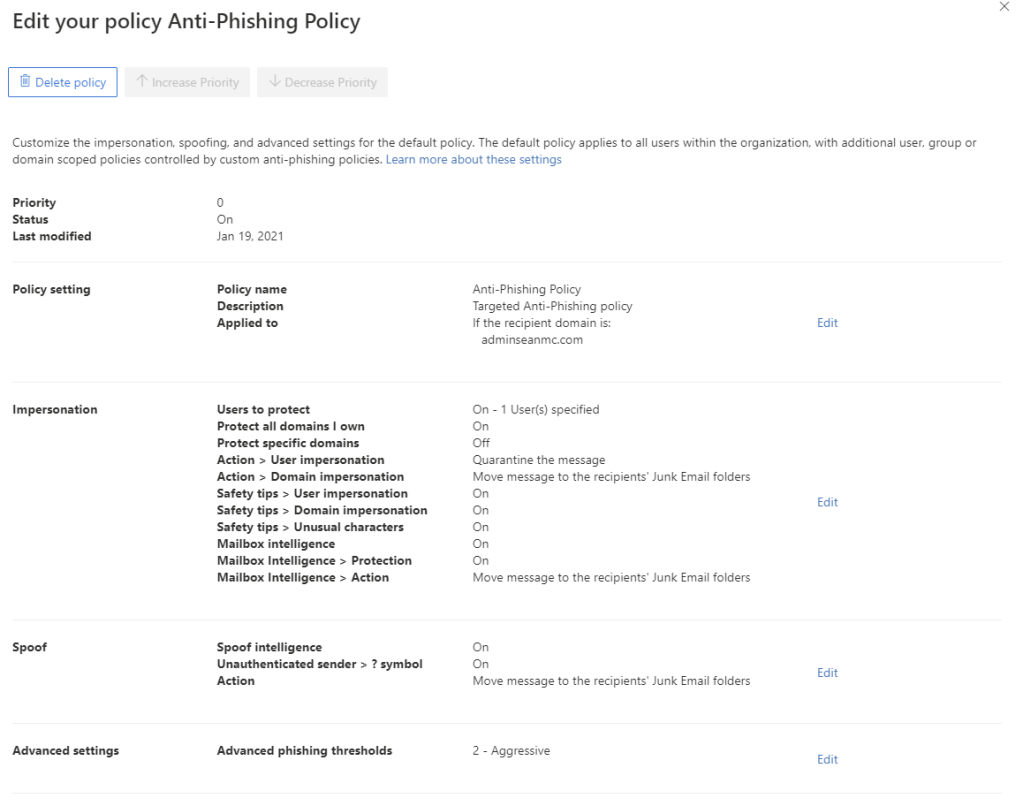
- 1 – Standard: This is the default value. The severity of the action that’s taken on the message depends on the degree of confidence that the message is phishing (low, medium, high, or very high confidence). For example, messages that are identified as phishing with a very high degree of confidence have the most severe actions applied, while messages that are identified as phishing with a low degree of confidence have less severe actions applied.
- 2 – Aggressive: Messages that are identified as phishing with a high degree of confidence are treated as if they were identified with a very high degree of confidence.
- 3 – More aggressive: Messages that are identified as phishing with a medium or high degree of confidence are treated as if they were identified with a very high degree of confidence.
- 4 – Most aggressive: Messages that are identified as phishing with a low, medium, or high degree of confidence are treated as if they were identified with a very high degree of confidence.
The actions available for detected impersonation are:
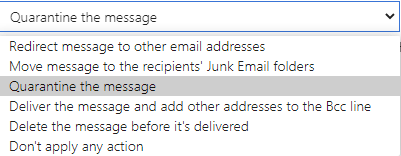
Once finished editing we can close out of the policy to save.
Safe Attachments Policies
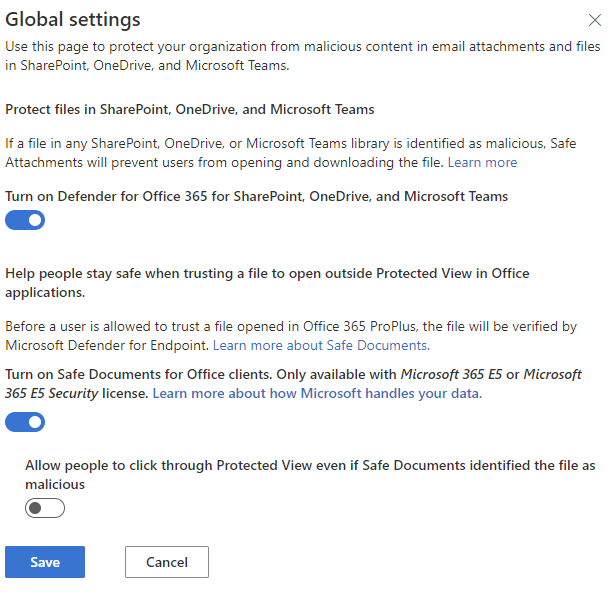
To configure Safe Attachments Policies, navigate back to the Policies page and select the “ATP safe attachments” option. Before configuring a policy, open the “Global settings” option to configure the service settings below:
- Protect files in SharePoint, OneDrive and Microsoft Teams – This option enables the scanning of files in SharePoint, OneDrive and Teams by Safe Attachments, blocking user access to malicious files
- Turn on Safe Documents for Office clients – This option enables the new “Safe Documents” feature in Office clients
- Allow people to click through Protected View even if Safe Documents identified the file as malicious – This option allows users to override the Safe Documents feature even if a file is identified as malicious, this is good for initial testing and rollout but I don’t recommend it in production
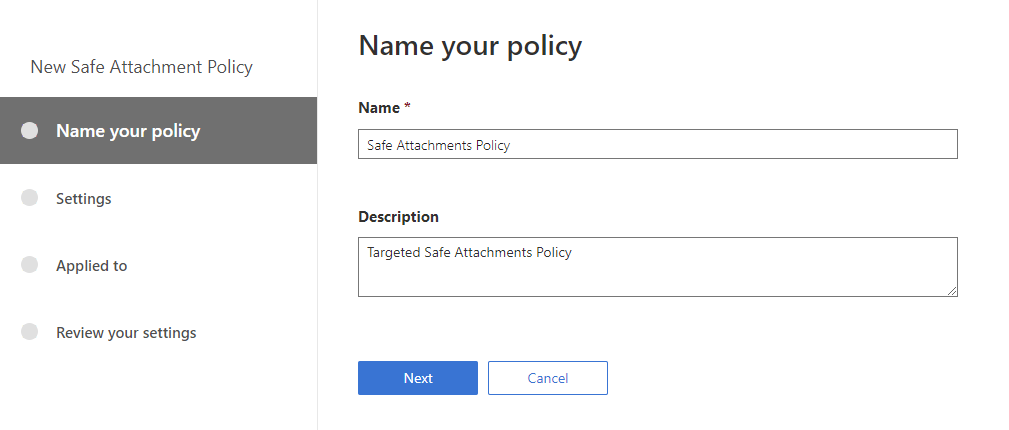
With the global settings configured, click the “Create” button to start creating our Safe Attachments policy. Give the policy a name and description to get started.
When configuring our safe attachments policy, we have the following options to consider:
- Safe attachments unknown malware response – This option defines the action to take if unknown malware is detected in an attachment / file. The options available are:
- Off – Does not scan attachments for malware
- Monitor – Monitors attachments for malware and reports detections but takes no action
- Block – Blocks the email and attachments with detected malware
- Replace – Replaces the malicious attachment with a placeholder file explaining that the attachment has been removed as it was detected as malicious
- Dynamic Delivery – Delivers the email without any attachments initially, once scanning is complete, if the attachment is deemed safe, it is reattached to the mail
- Redirect attachment on detection – Specify an address to forward malicious attachments to when they are detected
- Apply the above selection is malware scanning for attachments times out or error occurs – Define if the policy should be applied if an attachment cannot be scanned

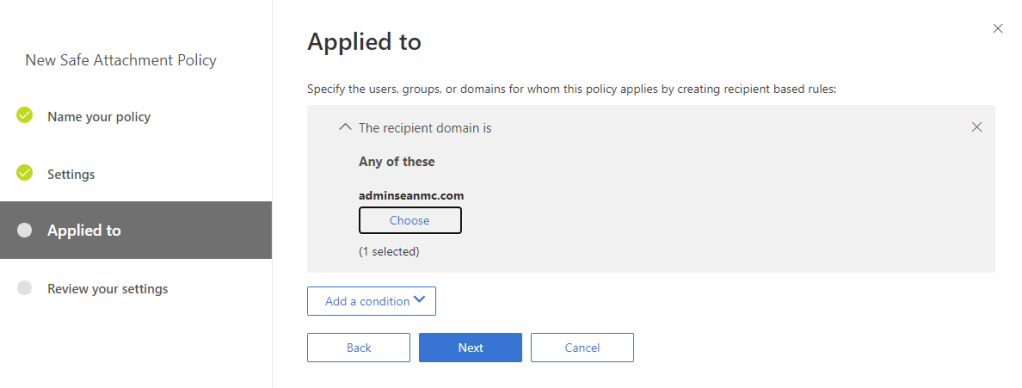
Once the settings are configured, select the scope for the policy by including/excluding users/domains/groups.
Finally, review the settings and create the policy by clicking “Finish”.

Safe Links Policies
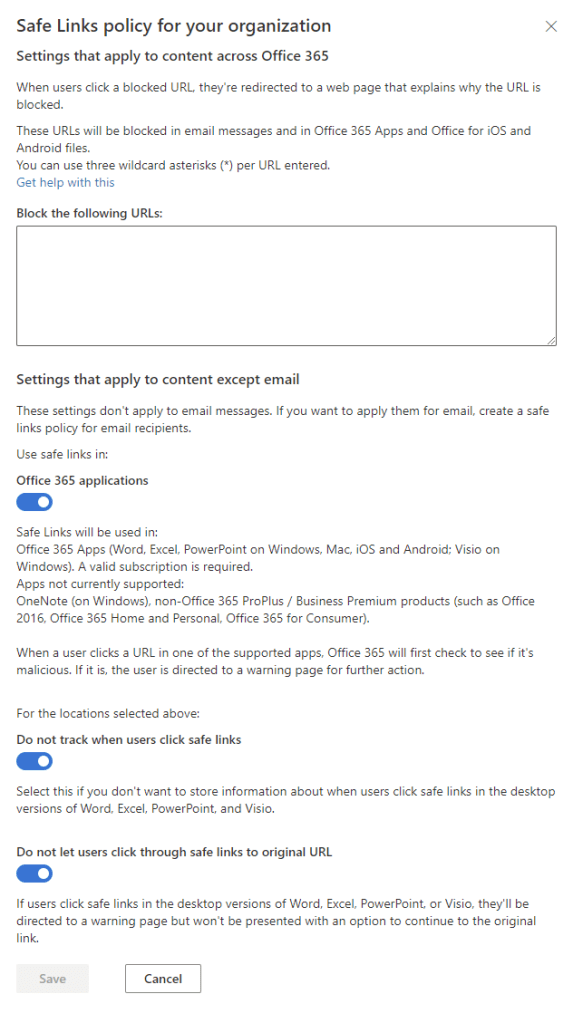
To create a safe links policy, once again navigate back to the policies page and open up the “ATP safe links” page. Similar to safe attachments, open up the “Global Settings” option to configure the service settings. Here we can configure the following:
- Block the following URLs – Add URLs to always block
- Settings that apply to content except email – This settings apply to Word, Excel and PowerPoint on end user devices and Visio on Windows only
- Use safe links in Office 365 applications – Define is Safe Links should be used in Office apps
- Do not track when users click safe links – Define if link clicks within Office apps are tracked
- Do not let users click through safe links to original URL – Define if users can bypass safe links and navigate to the URL even if it is detected as malicious
Once the service settings are configured, click “Create” to create a safe links policy and give it a name and description.

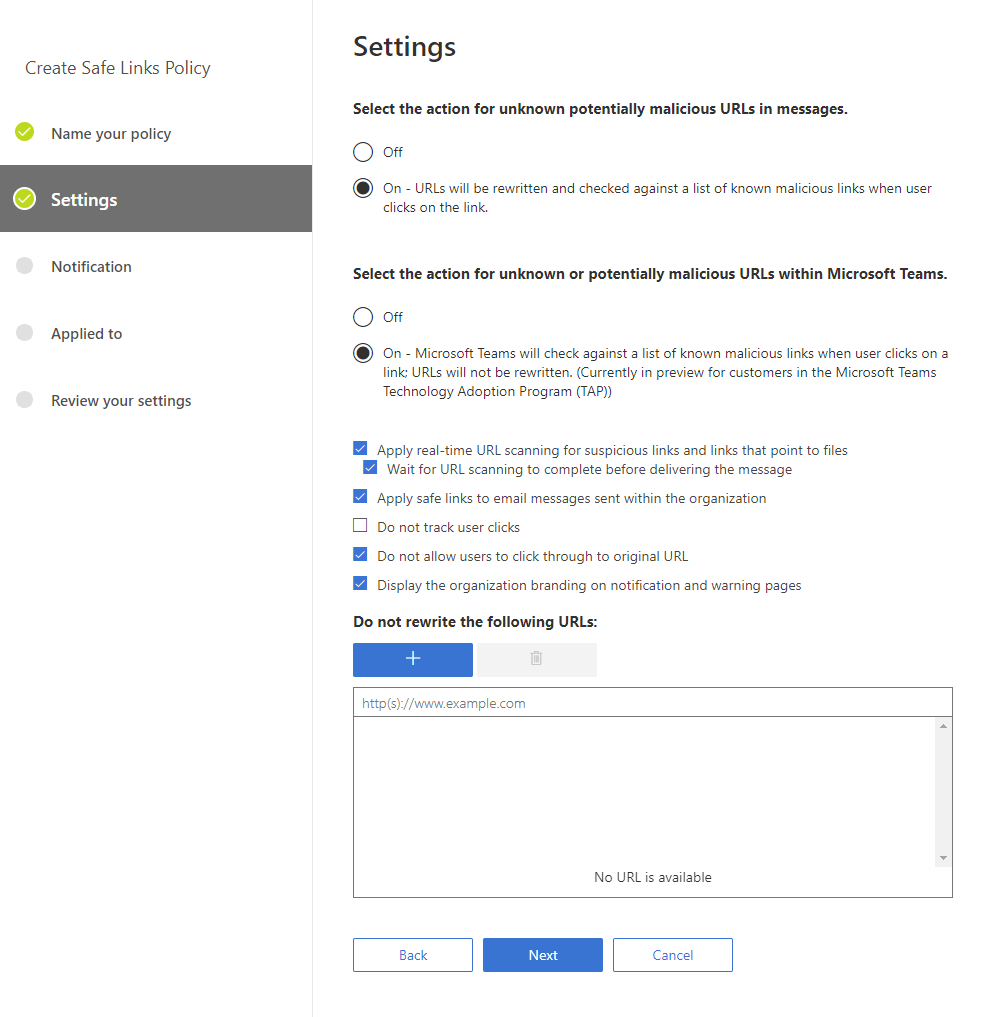
On the settings page, we have the following options to configure:
- Select the action for unknown potentially malicious URLs in messages – Enable or disable URL rewrite for unknown URLs in messages
- Select the action for unknown or potentially malicious URLs within Microsoft Teams – Enable or disable URL scanning in Teams
- Apply real-time URL scanning for suspicious links and links that point to files – Enable real-time scanning of links sent in messages that point to files (using safe attachments)
- Wait for URL scanning to complete before delivering the message – Defer delivering the message until scanning is complete
- Apply safe links to email messages sent within the organization – Enable / Disable safe links for internal emails
- Do not track user clicks – Enable / Disable tracking of safe link clicks by users
- Do not allow users to click through to original URL – Block users from bypassing safe links when a link is marked as malicious
- Display the organization branding on notification and warning pages – Display the organization branding on the warning pages
- Do not rewrite the following URLs – Enter a list of URLs to exclude from safe links rewrite
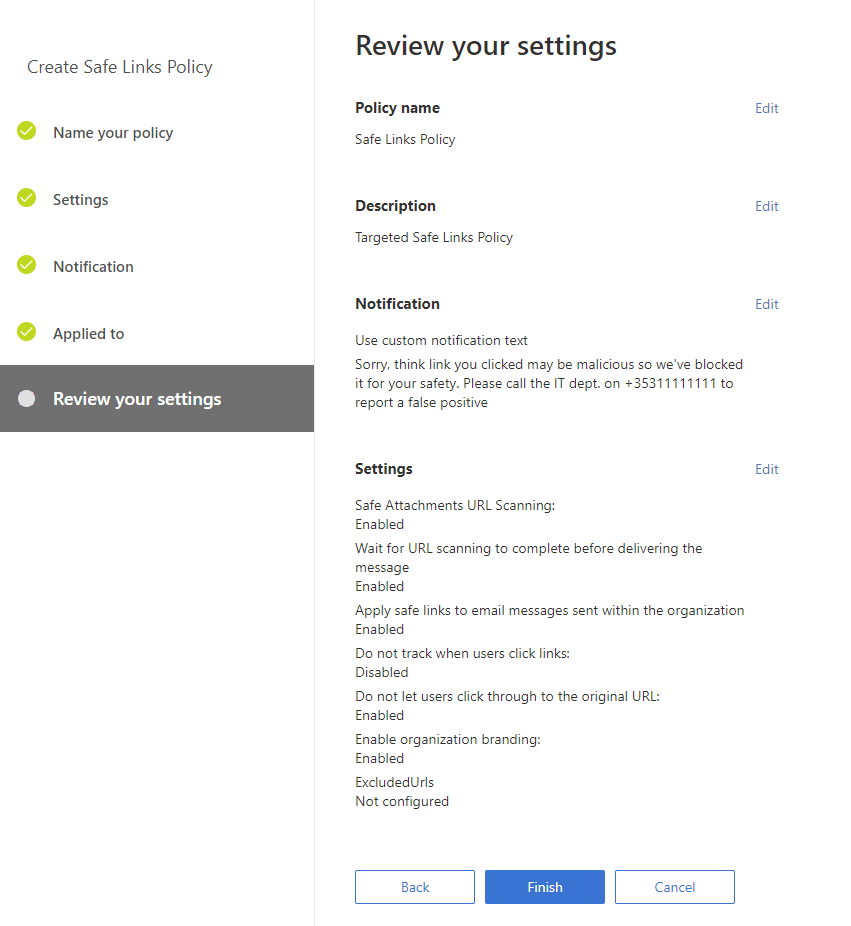
On the next page we can configure a custom notification text to inform users or accept the default Microsoft text.

Next, define the scope for the policy as we did with the previous policies.

Finally Review the settings and click “Finish” to complete the policy setup.
Anti-spam Policies
To configure Anti-spam policies, once again we navigate back to the “Policies” page and this time open up “Anti-spam”.
Within Anti-spam we have four default policies:
- Default Spam Filter Policy – This policy contains the default settings for our spam protection, we’ll go through each option when we create a custom policy
- Connection Filter Policy – This policy deals with whitelisting and blacklisting IP lists
- Outbound Spam Policy – This policy controls outbound spam to ensure our internal users or systems are not spamming outbound
- Spoof Intelligence Policy – Review detected spoof addresses and block or allow the senders
In addition to modifying these default policies, we can also create custom spam filter and outbound spam policies. To create a custom spam filter policy, select “Create a policy” at the top of the page to open up the new spam filter policy page.
Anti Spam Policy
The following options are available to us to configure our spam filter policy:
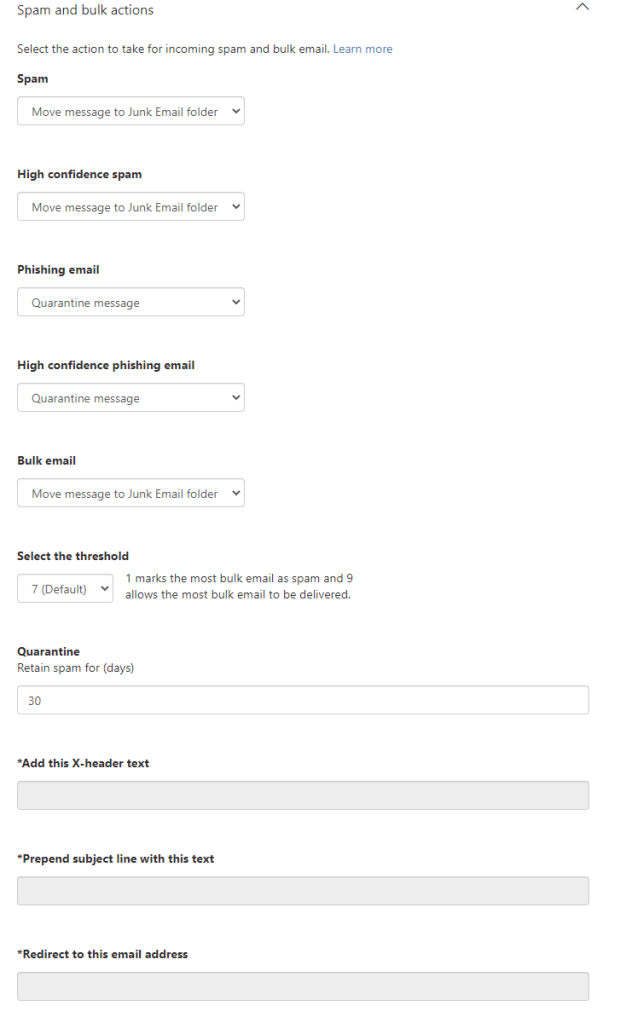
Spam and Bulk Actions
- Spam – Select the action to take when spam is detected
- High Confidence Spam – Select the option to take when high-confidence spam is detected
- Phishing Email – Select the option to take when a phishing email is detected
- High Confidence Phishing Email – Select the option to take when a high confidence phishing email is detected
- Bulk Email – Select the action to take when bulk email is detected
- Select the threshold – Set the threshold for bulk email detections, 1 being the most strict and 9 being the most relaxed
- Quarantine – How long spam is held in quarantine before it is deleted
- Add this X-header text – If the action to “Add X-header” is selected, define the contents of the header here
- Prepend subject line with this text – If the action to “prepend the subject line with text” is select, define the text here
- Redirect to this email address – If the option to redirect spam mails is selected, define the target address here
- Safety Tips – Enable safety tips for spam mails
- Zero Hour Auto Purge (ZAP) – ZAP retroactively removes spam and phishing mails from mailboxes if it is discovered after delivery
- Spam ZAP – Enable ZAP for spam mails
- Phish ZAP – Enable ZAP for phishing mails

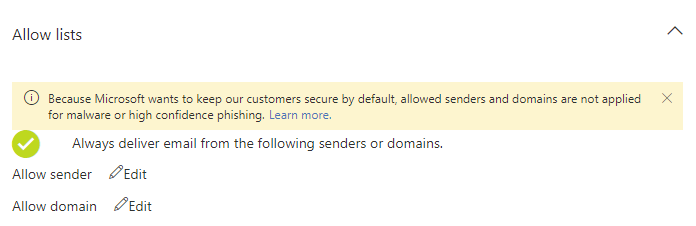
Allow lists
- Allowed sender – Whitelist a specific sender
- Allowed domain – Whitelist a specific domain
Note: I don’t ever recommend using whitelisted senders / domains. Allowed senders and domains are not applied for malware or high confidence phishing
Block lists
- Block sender – Blacklist a specific sender
- Block domain – Blacklist a specific domain

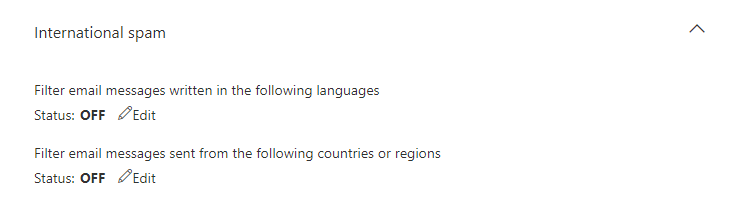
International Spam
- Filter email messages written in the following languages – Block mails in specific languages
- Filter email messages sent from the following countries or regions – Block mails from specific countries / regions
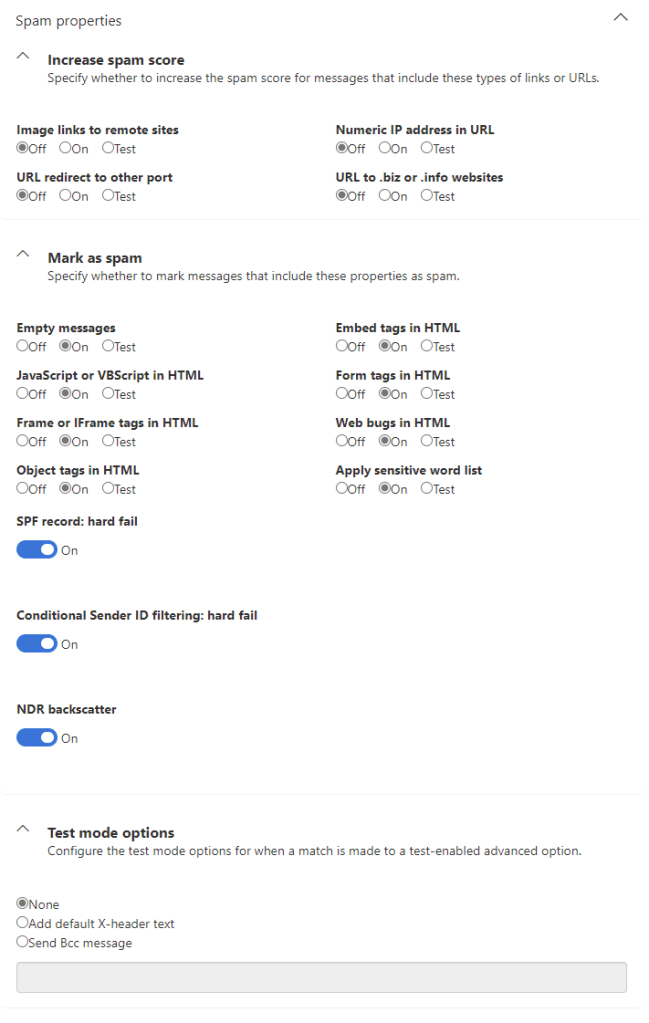
Spam Properties
- Increase spam score – Select which options affect the spam score of a mail
- Mark as spam – select which criteria automatically marks a message as spam
- Test mode options – Configure an action for an option in the above settings which is set to “Test”
When the settings of the policy are configured, set the scope of the policy and click save to create it.
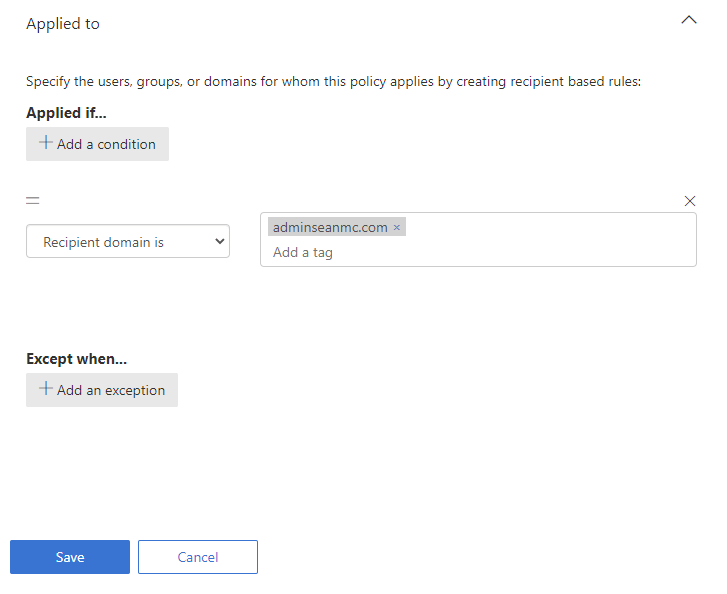
Outbound Spam Policy
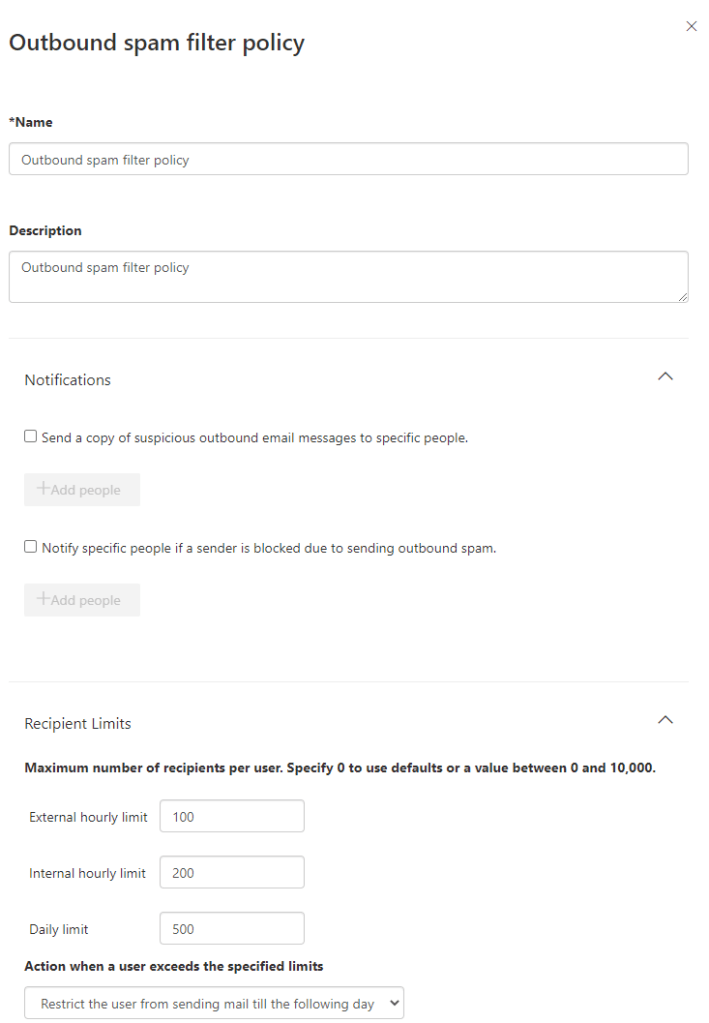
To create a custom outbound spam policy, select the “Create an outbound policy” option at the top of the page. After giving the policy a name and description, we can configure the following options:
- Send a copy of suspicious outbound email messages to specific people – Copy specific addresses on outbound mail detected as potential spam
- Notify specific people if a sender is blocked due to sending outbound spam – Notify specific addresses on outbound mail detected as potential spam
- External hourly limit – Define the maximum mails a single user can send externally per hour
- Internal hourly limit- Define the maximum mails a single user can send internally per hour
- Daily limit Action when a user exceeds the specified limits – Define the action to take when a user hits the limit specified
- Automatic Forwarding – Define if automatic forwarding via mailbox rules to external addresses is allowed (also check out this recent change)
Finally set the policy scope as usual and click “Save” to complete creation.

Anti-malware Policies
The final policy we will create is the Anti-malware policy. From the policies page, click “Anti-malware” to get to the anti-malware policies page. We can see a single default policy is already created which we can edit if we like.

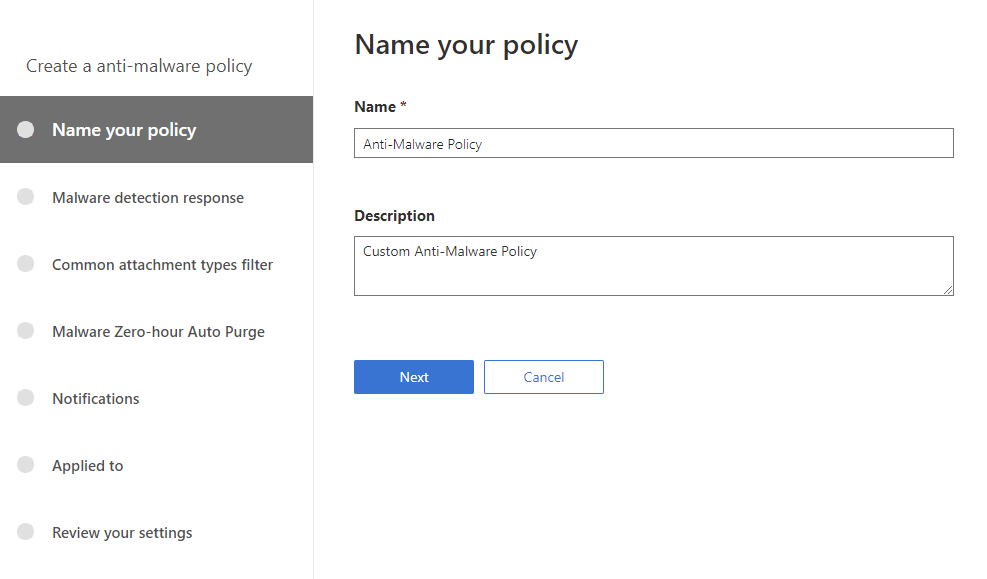
To create a custom policy, click “Create” at the top of the page. Give the policy a name and description and click next to get started.
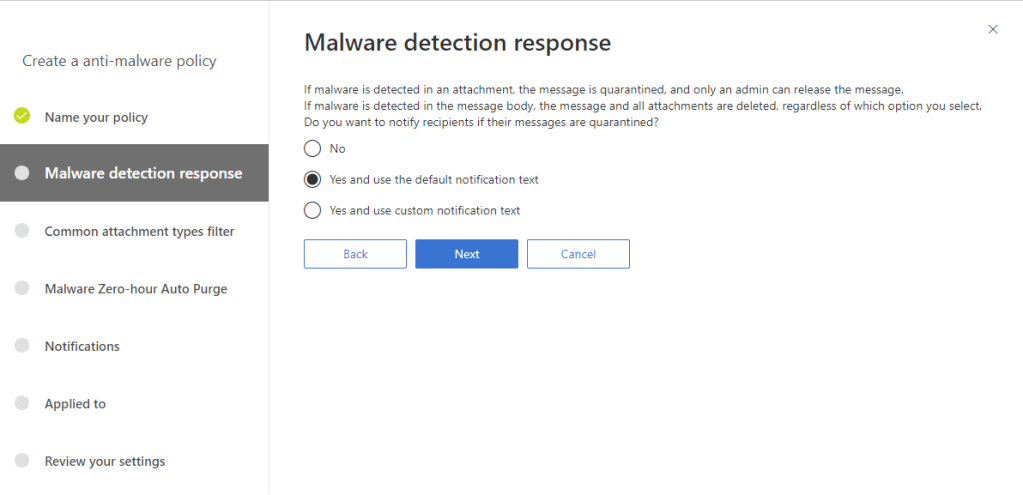
Next, configure the notification for users when one of their mails is quarantined for potential malware.
Enable and configure common attachment types to flag as potential malware.

Enable Zero Hour Auto Purge (ZAP) for Malware. This will retroactively remove malware if it is identified after it has been delivered.

Configure who should receive notifications when malware is detected. It’s recommended not to notify external senders.

Finally, scope the policy as usual and click “Create this policy” to finish.

Summary
In this post we have configured the following policies to protect our environment:
- Anti-phishing
- Safe Attachments
- Safe Links
- Anti-spam
- Anti-malware
In the next post we will look at how we can manage and monitor Defender for Office 365 and also how we can take advantage of the built in simulation tools. For more information on the policies detailed here, check out the below links:
Microsoft Defender for Office 365 – Office 365 | Microsoft Docs
Set up Safe Links policies in Microsoft Defender for Office 365 – Office 365 | Microsoft Docs
Set up Safe Attachments policies in Microsoft Defender for Office 365 – Office 365 | Microsoft Docs
Configure anti-phishing policies in Microsoft Defender for Office 365 – Office 365 | Microsoft Docs
Configure anti-malware policies – Office 365 | Microsoft Docs
Configure spam filter policies – Office 365 | Microsoft Docs
Configure the default connection filter policy – Office 365 | Microsoft Docs
Office 365 ATP Preset Security Policies – Sean McAvinue
Microsoft Defender for Office 365 Configuration Analyzer – Sean McAvinue

Pingback: Study Guide Series – Exam MS-500: Microsoft 365 Security Administration – Sean McAvinue
Pingback: Study Guide Series: Exam MS-500 – Manage Office 365 ATP – Sean McAvinue