
This post is part of the overall MS-500 Exam Study Guide. Links to each topic as they are posted can be found here.
This post will cover the following exam topics listed under the “Manage Search and Investigation” section:
- Use search and investigation tools to perform content searches (Advanced eDiscovery)
- Export content search results
- Manage eDiscovery cases
Use Search and Investigation Tools to Perform Content Searches (Cont..)
Advanced eDiscovery
To run an Advanced eDiscovery, select the “Advanced” page from the “eDiscovery” section and open up the “Cases”. Select “Create a case” to get started and give the case a name, number and description. We’ll also leave the option to add members and configure analytics selected for now.

We have a lot more options available in Advanced eDiscovery:
- Overview – View statistics about the case
- Data Sources – Define “Custodians” which are users relating to the case and “Data Locations” which are non-user objects relating to the case
- Searches – Create a search based on selected custodians, locations and criteria
- Review Sets – Create a Review Set which can be used to manage content discovered as part of the case
- Communications – Manage communications/notifications to users/custodians
- Hold – Create in-place holds to preserve content relating to the case
- Processing – View and remediate indexing errors
- Exports – Manage exporting of Review Sets
- Jobs – Track running eDiscovery tasks
- Settings – Manage the current case details and status, add members and configure the search and analytics settings such as Optical Character Recognition
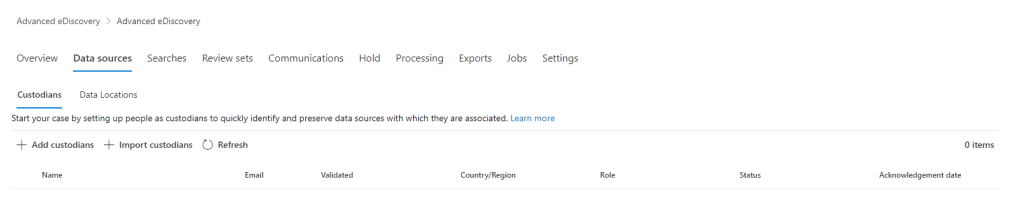
To get started, let’s add a custodian and a data location. Open the “Data Sources” tab and on the “Custodians” section, select “Add custodian”.
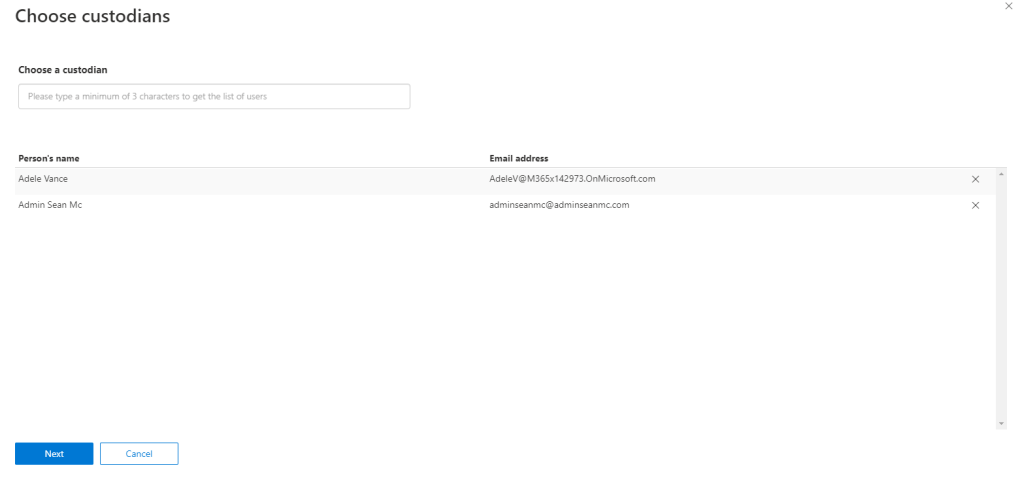
Search for and add the custodians to the case and click next.
Next select the locations to include (Exchange / OneDrive) for each custodian.
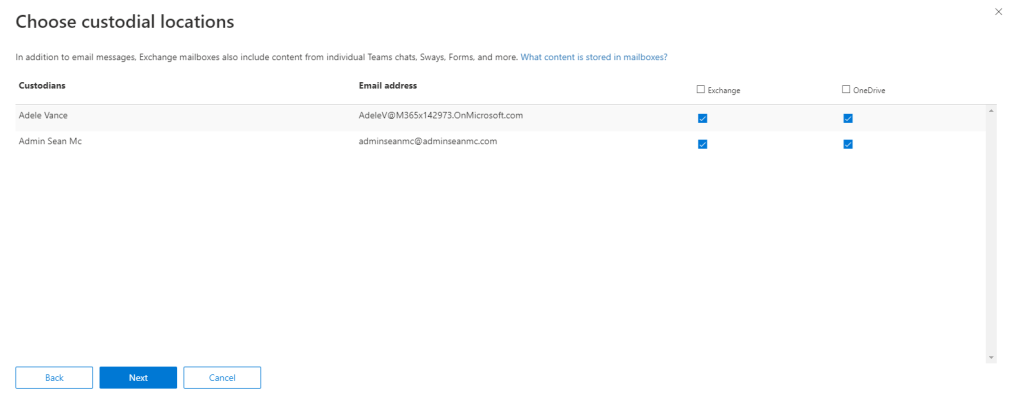
Add in any additional locations such as Shared Mailboxes, Team, SharePoint Sites and Yammer Groups.

Next, select weather to put the custodians and related data on hold. Click “complete” when done to add the custodians.

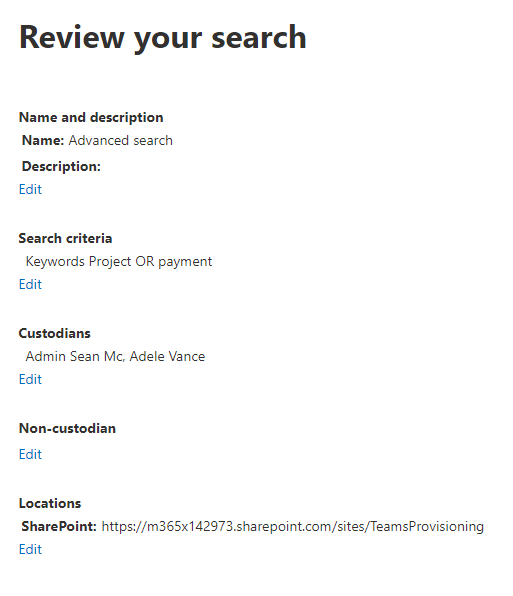
With the custodians added, we can move on to running a search. Open the “Searches” tab and click “New Search”, give the Search a name and description and hit “Next”.

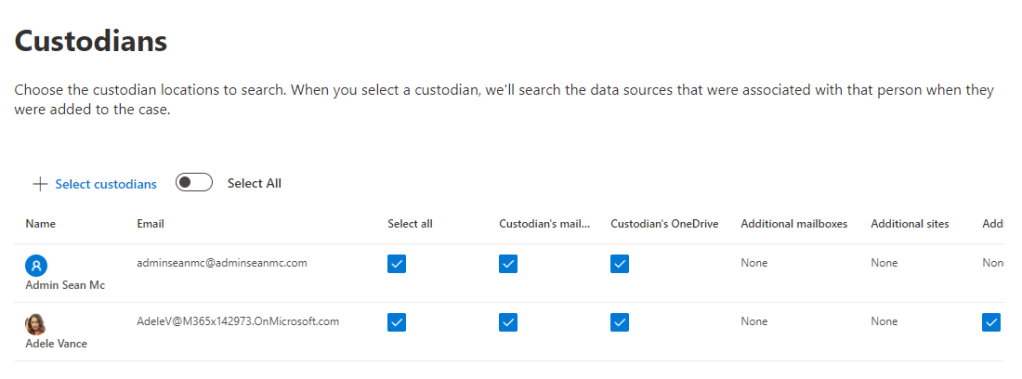
Choose the custodians to include in the search from the ones we added to the case, then specify the areas of each custodian to search and hit “Next”.
If we added any non-custodian data sources such as SharePoint sites to the case we can add them here. If not, just click “Next”.

Add in any ad-hoc additional locations to search.

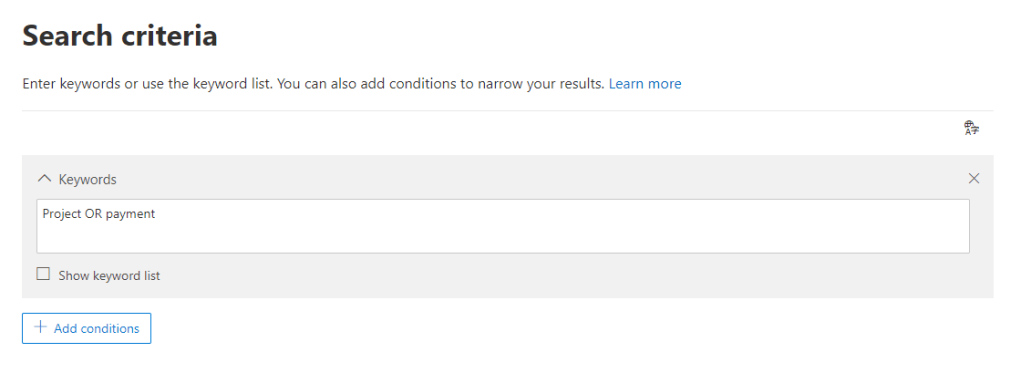
Specify the search criteria as we did in the core eDiscovery.
Finally, hit “Submit” on the summary page to start the search.
When the search has run, we can see the statistics by clicking on the search item. From here we have a few options:
- Statistics – Allows us to view and download the search result statistics
- Preview – Allows us to quickly preview a sample of the results returned
- Add results to review set – Allows us to add all results to a review set
- Edit – Allows us to modify the search
- Sample – Allows us to configure the representative sample for review before adding the entire set. We can configure the percentage confidence we want in the sample or use a random percentage of the total set
- Delete – Allows us to delete the search
- Copy – Allows us to copy the search to create a new one
For now, we will skip sampling and click the “Add results to review set” to create a review set containing the search results. Give the set a name and configure the below options and then click “Add”:
- Collect all versions of SharePoint items – Include complete version history of SharePoint results
- Collect contextual Teams and Yammer messages – Provides surrounding context for matches in Yammer and Teams messages
- Collect cloud attachments – Includes cloud based attachments from SharePoint, OneDrive etc. that were shared as part of a result

With the Review set created, it will appear on the “Review Sets” tab where we can open it to review the contents. This can take a few minutes and the progress of the review set job can be monitored on the jobs tab. Once complete, open up the review set and we see the list of items discovered in preview.
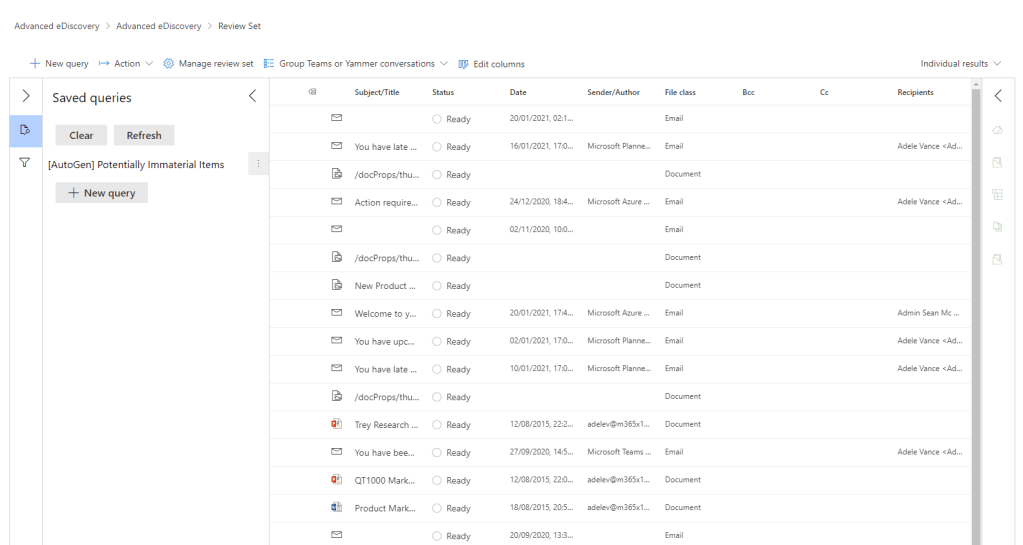
Within the review set, we can select items to review and see a preview of each item. We can also use the “Annotate View” feature to annotate and redact content before export.

Finally we can use the “Manage Review Set” button to access the following features:
- Analytics – Perform analytics on the review set to identify common themes, threads, duplication etc.
- Summary report – View a summary of the data within the set
- Load sets – View and manage load sets, load sets are instances where data was added to the review set
- Tags – Manage tags available for use when reviewing data within the result set
- Non-Office 365 data – Upload data from outside of Office 365 to the review set

Back on the review set page, we can filter our query by a variety of criteria such as load set and tags to narrow down the results, then we can use the “Actions” -> “Export” option to create an export containing our filtered, reviewed, annotated and redacted results.
Configure the settings of the export and click “Export” to create an export job. When the Export job is complete, it can be downloaded from the “Exports” tab just like we did with core eDiscovery.

Summary
The final two topics here are relating to managing eDiscovery cases and exporting from Content Search but we’ve already gone through these in the previous posts so I won’t go through them again here. There is a huge amount in Advanced eDiscovery and what I have covered here, while it is most likely more than enough for the exam, I do recommend checking out the below links from Microsoft to see more on what’s available.
Manage jobs in Advanced eDiscovery – Microsoft 365 Compliance | Microsoft Docs
Work with custodians in Advanced eDiscovery – Microsoft 365 Compliance | Microsoft Docs
Work with communications in Advanced eDiscovery – Microsoft 365 Compliance | Microsoft Docs

Pingback: Study Guide Series – Exam MS-500: Microsoft 365 Security Administration – Sean McAvinue