
This post is part of the overall MS-700 Exam Study Guide. Links to each topic as they are posted can be found here.
In this post we get finish the Create Teams exam topic. The areas covered in this post are:
- Plan and manage org-wide teams
- Add and remove users in a team
- Assign and modify user roles in a team
- Configure dynamic membership
In my previous post, I outlined some of the basics of Team creation in Office 365. In this post I look at some of the more advanced scenarios for creating Teams.
Plan and Manage Org-Wide Teams
In part 1 of this topic, I touched on Org-Wide Teams when I discussed the different Team types available. In short, Org-Wide Teams contain all (real) users within the organization automatically. They are subject to the following restrictions that differentiate them from a Team with dynamic membership for example:
- They can only be created by a Global Admin
- They are only supported in organizations with 10,000 users or less
- There can be a maximum of 5 Org-wide Teams per tenant
- New users are automatically added with the exception of:
- Accounts that are blocked from sign in
- Guest users
- Resource or service accounts (for example, accounts associated with auto attendants and call queues)
- Room or equipment accounts
- Accounts backed by a shared mailbox
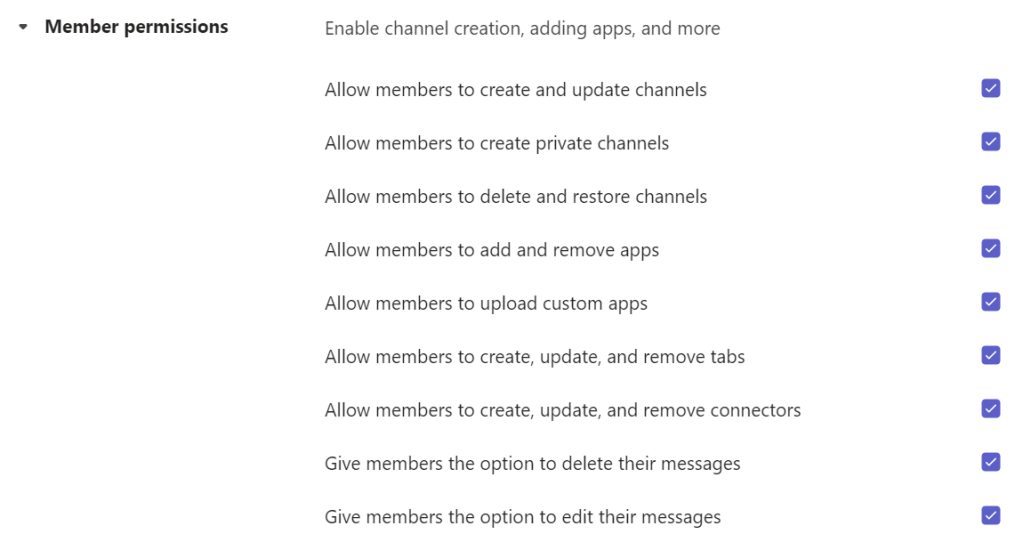
When planning for Org-Wide Teams, it’s important to consider the desired configuration of the Team as all users will be a member. For example, consider the member permissions in the Team (Figure 1) to avoid a flood of modifications in a large organization.
It’s advisable in large organizations to prevent members from creating channels and apps in the Org-Wide Team and restricting that to the owners of the Team. It may also be worth considering blocking members from posting in specific or all channels by modifying the channel settings as shown in Figure 2.

Add and Remove Users in a Team
One of the major benefits to Teams is delegating Team management responsibilities away from the IT department. As Teams are based on Microsoft 365 Groups, the owners of the Team / Group get full control of membership. To add a user to a Team, select the Team options and choose the “Add member” option. From here, simply look up the user and select their role and they will be added (Figure 3). This change will be reflected in the corresponding Microsoft 365 Group. Users will always be added as a member first before being promoted to the owner role.

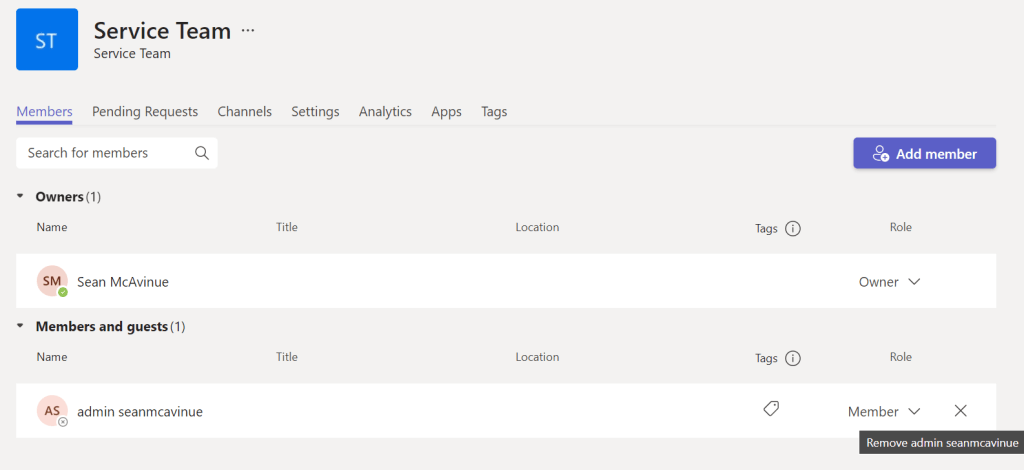
To manage group membership for an existing Team, once again go to the Team settings and this time select “Manage Team”. From this page, the “Members” window where you can manage member roles and add or remove members (Figure 4). If a user is a Team owner, they must be demoted to the member role before they can be removed.
Assign and Modify User Roles in a Team
Users can either be “Members”, “Owners” or “Guests” in a Team. For all internal users, only the “Member” and “Owner” roles apply. Managing user roles is very straightforward as seen above and can be done by any existing owner. I’ve shown the role management functionality from within Teams already so won’t repeat it here but membership and roles can also be managed by an admin via the TAC.
To manage a Teams roles in the TAC, open the “Teams” -> “Manage Teams” section and select the Team you want to manage. From here, select the members tab and you will have the same interface as users get for managing roles (Figure 5).

Configure Dynamic Membership
We’ve already seen that Teams can have dynamic membership but haven’t looked into exactly how that membership works. Well, we know that Teams are based on Microsoft 365 Groups, and Microsoft 365 Groups can have dynamic members based on queries. This is where the process differs from standard Team creation. Regular users cannot create dynamic Groups, this requires an admin to configure. You also can’t create Teams as dynamic from the Teams app or TAC (Not directly anyway).
To create a dynamic Team, we first create a dynamic Microsoft 365 Group and then add a Team to it using the “Existing Microsoft 365 Group” option shown in part 1 of this topic. It’s important to note that dynamic Microsoft 365 Groups require an Azure AD Premium P1 subscription at a minimum so consider this if you only have base Office 365 licensing and not Microsoft 365 or EMS.
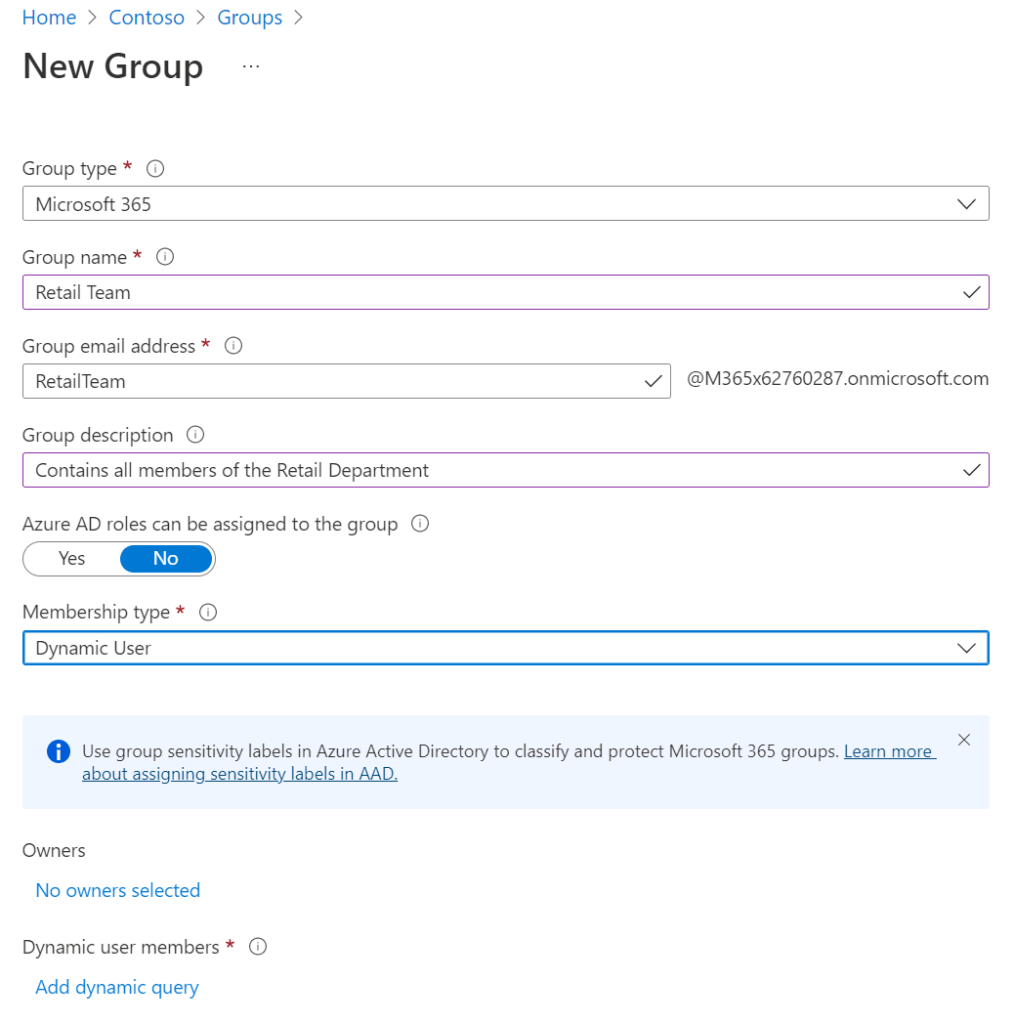
To create a Microsoft 365 Group with dynamic membership, navigate to the Azure AD Portal and open the “Groups” section. Create a new Group and select “Microsoft 365” as the Group Type and “Dynamic User” as the Membership Type (Figure 6).
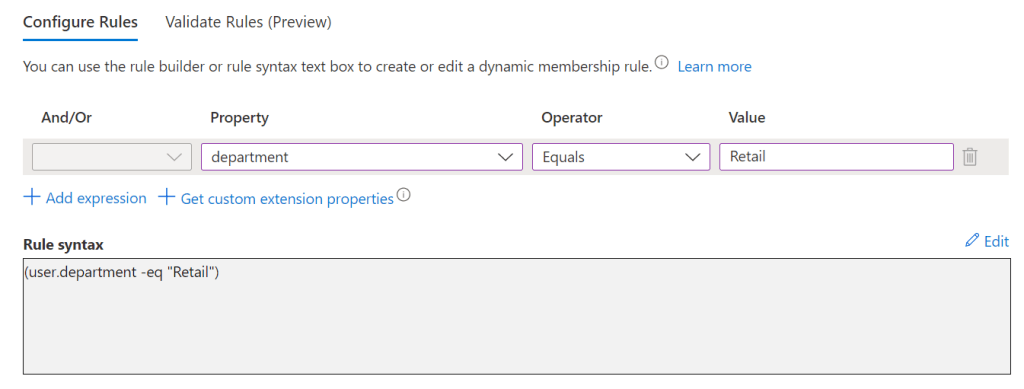
Click the “Add dynamic query” option to specify the “rules” for membership. Configure the rules as required, you can write the query yourself for more advanced queries but the query builder is excellent for standard requirements. In Figure 7, I have created a rule to include all users with the department “Retail”.
You can also test the rule against some users using the “Validate Rule” (Preview) feature to make sure it works as expected (Figure 8). Once you’re happy, save the rule and create the group.

With the Group created, add a Team to it using the steps described in part 1 of this topic and you will see all the members matching your filters are present (Figure 9) – this can take a few hours before all members are reflected. Something to note is that because membership is dynamic, you can’t modify members from Teams, this needs to be done by modifying the membership rules in Azure AD.

Summary
This post finished the creatively named “Create Teams” topic. We have looked at the options for creating Teams, the different types of Teams and specific use-cases like Org-Wide or Dynamic Teams. In the next post we move on to managing chat and collaboration in Teams.
