
This post is part of the overall MS-700 Exam Study Guide. Links to each topic as they are posted can be found here.
In Part 1 of this topic, I detailed the considerations and steps required to successfully configure and manage Teams channels. For the current exam blueprint, that pretty much covers it. However, with Shared channels being released into preview at the moment, it wouldn’t make sense to close out this topic without focusing on what Shared channels are and how they work.
I expect Shared channels to be added to the blueprint in the future so with that in mind, we will now look at how they work in the context of Teams and how to configure them.
What are Shared Channels
Shared channels work similarly to Private channels in that the membership of the channel and the backend document library do not align with the hosting Team. That is, however, where the similarities end.
Shared Channels allow for a specific channel to be “Shared” among multiple users and Teams, not limited to the existing Team membership. For example, you can share a channel across multiple Teams in your tenant so that each Team can work in the same channel simultaneously without needing to all be members of the hosting Team. There are definitely some use cases for this functionality but what’s probably more exciting than internal sharing of channels, is how they work with external organizations.
One of the pain points of external collaboration on Teams was the requirement for Guest accounts and organizational switching. This meant the when you wanted to check in on a Team from another organization, you either needed to switch organizations – making yourself unavailable in your current org – or open a second Teams instance in a browser.
Shared channels leverage Azure AD B2B Direct Connect. Direct Connect (Currently limited to Teams Shared channels) allows for a trust relationship to be formed between two tenants so that users on either side can access resources without having an Azure AD Guest User account provisioned.
Azure AD B2B Direct Connect
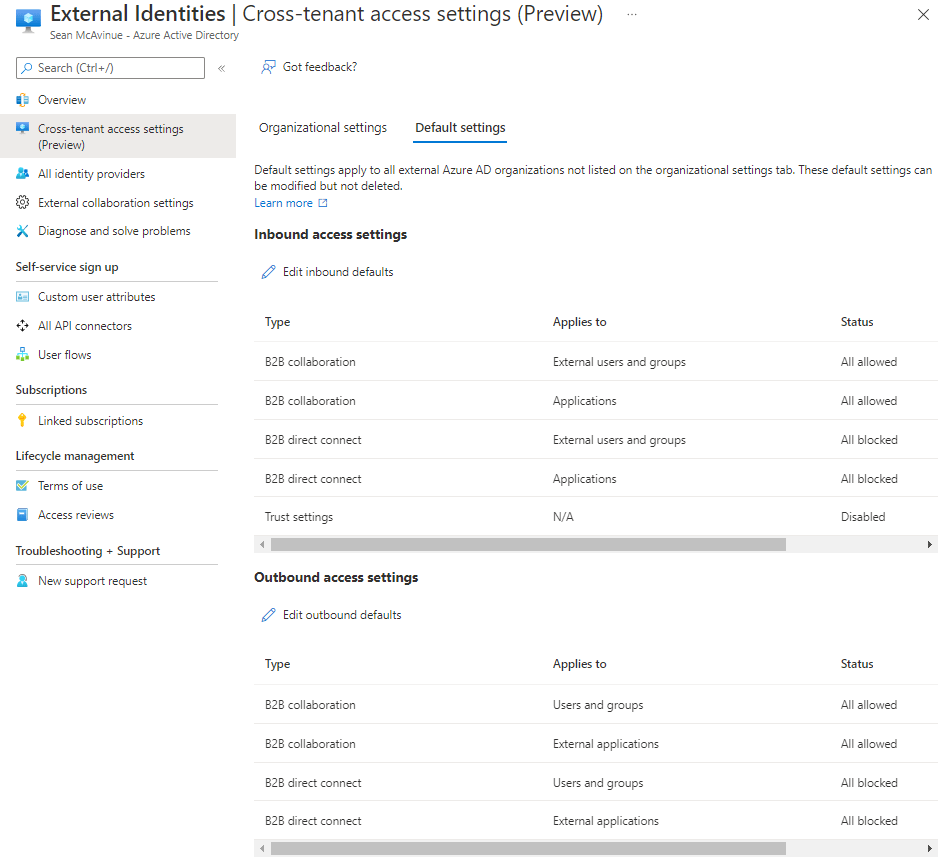
Direct Connect is off by default but can be modified from the External Identities -> Cross-tenant access settings page in the Azure AD Admin Portal. From here, you can view and modify the default settings for Direct Connect (Figure 1). These settings are split into inbound and outbound policies. You can also add additional control to the standard B2B collaboration functionality by limiting which tenants can send or receive Guest User invites with your users.
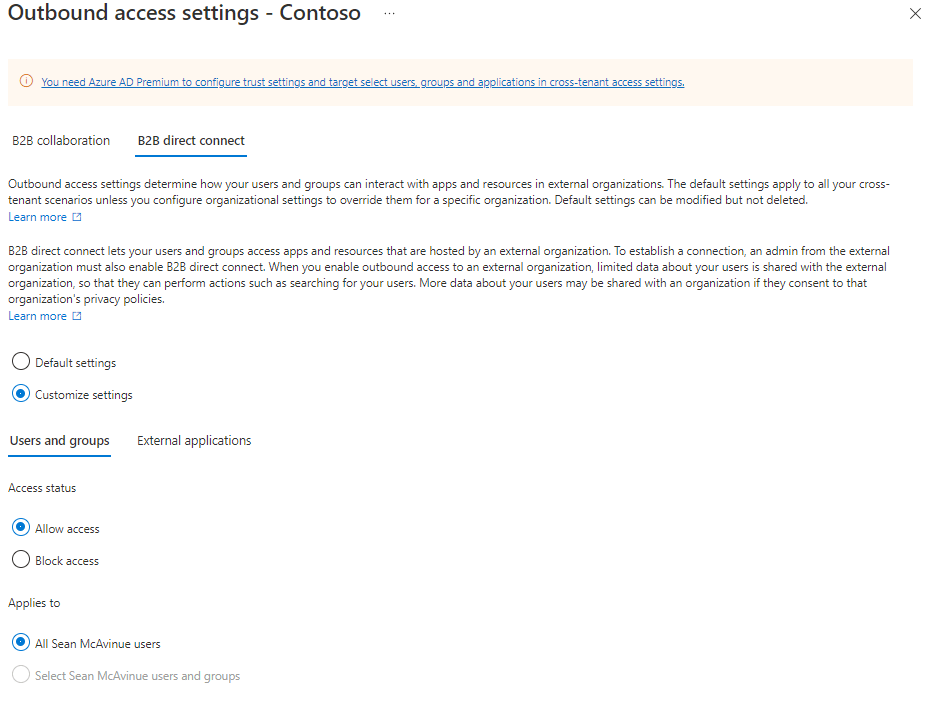
If you choose to leave the default setting as blocked for Direct Connect (and I recommend you do) the organizational settings page allows you to specify specific organizations to form a relationship with by specifying either their Tenant ID or Domain Name. Once the organization is added, you can modify the inbound and outbound access settings to allow Direct Connect and override defaults (Figure 2). With Azure AD Premium P1 licensing you can also limit these relationships to specific user groups or applications in your tenant.
Teams Policies for Shared Channels
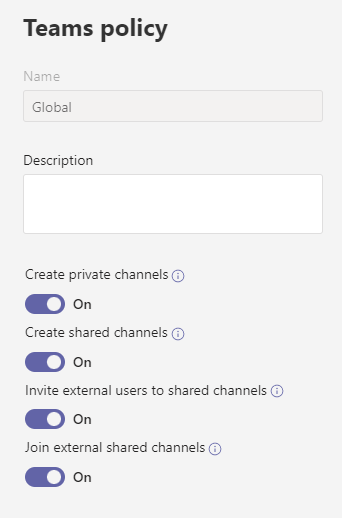
In a previous post, we looked at Teams policies and how to deploy them to users. Teams policies define the ability of users to create, join and shared Shared channels (Figure 3).
Sharing a channel
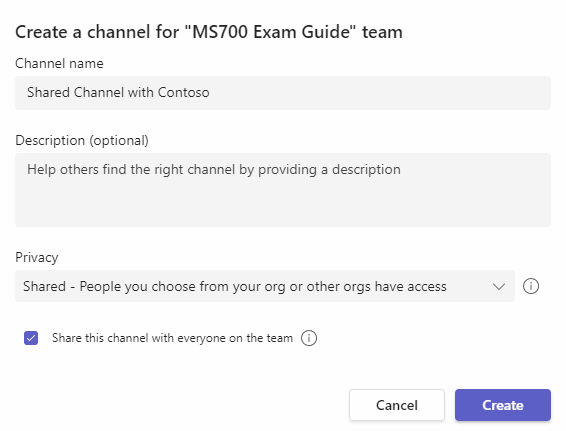
I’ve looked previously at creating each type of channel but what we didn’t go into there was how to share a channel. When a new Shared channel is created (Figure 4), we have several sharing options.
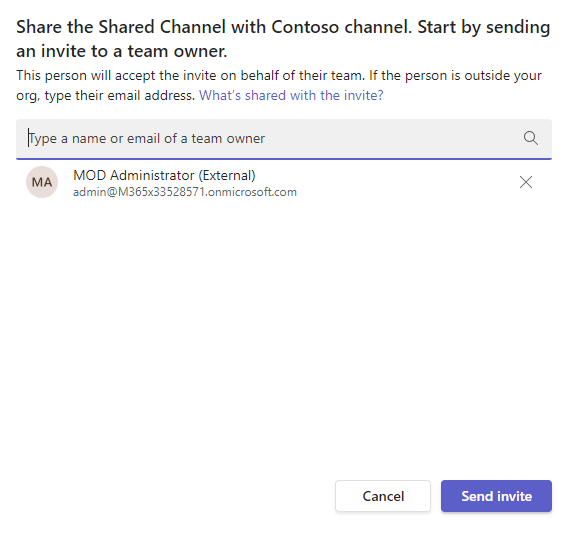
Sharing a channel can be done by sharing with individual users or Teams. You can directly add to a Team you already own but to share with another Team, including external, you will need to specify a Team owner (Figure 5).
The receiving Team owner will get a notification in Teams to make them aware of the invite. From here they can accept or decline the invitation as shown in Figure 6.

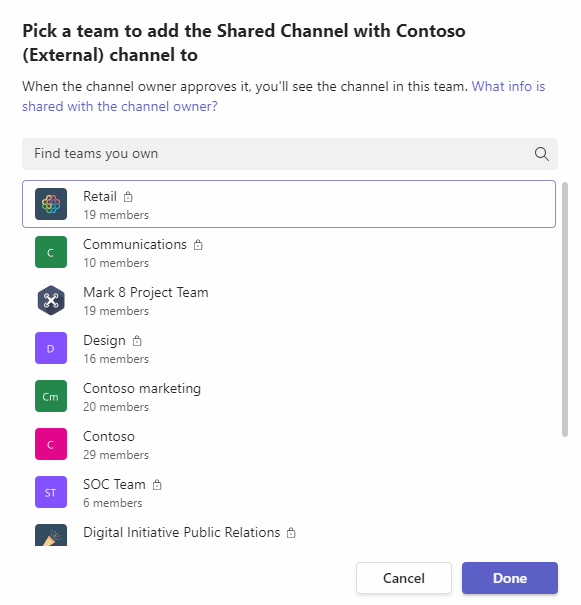
Upon accepting the invitation to the Shared channel, the owner is then asked which Team they would like to add the channel to (Figure 7).
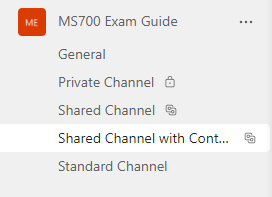
Once present in the team, Shared channels then appear in the channel list with the Shared channel icon as shown in Figure 8.
Summary
As I mentioned, Shared channels are still in preview and not currently on the exam blueprint but will be a big part of Teams going forward. It’s worthwhile getting familiar with them now to prepare for any updates to the exam in future.
