
Microsoft Teams Calling Features have some great flexibility for standard calling requirements. For some more bespoke requirements there are great integrations available trough a number different contact center ISVs also. One of the cool built in features is the Microsoft Teams Auto Attendant. Auto Attendant has been around for a while now, coming from Skype for Business, and can help Organizations put a front end on customer facing numbers. In this post I’ll go through the steps to configure a Microsoft Teams Auto-Attendant.
Set up a Resource Account
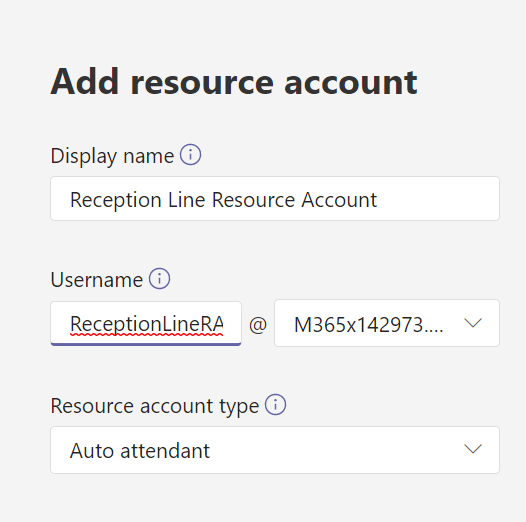
The first requirement for an Auto Attendant is to create a resource account to act as the ‘entry point’ and have the associated front end phone number. Every Auto Attendant must have at least one Resource account associated and can have more than one if multiple numbers are required.
To set up a resource account, open the Teams Admin Center and go to ‘Org Settings‘ -> ‘Resource Accounts‘ and add a new account as below:
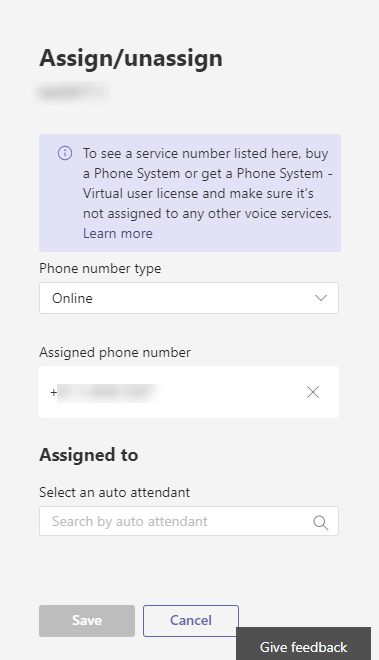
Next we assign a phone number to our resource account to enable it for dial-in. Depending on if you are using Dial Plans or Direct Routing this is slightly different.
For Dial Plans, hit the assign button and assign an Online number as below,
For Direct Routing, this currently needs to be done via the Skype For Business Online Management Shell. Use the command below to set this number on the resource account:
Set-CsOnlineVoiceApplicationInstance -Identity receptionlineRA@M365X142973.onmicrosoft.com -TelephoneNumber +0000000000Set up an Auto Attendant
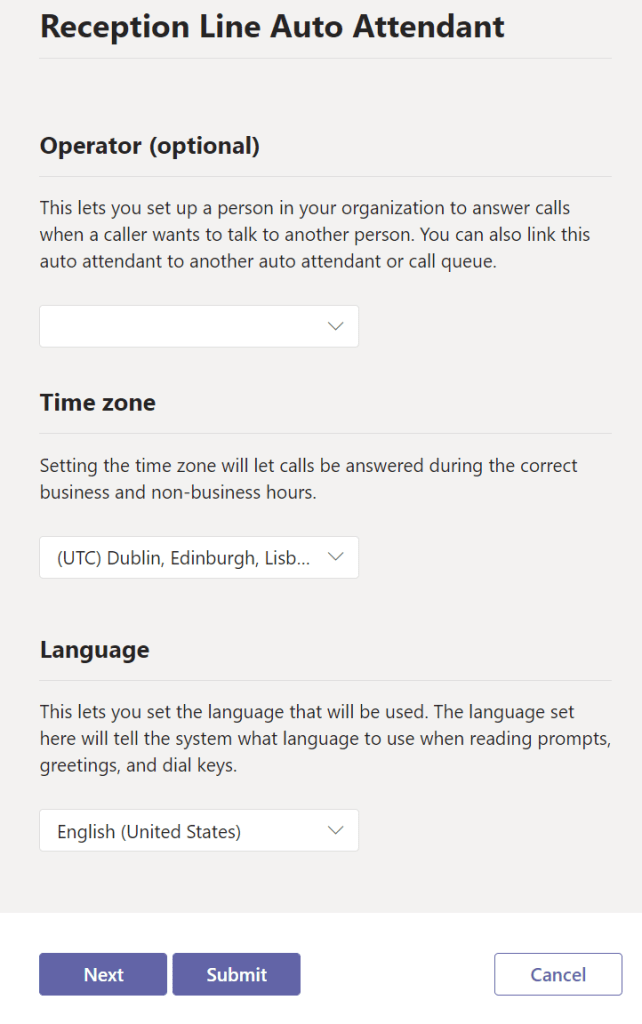
Once we have our number set we can set up our Auto Attendant. Open the ‘Voice‘ -> ‘Auto Attendant‘ section of the Admin Center and create a new Auto Attendant.
On the creation page, select:
- An Operator – The real person to get called if a user doesn’t want to speak to the Auto Attendant. This can be a real person, another Resource Account or an number that is external to Teams
- Time Zone – this is for mapping opening hours to your current Time Zone
- Language – The language the Auto Attendant should be in
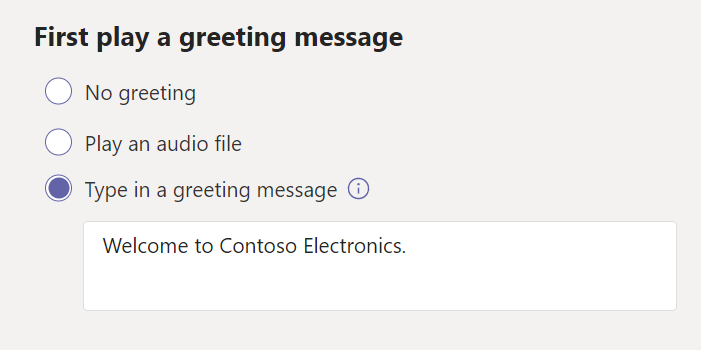
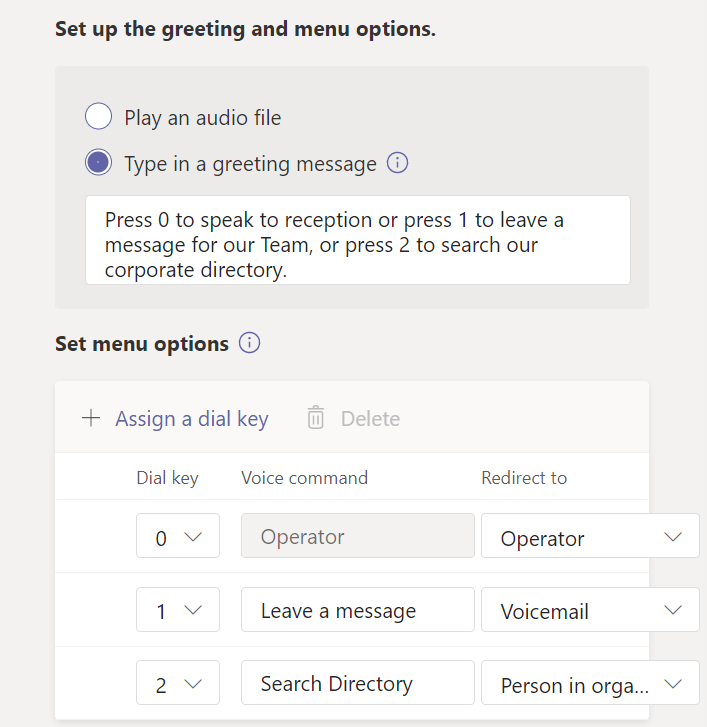
On the next page, we can set up an initial greeting, this can be a recorded audio file or have the Teams system read out a typed message.
Next we choose what to do with our auto attendant. We can disconnect, reroute the call to another Resource Account or play a menu with associated triggers. If we choose to play menu options, we again have the option to record the message, or have the system read a written message.
We assign dial keys to trigger one of the below options, we can also add voice commands to each of the dial keys.
- Operator – Speak to our chosen operator
- Person in Organization – Search Directory (We’ll get to this in a later section)
- Voice App – Another Resource Account linked to another Auto Attendant or Call Queue
- Voicemail – Leave a Voicemail for an Office 365 Group
- External Phone Number – A Number External to Teams
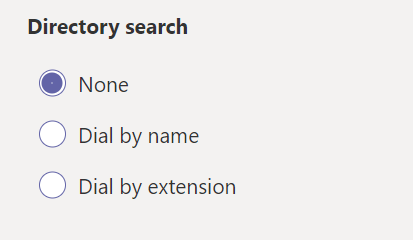
For our directory search option, we can allow users to search by name or extension.
Next we set our Business hours and choose what happens when we are outside business hours.

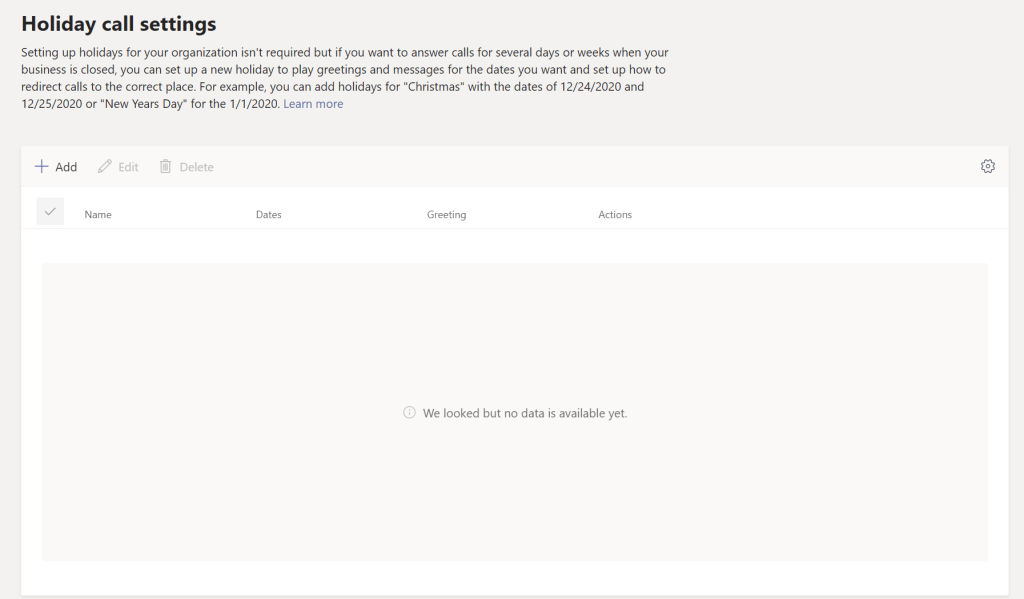
We can then set our settings for during holidays:
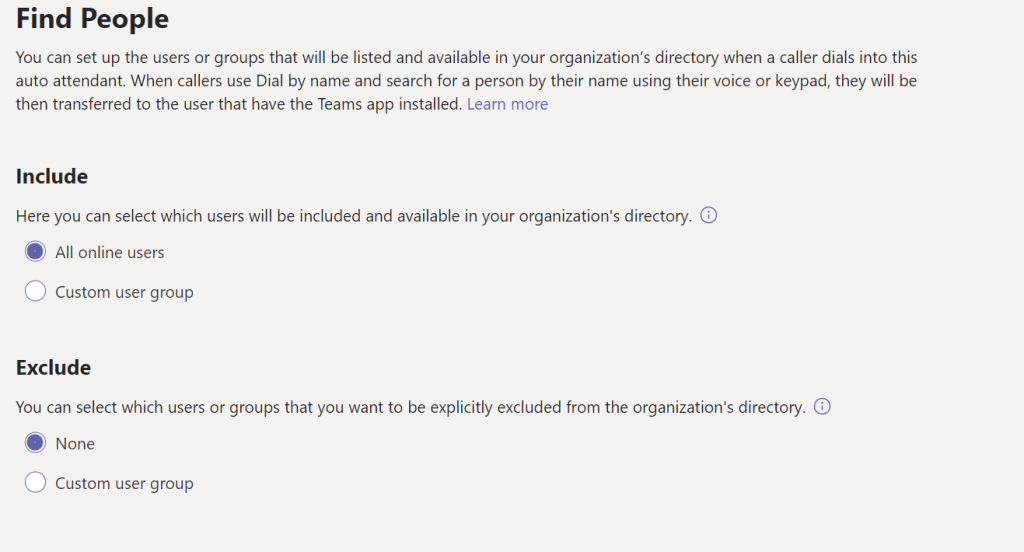
We configure who is accessible to directory search from this line, this can be a particular group of users or all users with particular excludions.
Finally, we link our resource account to our Auto Attendant and we’re all set. After a little time to propagate changes, our Resource Account number will route directly to our Auto Attendant flow.
Auto Attendants and Call Queues add some great functionality for receiving and routing calls for a lot of basic use cases. While more complex cases such as call center management can be fulfilled with Microsoft Partner integrations, the default functionality provides a lot of out of the box flexibility.
For more on Auto Attendants, Call Queues and licensing required see the Official Microsoft Documentation.

Pingback: Configure Microsoft Teams Common Area Phones – Sean McAvinue
Pingback: Replace Teams Outbound Caller ID with Resource Account Number – Sean McAvinue