
This post is part of the overall MS-500 Exam Study Guide. Links to each topic as they are posted can be found here.
Azure AD Identity Governance
With the fast pace and scale required by many organizations to provision and control user identities today, it is extremely important that a robust system is in place to ensure user access governance and controls are in place. It can be very difficult to scale a traditional service desk based, access request model to a large organization. The impact of this is that legacy access is often left in place as there is no end-to-end lifecycle around user identity and access. This problem becomes larger when we consider the proliferation of B2B “Guest” accounts throughout a typical Microsoft 365 tenancy. Now it’s not just internal user access that can become stale, but potentially external users who maintain access to resources in our organization long after the original requirement is expired.
Identity Governance is essentially a set of features in Azure AD Premium which help us to manage the identity and access lifecycles. The components that make up the Azure AD Identity Governance offering are:
- Entitlement Management
- Access Reviews
- Privileged Identity Management*
*There is a dedicated section on the exam for Privileged Identity Management so we won’t cover that here.
Entitlement Management
Entitlement Management in Azure AD Premium allows us to logically group resources into “Access Packages”, these packages are made available for assignment through a catalog. We apply a set of rules to the Access Package around how it can be assigned to ensure that any access assignment follows our internal policies. The package can then be delegated to specific users to manage assignment.

To understand, let’s look at an example. We have a business requirement to grant access to an external consultancy organization to collaborate on “Project X”. We would like our Project manager Adele, to be able to provision access for both internal and external project team members but we want to ensure the access they get is predefined, and that after the access expires, external users are removed from our directory.
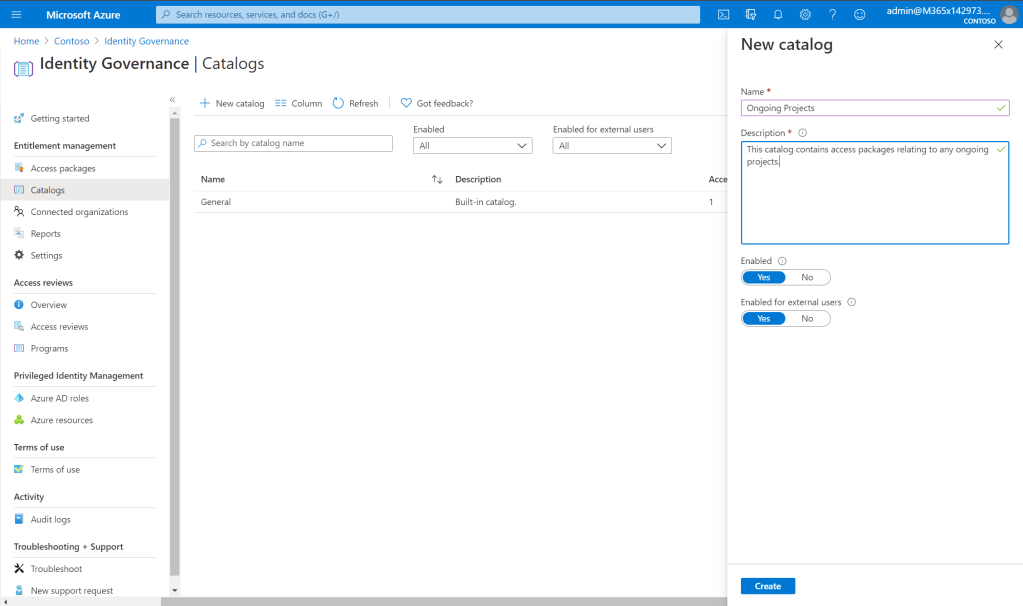
First we provision a Catalog to hold our Access Packages. We could use the default catalog but let’s create one purely for ongoing projects. We create the catalog in the Entitlement Management blade of the Identity Governance page and ensure it’s both enabled and enabled for external users.
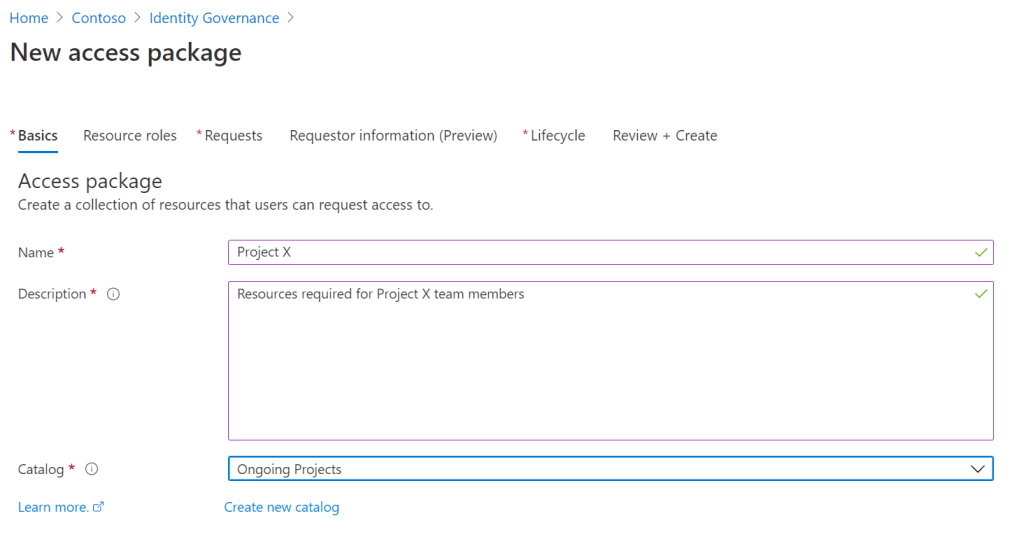
Next, we open the “Access Packages” blade and create a new package. We give it a name and description and select our Ongoing Projects catalog as the destination.
We add in the relevant resources to make available, in this case, users will be granted access to the “testscripts” Azure AD Application and be added as a member to the “Project X” Microsoft 365 Group / Team.

Next, we want to publish the package first to all of our internal users. We don’t require approval for internal users. Make sure to choose “All Members (Excluding Guests)” for who can request access.

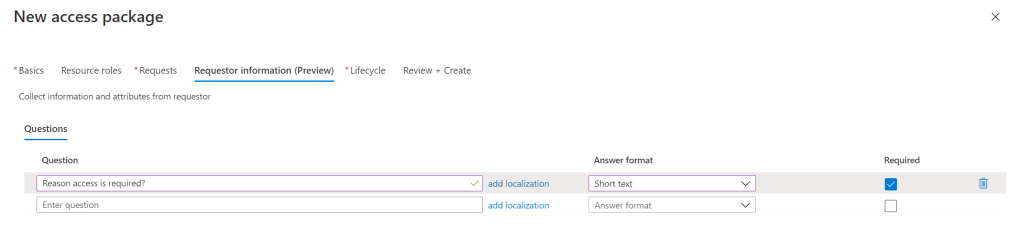
We can configure the preview feature “Requestor Information” which prompts our requestor to answer some questions while requesting access. We will just ask them for the reason they need access here.
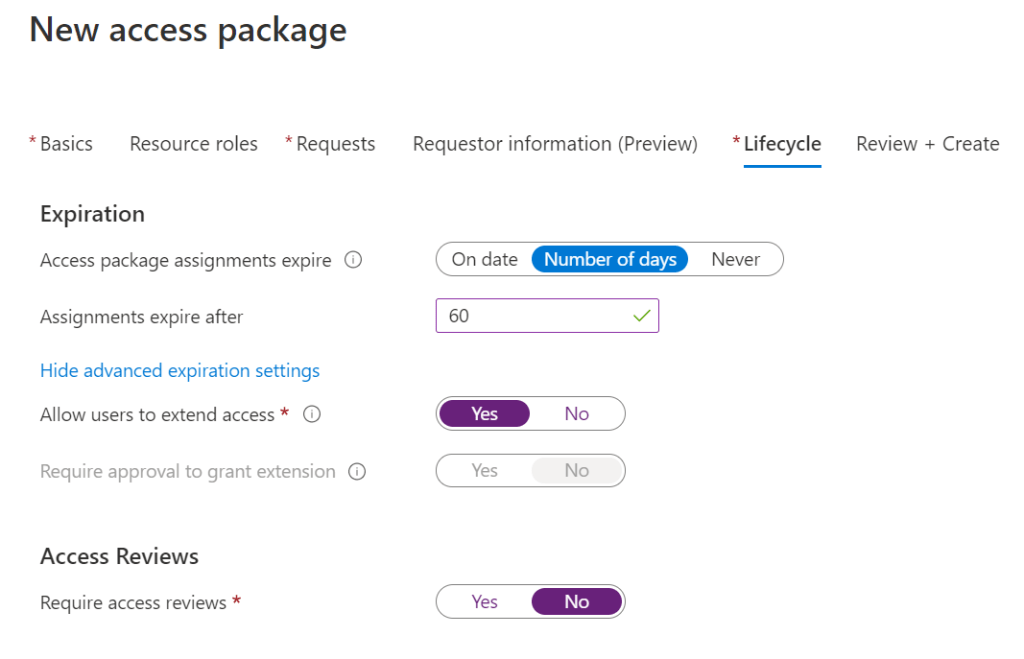
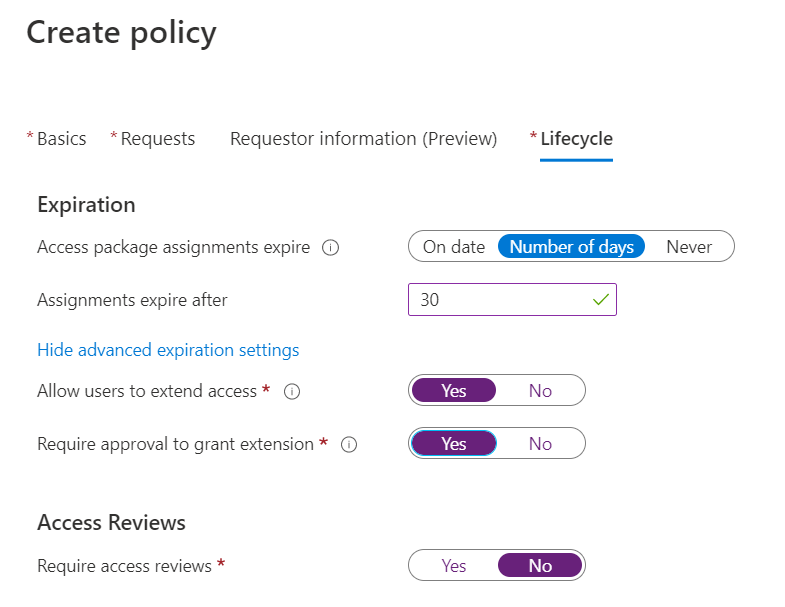
We now configure the lifecycle of the entitlement. We want user access to last for 60 days after request but allow them to extend if required. We won’t require access reviews for our internal users.
Finally we hit create to provision our access package and make it available to our internal users.
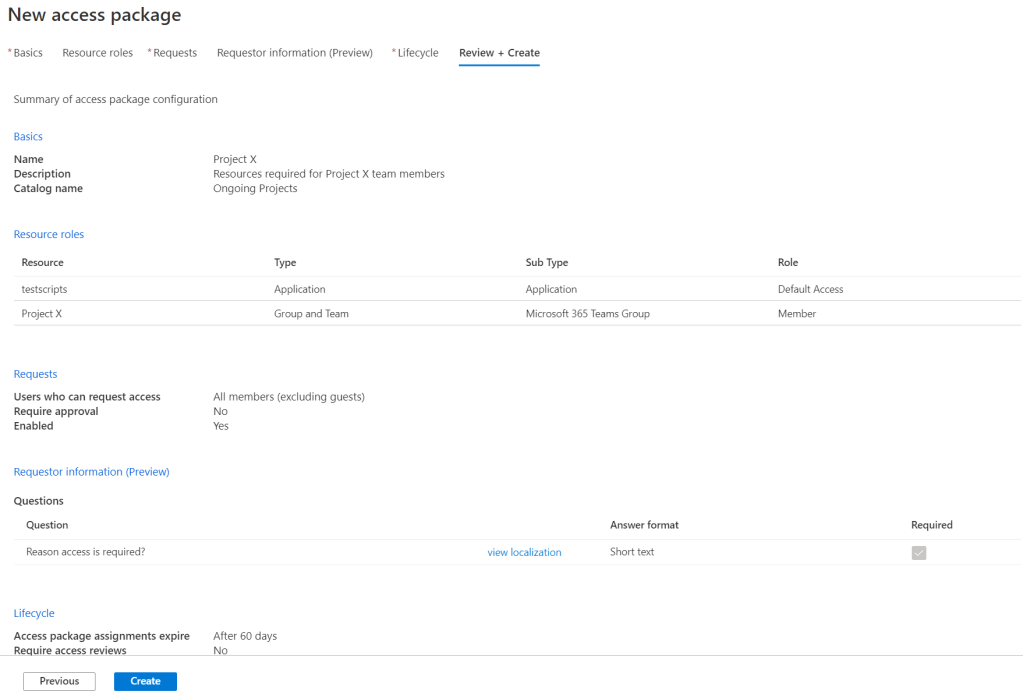
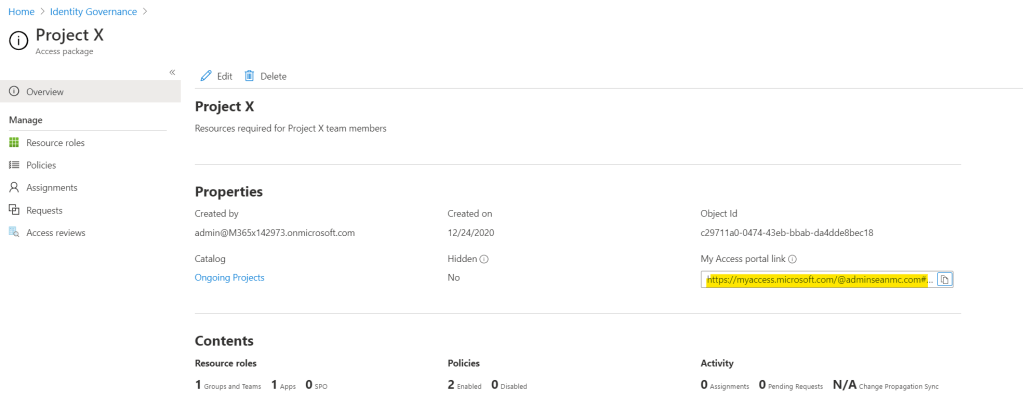
Now that we’ve created our policy for internal users, we can review our Access Package to ensure we got everything right.

Next we need to provision access for our external users. We have a few options here, we can open our Access Package so it can be requested by any external user, or we can specify specific external organizations. In practice, there aren’t a lot of reasons I would recommend opening to any external user so let’s create a connected organization to represent our partner company.
In the Identity Governance page, open the “Connected Organizations” blade and add a new connected organization.

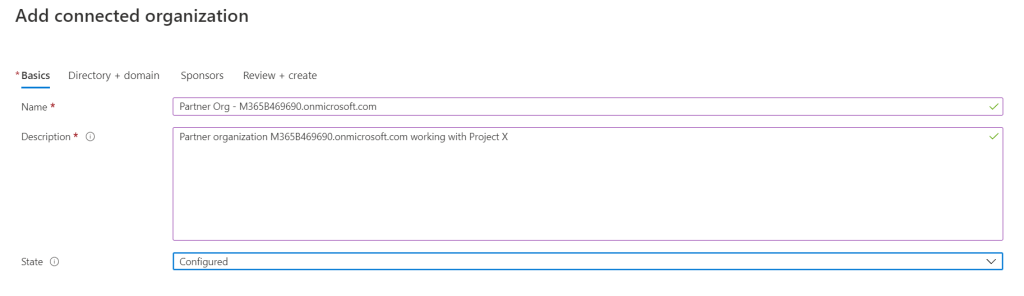
Give the organization a name and description and set the state to Configured. (An organization with the state set to “Proposed” is not active for use, proposed organizations are often the result of automatic creation)
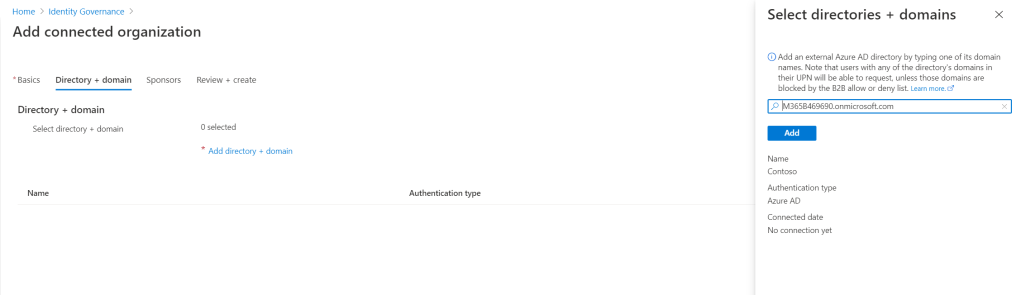
On the next page, search for the tenant via email domain and add the organization.
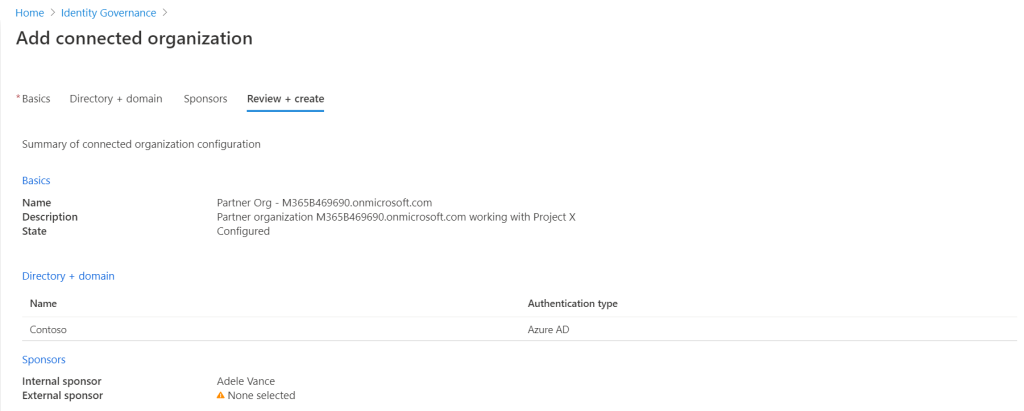
Next, select the sponsors for the organization, sponsors will be responsible for approval of requests for this domain. We can specify existing guest users from the connected domain to operate as a sponsor, this could be an external project manager etc. For our example, we won’t be using an external sponsor. With the sponsor in place, review and complete the creation of the connected organization.
Next up, let’s add our policy to the Access Package. In the Access Package, open up the “Policies” blade and create a new policy.
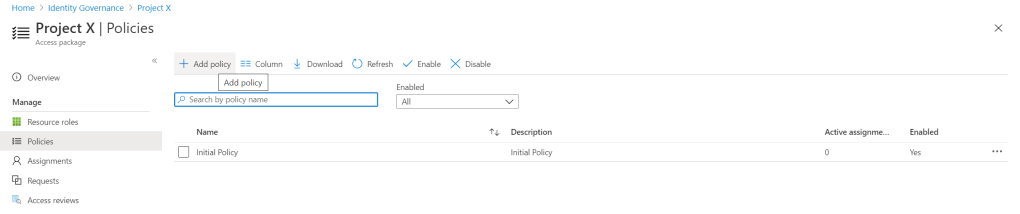
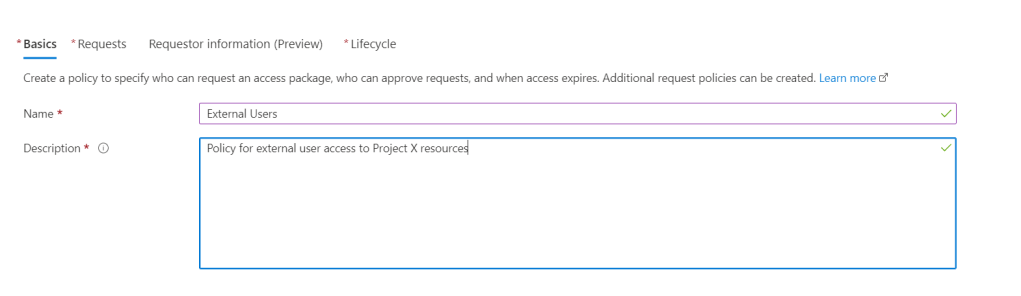
As before, give it a name and a description and click next.
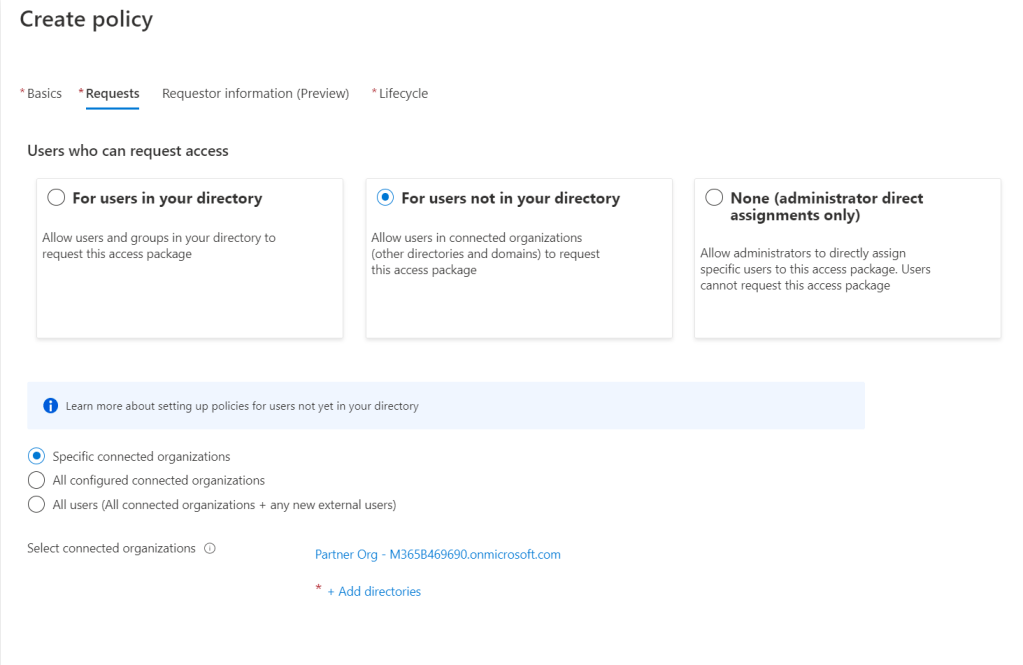
Next, we create the policy settings. For this example, we will select “For users not in your directory” as the requestors do not already have a guest account. We then want to limit access to only our partner organization so we choose the option for “Specific connected organizations”. We then select our previously created partner organization.
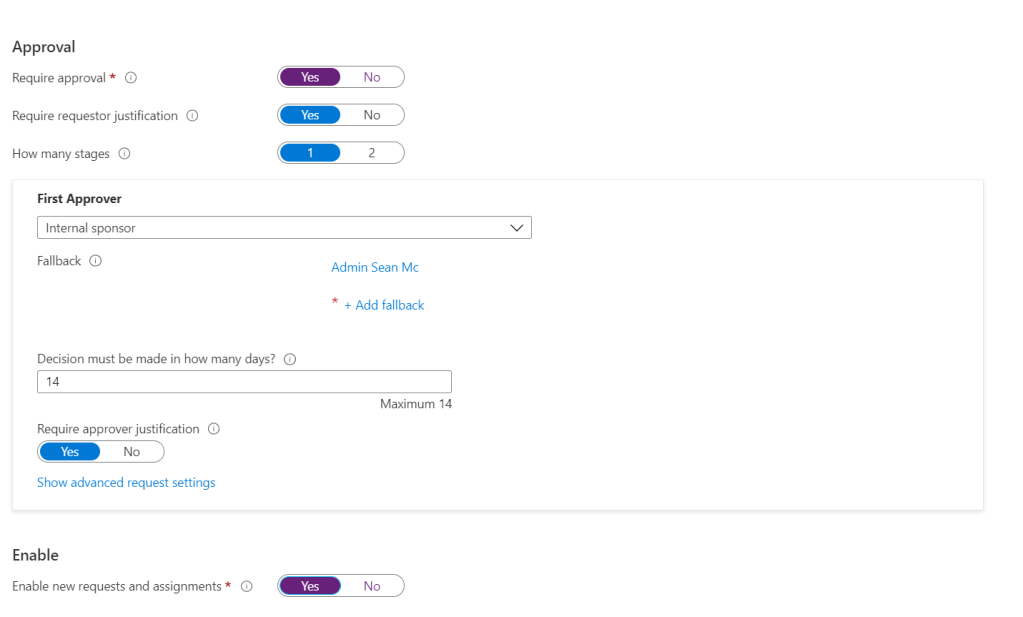
With our partner organization selected, now we choose the workflow for requests. In this policy, we are requiring a justification from the requestor, we are requiring one stage of approval which will go to the internal sponsor who will need to provide a justification for approval, this can also be approved by our fallback approver. If the requests is not approved in 14 days, it will automatically be rejected. Finally, don’t forget to hit enable at the end.
As before, we can add some fields for information from the requestor.

Next, set our expiration and extension settings as before (we will get to Access Reviews in the next section). Then hit “Create” to add the policy.
And that’s it! Our Access Package is set up. Let’s look at what it looks like for our users now. We will need the access portal link from the Overview page for our users.
Entitlement Management User Experience
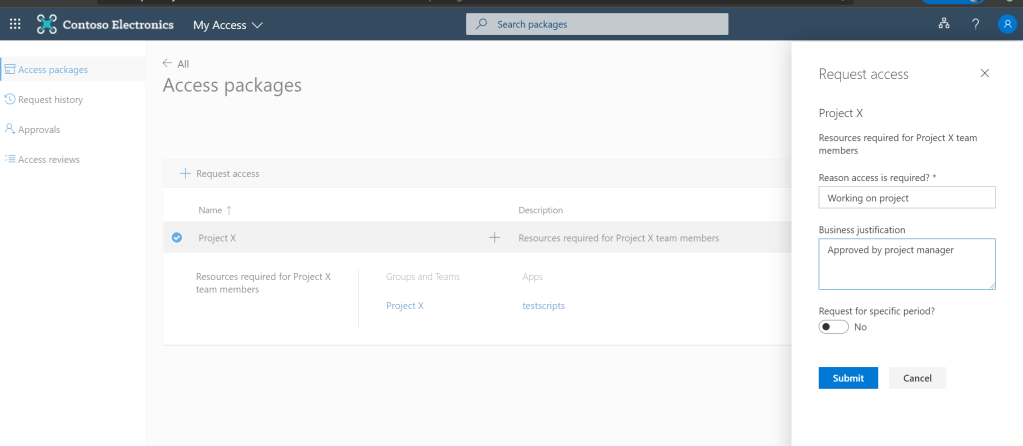
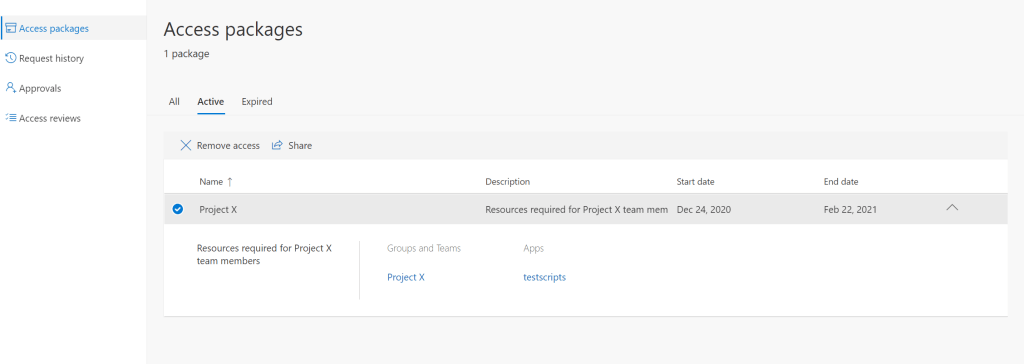
As an internal user, we can navigate to https://myaccess.microsoft.com or the link specified in the above screenshot and see our available Access Packages. To request access, we simple select the access package, give a justification and click request. We didn’t set up approval so this is process immediately.
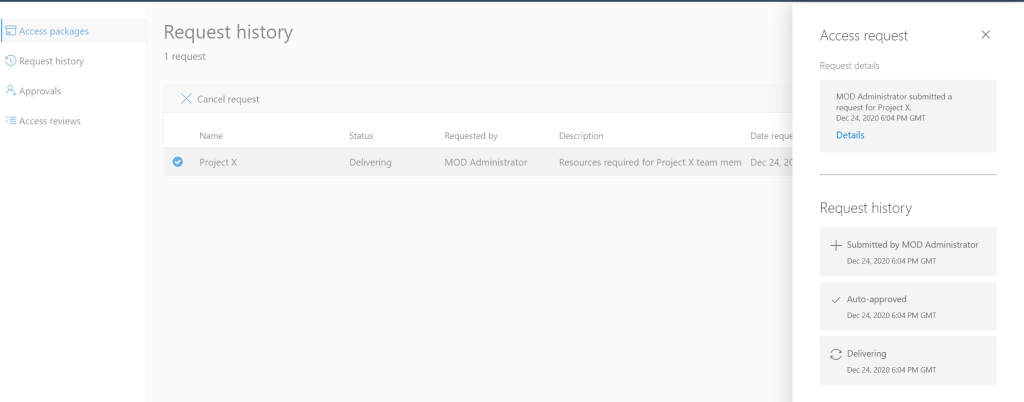
After a minute, refresh the page and access will be in place. The links in the access package can also be used to view the resources.
Entitlement Management External User Expierience
As an external user, we need to navigate to the Access Portal link provided (above) so we hit the right tenant. When we get there, we can request access just like an internal user however now there is approval required. External users will also be required to accept the terms specified.

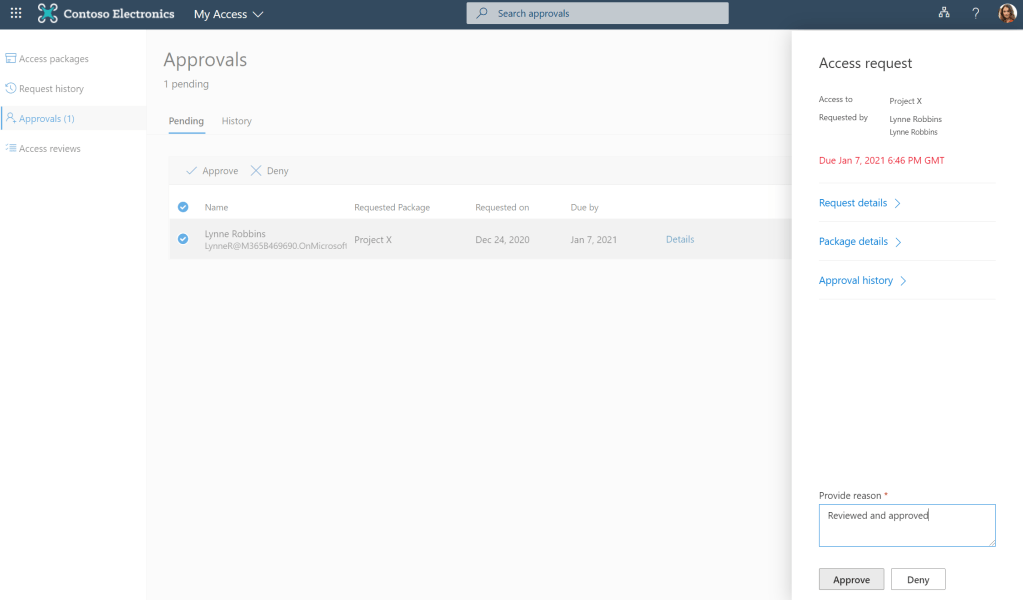
Once requested, the sponsor for the organization will have an approval waiting for them. They will also be notified of this via email so don’t need to monitor the approvals page.

Our sponsor can review the details of the request and approve or deny.
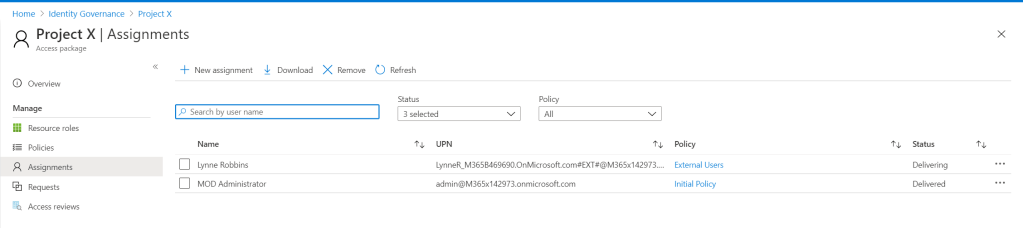
Upon approval, a guest account is created for the external user if one does not already exist and the account is provisioned with the appropriate access.
Additional Entitlement Management Settings
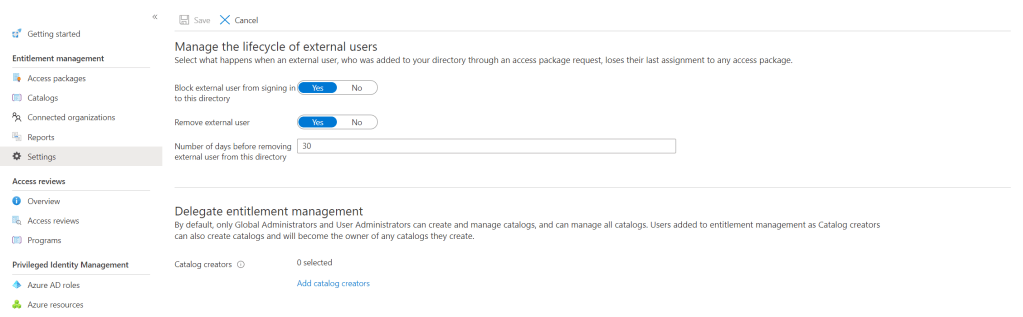
Now that we’ve stepped through setting up Entitlement Management, some other settings to be aware of in the settings blade. We can at a top level prevent external users from accessing our directory completely after their access expires or even fully delete the account (We can specify a grace period for this).
Finally, we can also delegate out access to provision and manage catalogs to non-admin users by adding them into the settings page.
Access Reviews
Entitlement Management allows us to govern the provisioning of access and manage the lifecycle of these entitlements. There are cases though, where Entitlement Management either wasn’t used to provision access, or where it doesn’t meet the access requirements. Azure AD Access Reviews allow us to audit and review existing access assignments both inside and outside of Entitlement Management. It does this by allowing us to automate periodic reviews of access requirements. For instance, let’s take a scenario where multiple guest users have been added to a projects Team Site indefinitely. There was no Access Package in place for this site so an admin added the Guest users manually. The IT organization now has very little insight into if this access is still required and a lot of manual work would be required to verify this access and remediate if required.
With Access Reviews, we can automate this process by targeting the group and assessing, based on various factors if the access is still required. If it’s not, then we can also automatically remove the access. To get a better view, let’s jump into the configuration.
In the Access Reviews blade of the Identity Governance page, we can create a new access review.

When creating a new Access Review, we need to specify a few settings:
- The Access Review name and description – This one’s obvious…
- The start date – When the Access Review Process should begin
- Frequency – How often should an Access Review flow be run
- Duration – How long, in days, should an Access Review last (how long do reviewers have to respond)
- End – when the Access Review process should stop
- Users to review – This can be set to group membership or application access
- Scope – If all users should be reviewed of just guest users
- Group / Application – Group or application to be reviewed
- Reviewers – Who should review the access requirements
- Programs – Several Access Review Programs can be created to logically group Access Reviews. This does not impact the review itself

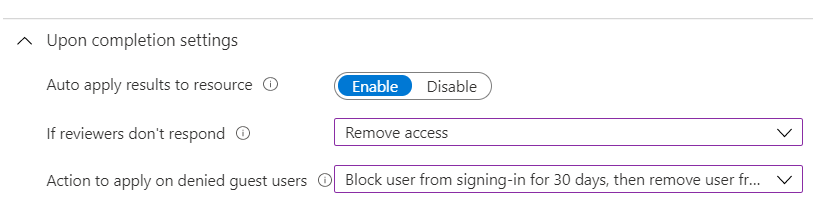
Once all of this is decided, we can specify the action to take when an Access Review Finishes. We can decide the following:
- Auto apply results to resource – If we want to automate removal of access to users who have been denied
- If reviewers don’t respond – Action to take when a reviewer doesn’t respond to a review. We can choose to make no change (just log the results), remove the access, leave the access in place or to take the recommendation from Azure AD which will be based on the users last access and behavior
- Action to apply on denied guest users – We can choose to remove access from guests who are denied during a review or we can choose to block their access and delete the guest account after 30 days
Finally, we choose our advanced settings, here we decide:
- Show Recommendations – If Azure AD should provide recommendations to our reviewers
- Require Reason on Approval – Require a justification from the reviewer for approval
- Mail Notifications – If mail notifications should be sent to our reviewers
- Reminders – If reminders should be sent to reviewers who don’t complete their reviews
- Additional Content for Reviewer Email – this can be used to add some custom text to the email to a reviewer, it can be useful to give them some insight into why they are being asked to review

Access Review – Reviewer Expierience
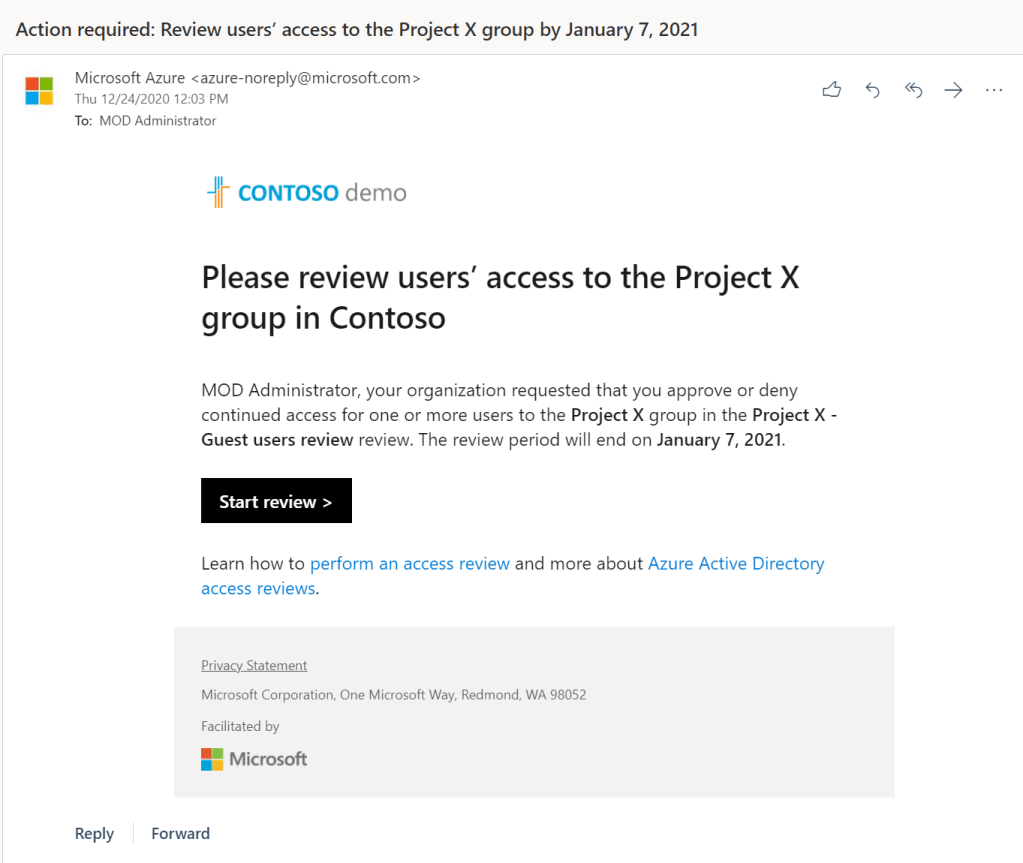
When an access review is run, the specified reviewers (Group owners in this case) will receive and email asking them to review the entitlements. when they click “Start review” they will be brought to the access management page we saw during the entitlement management section.
Here, the reviewer will see the actions assigned to them and can open them to see the users to review.
We can see that there is one guest user in this group and they haven’t signed in over the last 30 days. We can manually approve or deny, also we can accept the recommendation made by Azure AD, which in this case is to deny as the user hasn’t signed in recently.

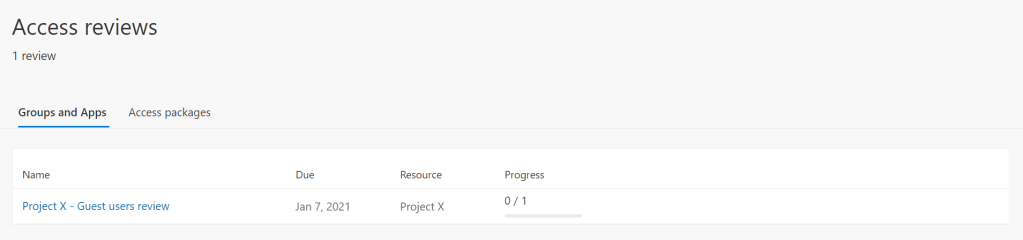
That’s it, the action is selected and the user will be removed when the Access Review finished. As an admin, we can track progress from the Access Review page and even view logs for the current review, or the entire series.

Summary
Identity Governance is a great set of tools for Microsoft 365 / Azure AD. To really see the benefit though, the business processes need to align to the technical process. We skipped over PIM here as we have a dedicated post for that coming up.
Some useful links to check out for Identity Governance:
Identity Governance – Azure Active Directory | Microsoft Docs
What is entitlement management? – Azure AD | Microsoft Docs
What are access reviews? – Azure Active Directory | Microsoft Docs

Pingback: Study Guide Series – Exam MS-500: Microsoft 365 Security Administration – Sean McAvinue
Pingback: Study Guide Series – Exam MS-500: Configure and Manage Azure AD User Authentication Options and Self-Service Password Management – Sean McAvinue
Pingback: Study Guide Series: Exam MS-500 – Implement Azure AD Privileged Identity Management (PIM) – Sean McAvinue
Pingback: Securing External Access to Files in Teams: The Two Most Important Basic Configurations – Sean McAvinue
Pingback: Study Guide Series: Exam MS-700 – Plan and Implement Governance and Lifecycle Management for Microsoft Teams (Part 3) – Sean McAvinue