
Within Microsoft 365, it’s almost impossible to avoid deploying Microsoft Teams. The value provided by Teams from a collaboration perspective is very hard to pass up. This is all great but since Teams allows such easy to use collaboration features, there are also risks that data leakage can occur either by mistake or intentionally. There are a number of cool solutions available to us to secure this external collaboration (Such as Sensitivity Labels, MCAS etc) which I’ve looked at in the past, however I see a lot of organizations missing out on some of the basic features that help us control this collaboration.
In this post I’m going to look at the basic pieces of configuration that all tenant owners should consider before thinking about more advanced features. The features here also have the benefit of being available under standard licensing (such as Office 365 E3) and not requiring specific licenses.
How External Users Access Teams Data
First, let’s look at how our external users can access Data within Teams. It’s important to understand that Teams does not store any files, the storage of files within Teams Channels is held in SharePoint, while direct file shares between users is held in the sending users OneDrive.

It’s important to understand this distinction as the controls we apply to SharePoint and OneDrive will also shape how files are made available within Teams.
Guest User Accounts vs External Users
Another distinction to keep in mind is the difference between Guest Users and External Users. Guest users are present in your Azure Active Directory (AAD) and authenticate with their own AAD, a one-time passcode, the public Microsoft Cloud, Google etc.. We send a Guest User Invite to the external user and they redeem that invite via their own IDP and use that authentication validation to access resources within your directory.
External users are exactly that, they have no link to your AAD directory and receive a file or folder share from your users OneDrive or SharePoint site. When they receive the share, they sign in with their own supported IDP as listed above and gain access to the file.
The below table breaks down the functionality available to both Guest and External Users:
| Guest User | External User | |
| Access files shared with them | Yes | Yes |
| Access all Teams Channels Files | Yes | No |
| Access one to one/many chat in Teams | Yes | Yes |
| Access Teams Channel Chat and participate in a Team | Yes | No |
| Access files / chat via Teams | Yes | No |
| Join Teams Channel Meeetings | Yes | No |
Controlling File Access
As mentioned before, there are some cool features such as Sensitivity Labels for Microsoft 365 Groups, Conditional Access and Data Loss Prevention that we can use to control how our data is accessed, however in this post we will look at some of the foundational settings we should assess out of the box. We will look at the effects of two settings in particular:
- SharePoint / OneDrive Sharing settings
- Guest User Invitation Settings
SharePoint / OneDrive Sharing Settings
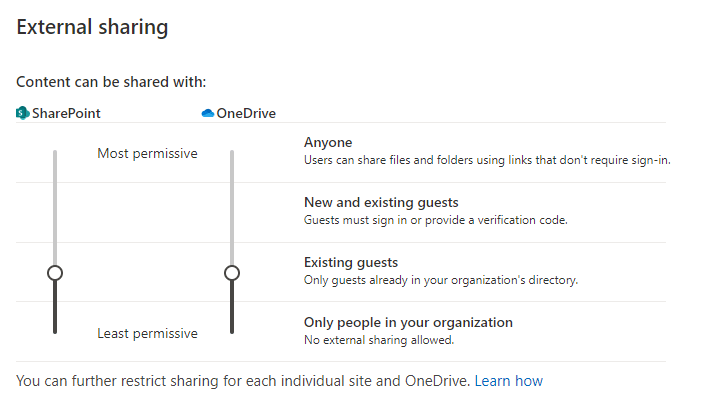
So far we know that Microsoft Teams uses SharePoint / OneDrive for file storage, so before we consider Teams, we need to assess how we allow sharing from the source. This is achieved via the SharePoint Online Sharing Settings which can be access from the SharePoint Admin Portal, under “Policies” -> “Sharing”. The first setting we should consider is the “Content can be shared with” setting. This setting defines who can gain access to the files in our environment. This is one of the easiest to configure and most important settings to decide when building out a new tenant.
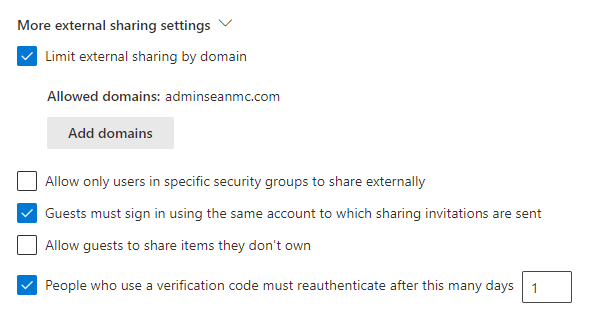
Other useful settings here are under the “More external sharing settings” dropdown. Here we define how external users access files along with the option to limit the external sharing functionality to specific whitelisted or blacklisted domains. This allows us to allow full collaboration with selected partners while not allowing sharing to the rest of the world.
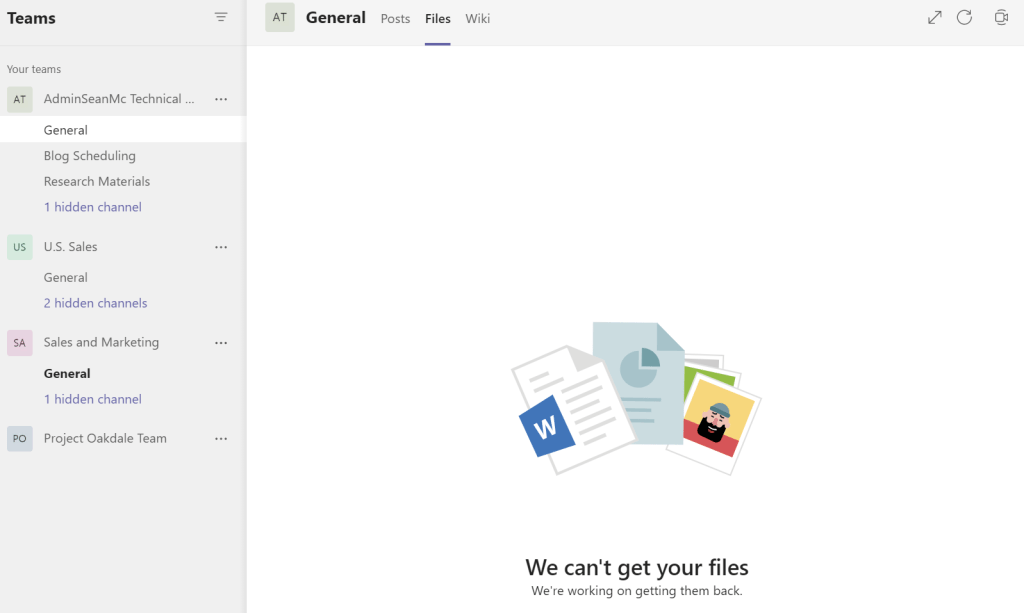
It’s important to note that even if a user is a guest and added to a Team, the user will only be able to access the files of the Team if they comply with these settings. For example, a guest user from a domain we do not have listed in the “Allowed Domains” list, will see something like the below within Teams when trying to access files:
It’s also important to note that the settings applied here will take effect retroactively so a change here may block access for existing external users.
Guest User Invitation Settings
After we have established who can access our files, we need to consider who we allow to participate in a Team. As Teams are essentially Microsoft 365 Groups, the settings to control Teams are defined for all Microsoft 365 Groups. We can configure this piece from the Azure AD Portal under “External Identities” -> “External Collaboration Settings”.
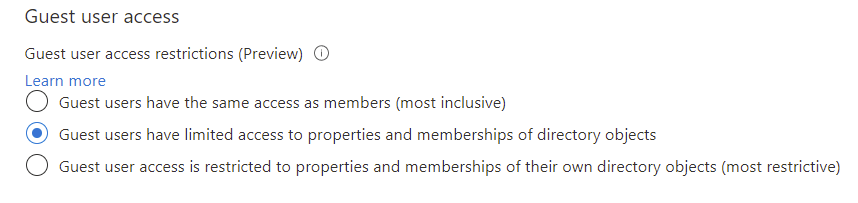
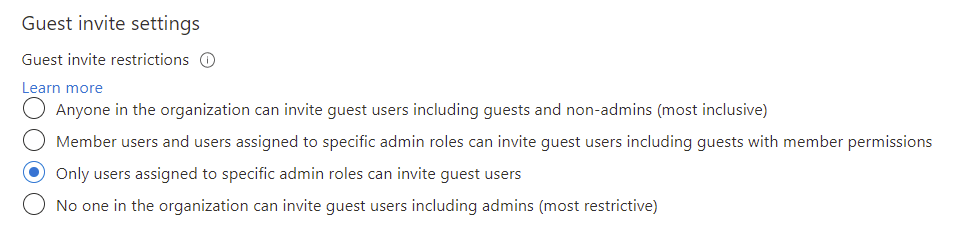
From here we have a few options we should consider, the first option is the level of permissions that Guest users in our tenancy have. By configuring this setting we can control the level of visibility available to guest users of the objects in our directory. It’s important to consider what visibility (if any) is required and allow for least privilege.
Next we can limit who in our tenant can invite Guest users. Given the risks associated with Guest users, it may be a good idea to restrict the ability to add Guests down to either admins or a specific group of users who are aware of the implications of Guest User invitations. The Guest User Inviter role is available for assignment within Azure AD if we want to delegate the permissions using that option.
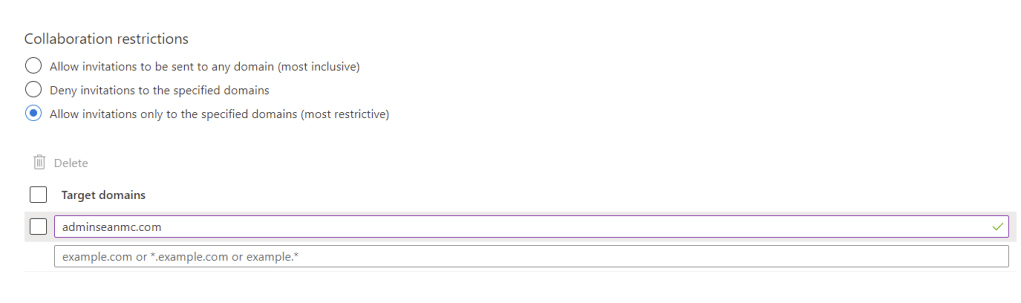
Finally, just like with SharePoint, we can restrict down the list of domains we allow Guest collaboration with to a specific whitelist or implement a blacklist. This setting doesn’t override the SharePoint restrictions so for full collaboration with Guests, we need to ensure we manage both lists.
Summary
In previous posts, we have looked at the cool advanced features that we can leverage to help secure our collaboration environment and I absolutely recommend checking them out (I’ll include a short list below). When it comes to day one, out of the box, basic configuration of Teams collaboration, the two configurations detailed here should be one of the first steps towards securing the platform.
Here’s a list of some of the more ‘advanced’ features that we should consider after working through the configurations listed here:
- Sensitivity Labels
- Sensitivity Labels for Microsoft 365 Groups
- Data-Loss Prevention
- Retention Labels / Policies
- Azure AD Access Reviews
- Azure AD Access Packages
There are plenty more features outside of this list but these are some of the most beneficial to consider.
